A Tribute to Mary Oliver

The ‘fruits of our labor’; ripening blueberries. This provided the visual imagery for the card.

The ‘fruits of our labor’; ripening blueberries. This provided the visual imagery for the card.

Proofing the block before printing cards. I was satisfied with the image. However, I needed to do a bit of carving to clean up the background. Proofing was  a valuable step. It saved time once I began printing on my letterpress.

Proofing the block before printing cards. I was satisfied with the image. However, I needed to do a bit of carving to clean up the background. Proofing was a valuable step. It saved time once I began printing on my letterpress.

I am now printing the quote which I set in 18 point New Times Roman metal type. I was particularly satisfied with how the text and the image came together within the horizontal orientation.

I am now printing the quote which I set in 18 point New Times Roman metal type. I was particularly satisfied with how the text and the image came together within the horizontal orientation.

I have been inspired by the poetry of Mary Oliver for many years. Her recent death prompted me to design and print a card using a quote from her writings. I sketched a blueberry sprig, which I photographed last summer in our garden. I carved a small relief block using the sketch. I then set the quote in 18 pt New Times Roman metal type. Finally, I brought the components together and printed the card. I am delighted with this tribute. Rest in peace, Mary Oliver.

Carving the relief block. Notice the sketch, which I traced. I then transferred the image onto the block from the tracing paper image. Yes, my process is very ‘old school’!

Carving the relief block. Notice the sketch, which I traced. I then transferred the image onto the block from the tracing paper image. Yes, my process is very ‘old school’!

The relief block is set up on the Vandercook and printing is underway! I printed this card on chip board. This is an inexpensive paper and I like the weight, tone, and texture for cards.I chose to print using a blue mixed from reflex blue and black …

The relief block is set up on the Vandercook and printing is underway! I printed this card on chip board. This is an inexpensive paper and I like the weight, tone, and texture for cards.

I chose to print using a blue mixed from reflex blue and black ink, with a bit of trans-base.

Card edition is finished; scoring, folding, and packaging are underway.

Card edition is finished; scoring, folding, and packaging are underway.

Thank you Mary Oliver for your inspiration.

Thank you Mary Oliver for your inspiration.

My 2018 Holiday Card - The Titmouse in the Dogwood

Each year I design and create a holiday greeting card to send to friends and family. I chose to print the Titmouse in the Dogwood using red ink on chip board paper for this year’s card. It was a ‘labor of love’; since the titmouse is one of my favorite birds. Here is a look at this project.

The relief block is locked into place and printing is underway! I printed fifty cards this year and used every one of them. I enjoy sending and receiving ‘snail mail’; particularly when handmade.

The relief block is locked into place and printing is underway! I printed fifty cards this year and used every one of them. I enjoy sending and receiving ‘snail mail’; particularly when handmade.

A pencil drawing is transformed into a printed card.

A pencil drawing is transformed into a printed card.

Printing the interior message using 24 pt Garamond metal type.

Printing the interior message using 24 pt Garamond metal type.

A New Flock of Birds

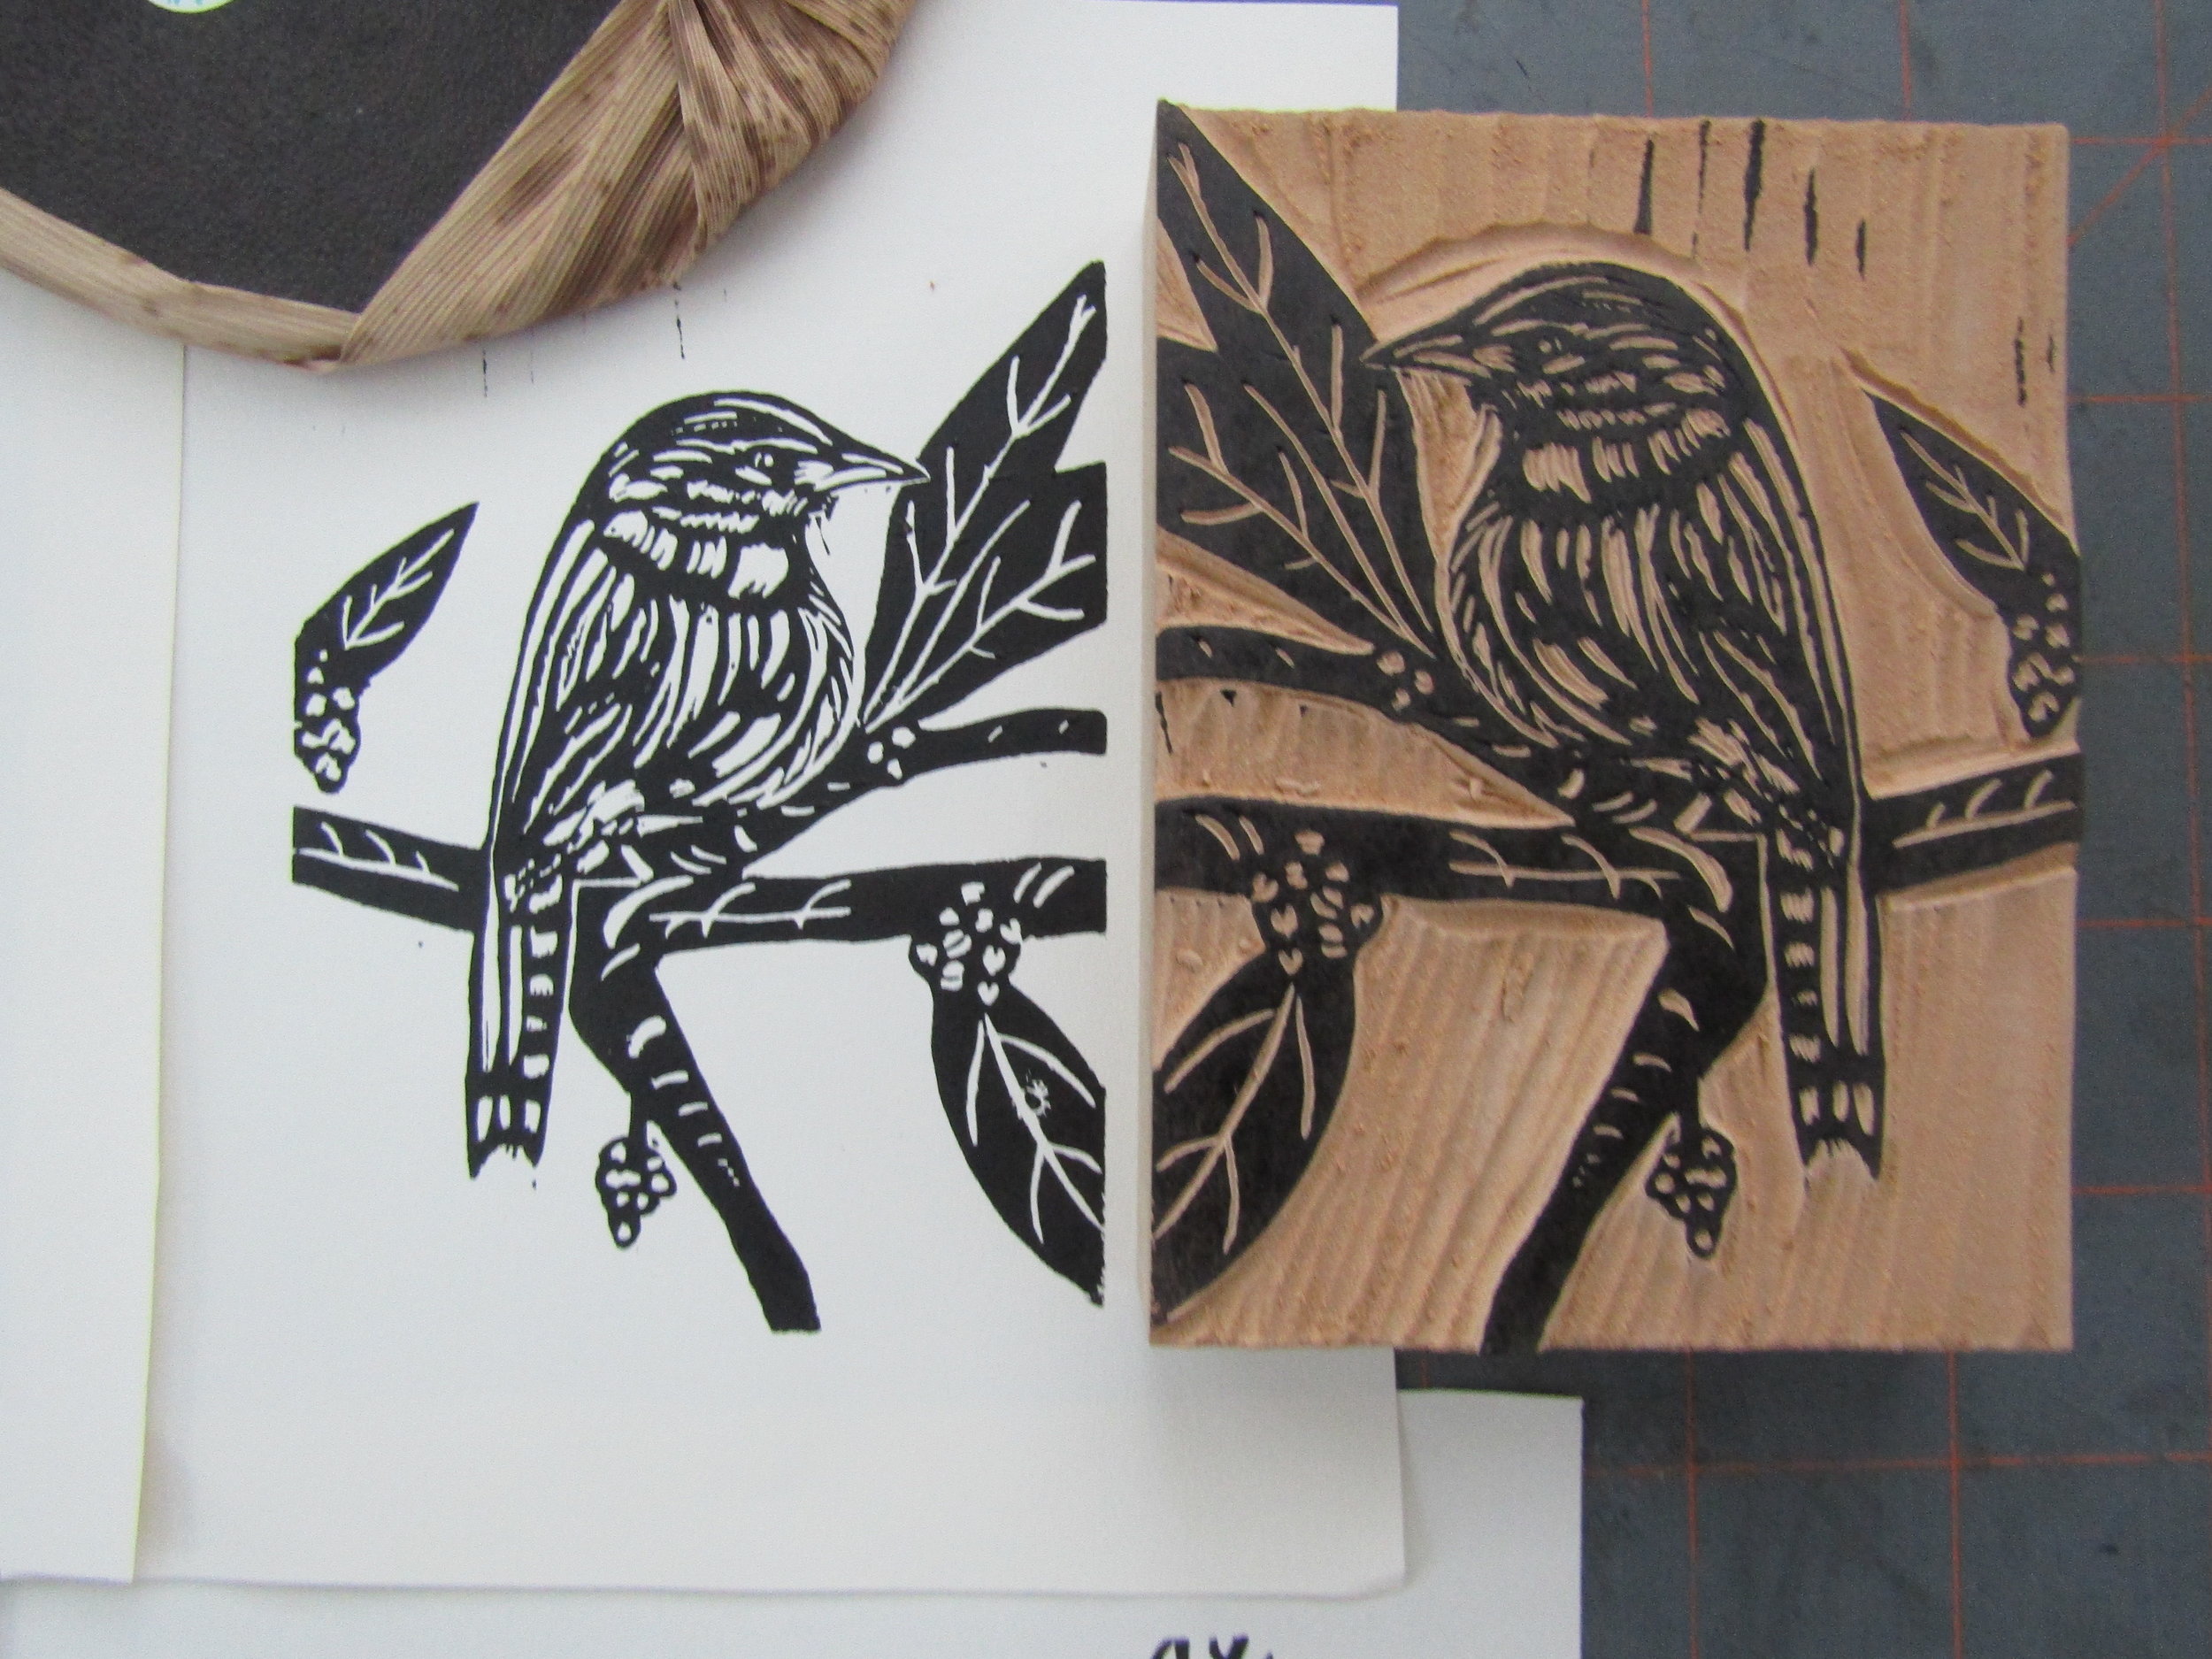
After completing the sketches, I transferred the images to the blocks, and then carved them. Once the carving was complered, I proofed each image prior to printing on my Vandercook SP 15.

After completing the sketches, I transferred the images to the blocks, and then carved them. Once the carving was complered, I proofed each image prior to printing on my Vandercook SP 15.

This is a proof of the titmouse in the dogwood. I chose this image for my holiday card which I will share in a later blog post. Though I was pleased with all of the proofs; each one needed a bit of ‘cleaning up' in the background to eliminate the un…

This is a proof of the titmouse in the dogwood. I chose this image for my holiday card which I will share in a later blog post. Though I was pleased with all of the proofs; each one needed a bit of ‘cleaning up' in the background to eliminate the unwanted black lines.

I always love setting blocks up on the Vandercook and printing them. True, sometimes problems do arise. I decided to not use plain black for these cards. I combined Reflex Blue with Black and was very pleased with the subtle change in the color.

I always love setting blocks up on the Vandercook and printing them. True, sometimes problems do arise. I decided to not use plain black for these cards. I combined Reflex Blue with Black and was very pleased with the subtle change in the color.

I gain inspiration from my gardens. The movements, colors, textures, and habits of the creatures and botanicals intrigue me. I recently carved a new set of relief blocks of birds. I chose four of my favorite birds - the titmouse, wren, chickadee, and robin. Here is a look at the various stages of this project.

A proof of the carved wren in the beauty berry bush.

A proof of the carved wren in the beauty berry bush.

When all four birds were carved and proofed; I decided to print a group of blank greeting cards on chip board.

When all four birds were carved and proofed; I decided to print a group of blank greeting cards on chip board.

All four images have been printed! I will score, fold, and package the cards after the prints have dried.This was a delightful group of images to print; particularly since I had carved the blocks in late October. Commission work and other commitment…

All four images have been printed! I will score, fold, and package the cards after the prints have dried.

This was a delightful group of images to print; particularly since I had carved the blocks in late October. Commission work and other commitments demanded that I sit this project aside for a later date. I hope to eventually print a small edition of these birds on handmade paper.

Be Careful What You Wish For - A Recent Artist Book

I listed words which prompted images as I read the book. I intended to use the images in a drawing or series of drawings which I would incorporate into a relief print. This final sketch resulted from my combining an eye, a sewn scar, a needle and th…

I listed words which prompted images as I read the book. I intended to use the images in a drawing or series of drawings which I would incorporate into a relief print. This final sketch resulted from my combining an eye, a sewn scar, a needle and thread, mountains and birds off in the distance, a leaf, and a apothecary jar with a bone in it. I then decided to add the little blackbird on the leaf, and surround all of this with a stone arch. This would allude to a castle or stone architectural structure.

I worked with two linoleum plates to complete the print. This plate was printed in colored sections, very much like a reduction print. The sections served as a ground for the image.

I worked with two linoleum plates to complete the print. This plate was printed in colored sections, very much like a reduction print. The sections served as a ground for the image.

I printed the image in black onto the colored ground. Notice the colored sections beneath the black image. These colored sections helped me to decide how to divide the image into pages for the tunnel book structure.

I printed the image in black onto the colored ground. Notice the colored sections beneath the black image. These colored sections helped me to decide how to divide the image into pages for the tunnel book structure.

The accordion folded papers will become the sides of the book’s interior. I used a lovely teal Ingres paper for this part of the book. The pages are now cut into the arch shape. The white edges on the sides will be folded and placed into the accordi…

The accordion folded papers will become the sides of the book’s interior. I used a lovely teal Ingres paper for this part of the book. The pages are now cut into the arch shape. The white edges on the sides will be folded and placed into the accordion folded sides.

I cut Davey board into the arch shape; then covered it with papyrus. Layers of milk paint in various colors (the final layer of paint was black) were applied to the papyrus. Once the layers of paint were dried and sanded; shoe polish was applied and…

I cut Davey board into the arch shape; then covered it with papyrus. Layers of milk paint in various colors (the final layer of paint was black) were applied to the papyrus. Once the layers of paint were dried and sanded; shoe polish was applied and rubbed with a soft cloth giving the covers and smooth polished surface.

Here I am assembling the book’s interior pages.

Here I am assembling the book’s interior pages.

This image shows how the accordion folded papers hold the book together at the sides of the assembled book. This also shows how the pages extend out creating the layered interior pages.

This image shows how the accordion folded papers hold the book together at the sides of the assembled book. This also shows how the pages extend out creating the layered interior pages.

Asheville BookWorks will close in March, 2019. It’s final Book and Print exhibition It’s Alive!: Frankenstein, 200 Years asked for interpretations of Mary Shelley’s novel Frankenstein; celebrating the 200th anniversary of the publication. BookWorks has meant a great deal to my growth as a book artist and printmaker since it opened in 2004. Though I was a bit daunted by the concept of creating an artist book in response to Frankenstein; I decided to first read the novel. I could then create a book or print to submit to the exhibition if the story inspired me. Upon completing the book I was excited about this project. I was particularly attracted to and inspired by the visual imagery which occurred thoughout the story.

Take a look at how I went about creating Be Careful What You For. The finished piece was a tunnel book structure. The internal image used a letterpress printed relief print combined with metal type. The covers were painted papyrus on Davey board with a leather, waxed linen, and a vintage button closure.

I then carved this plate based on the pencil drawing. This provided the image which was printed on the colored sections.

I then carved this plate based on the pencil drawing. This provided the image which was printed on the colored sections.

I used Rives BFK paper printing a pale gray-green for the first color.

I used Rives BFK paper printing a pale gray-green for the first color.

Parts of each page were cut away, creating open spaces on the layered book pages.

Parts of each page were cut away, creating open spaces on the layered book pages.

All of the components - cover boards, accordion folded sides, book pages, and letterpress printed colophon. I used 12 point Garamond for the colophon and additional text. Notice the sentence that is printed across the base of the front page. It sums…

All of the components - cover boards, accordion folded sides, book pages, and letterpress printed colophon. I used 12 point Garamond for the colophon and additional text. Notice the sentence that is printed across the base of the front page. It sums up my response to Frankenstein - Be Careful What You Wish For.

This is a front view of the interior.

This is a front view of the interior.

The completed book. I added bits of leather, braided waxed linen thread. and a vintage button to the cover boards. This closure holds the book together when closed.

The completed book. I added bits of leather, braided waxed linen thread. and a vintage button to the cover boards. This closure holds the book together when closed.

This was a most rewarding project. I had never read Frankenstein. Reading this story and responding to it by creating an artist book - Be Careful What You Wish For; would never had happened were it not for Asheville BookWorks. I am so grateful to this most remarkable place and all that I have learned through taking classes there and participating in exhibitions!

Backyard Botanicals - The Series Continues

First stages of carving.

First stages of carving.

This print was fairly difficult to carve, register, and print due to the details of the flowers and buds.

This print was fairly difficult to carve, register, and print due to the details of the flowers and buds.

The next print in the series was based on the Spiderwort plant. I am always excited about the carving of an image and sometimes want to stop and just keep the plate!

The next print in the series was based on the Spiderwort plant. I am always excited about the carving of an image and sometimes want to stop and just keep the plate!

I am beginning to carve a Lenten Rose, one of my favorite flowers. I wanted the flower to have a light colored palette and the background to have darker hues.

I am beginning to carve a Lenten Rose, one of my favorite flowers. I wanted the flower to have a light colored palette and the background to have darker hues.

This is the photograph upon which the print is based.

This is the photograph upon which the print is based.

This is the print after the final and ninth run on the press. The ink was a dark marroon. I am so excited with this palette and the finished print!

This is the print after the final and ninth run on the press. The ink was a dark marroon. I am so excited with this palette and the finished print!

I have now completed several botanical prints. It has been a journey exploring carving techniques, printing on an antique letterpress, as well as mixing and combining colors. There have been numerous challenges. Here are some images of prints, drawings, and other aspects of the work process.

Here is the completed print after seven runs on the press. This means there are seven colors, the lighest one being the pale blue background. Note the plate and tracing paper - remnants of the process. I call this print Blue Daffodil.

Here is the completed print after seven runs on the press. This means there are seven colors, the lighest one being the pale blue background. Note the plate and tracing paper - remnants of the process. I call this print Blue Daffodil.

Here is the finished print. I call this one Winter Edgeworthia. I was particularly pleased with the registration of the layers and color palette.

Here is the finished print. I call this one Winter Edgeworthia. I was particularly pleased with the registration of the layers and color palette.

I am printing; purples and blues were the dominant colors in this print.

I am printing; purples and blues were the dominant colors in this print.

I used a rainbow roll in the first layer of this print. I also left some of the leaves uncarved. I was pleased with these and how they gave the image more depth in the background.

I used a rainbow roll in the first layer of this print. I also left some of the leaves uncarved. I was pleased with these and how they gave the image more depth in the background.

Printing the flower - oh so love how the layers and details are coming together.

Printing the flower - oh so love how the layers and details are coming together.

Most of the flower is carved away. Notice I left some in the center in order to give the flower portion of the print more depth as it will be the final and darkest color. I am also moving forward with the background and it is getting darker in color.

Most of the flower is carved away. Notice I left some in the center in order to give the flower portion of the print more depth as it will be the final and darkest color. I am also moving forward with the background and it is getting darker in color.

I continue to learn as I develop this series. Reduction prints are challenging, but a great way to explore technique, image, and color!

A New Series of Prints - Backyard Botanicals

My process begins with pencil drawings. Here are a few - a Fritilaria, Daffodil, and Spiderwort. I enjoy drawing with pencil, since it allows me to study form, line,  and composition.

My process begins with pencil drawings. Here are a few - a Fritilaria, Daffodil, and Spiderwort. I enjoy drawing with pencil, since it allows me to study form, line,  and composition.

Photograph of the Fritilaria, which inspired this print.

Photograph of the Fritilaria, which inspired this print.

Here I am printing the second color. Notice how the flower is 'coming to life'!

Here I am printing the second color. Notice how the flower is 'coming to life'!

Printmaking magic (most of the time); pleased with how the colors and image are coming together.

Printmaking magic (most of the time); pleased with how the colors and image are coming together.

I printed a total of 7 colors. This is the final color; a dark purple-black.

I printed a total of 7 colors. This is the final color; a dark purple-black.

During the cold months of Winter, I began a new series of prints based on the plants found in my gardens. I have explored birds and flowers in the past. However, with these prints I am focused on the botanicals. I spent a good bit of time completing a suite of drawings based on photographs I have taken. I recently completed my first print in this series. It was slow goint at first; since I had not worked in the reduction process for some time. 

I began with the Fritilaria. Here I have transferred the sketch to the linoleum and am carving the image. I will leave these areas white on the completed print.

I began with the Fritilaria. Here I have transferred the sketch to the linoleum and am carving the image. I will leave these areas white on the completed print.

The press and linoleum are inked and ready for the first run, a pale yellow color. I am printing on Rives BFK paper. I place the unmounted linoleum on a wooden base using permament double sided tape. Shims of chipboard are under the wood to get…

The press and linoleum are inked and ready for the first run, a pale yellow color. I am printing on Rives BFK paper. I place the unmounted linoleum on a wooden base using permament double sided tape. Shims of chipboard are under the wood to get the linolem type high which is .918 ".  Each time I print a new color, more of the block is carved away and more details are added to the image. This is the reason it is called a Reduction print.

I am printing the third color - a lovely teal. The background is now carved away and I will work solely with the flower and leaves for the remainder of this print. 

I am printing the third color - a lovely teal. The background is now carved away and I will work solely with the flower and leaves for the remainder of this print. 

Another color - this time a dark green.

Another color - this time a dark green.

Here is the finished print, an edition of twelve and one Artist Proof. I am excited at what I learned and can't wait to continue with this series!

Here is the finished print, an edition of twelve and one Artist Proof. I am excited at what I learned and can't wait to continue with this series!

Designing and Building Boxes

Cutting the boxes from Davey Board is the first step.

Cutting the boxes from Davey Board is the first step.

I combined various papers and patterns. The navy circles and squares are pressure prints I designed and printed on French paper - yum! The other patterned papers came from Paper Source; a fun place to find great papers. 

I combined various papers and patterns. The navy circles and squares are pressure prints I designed and printed on French paper - yum! The other patterned papers came from Paper Source; a fun place to find great papers. 

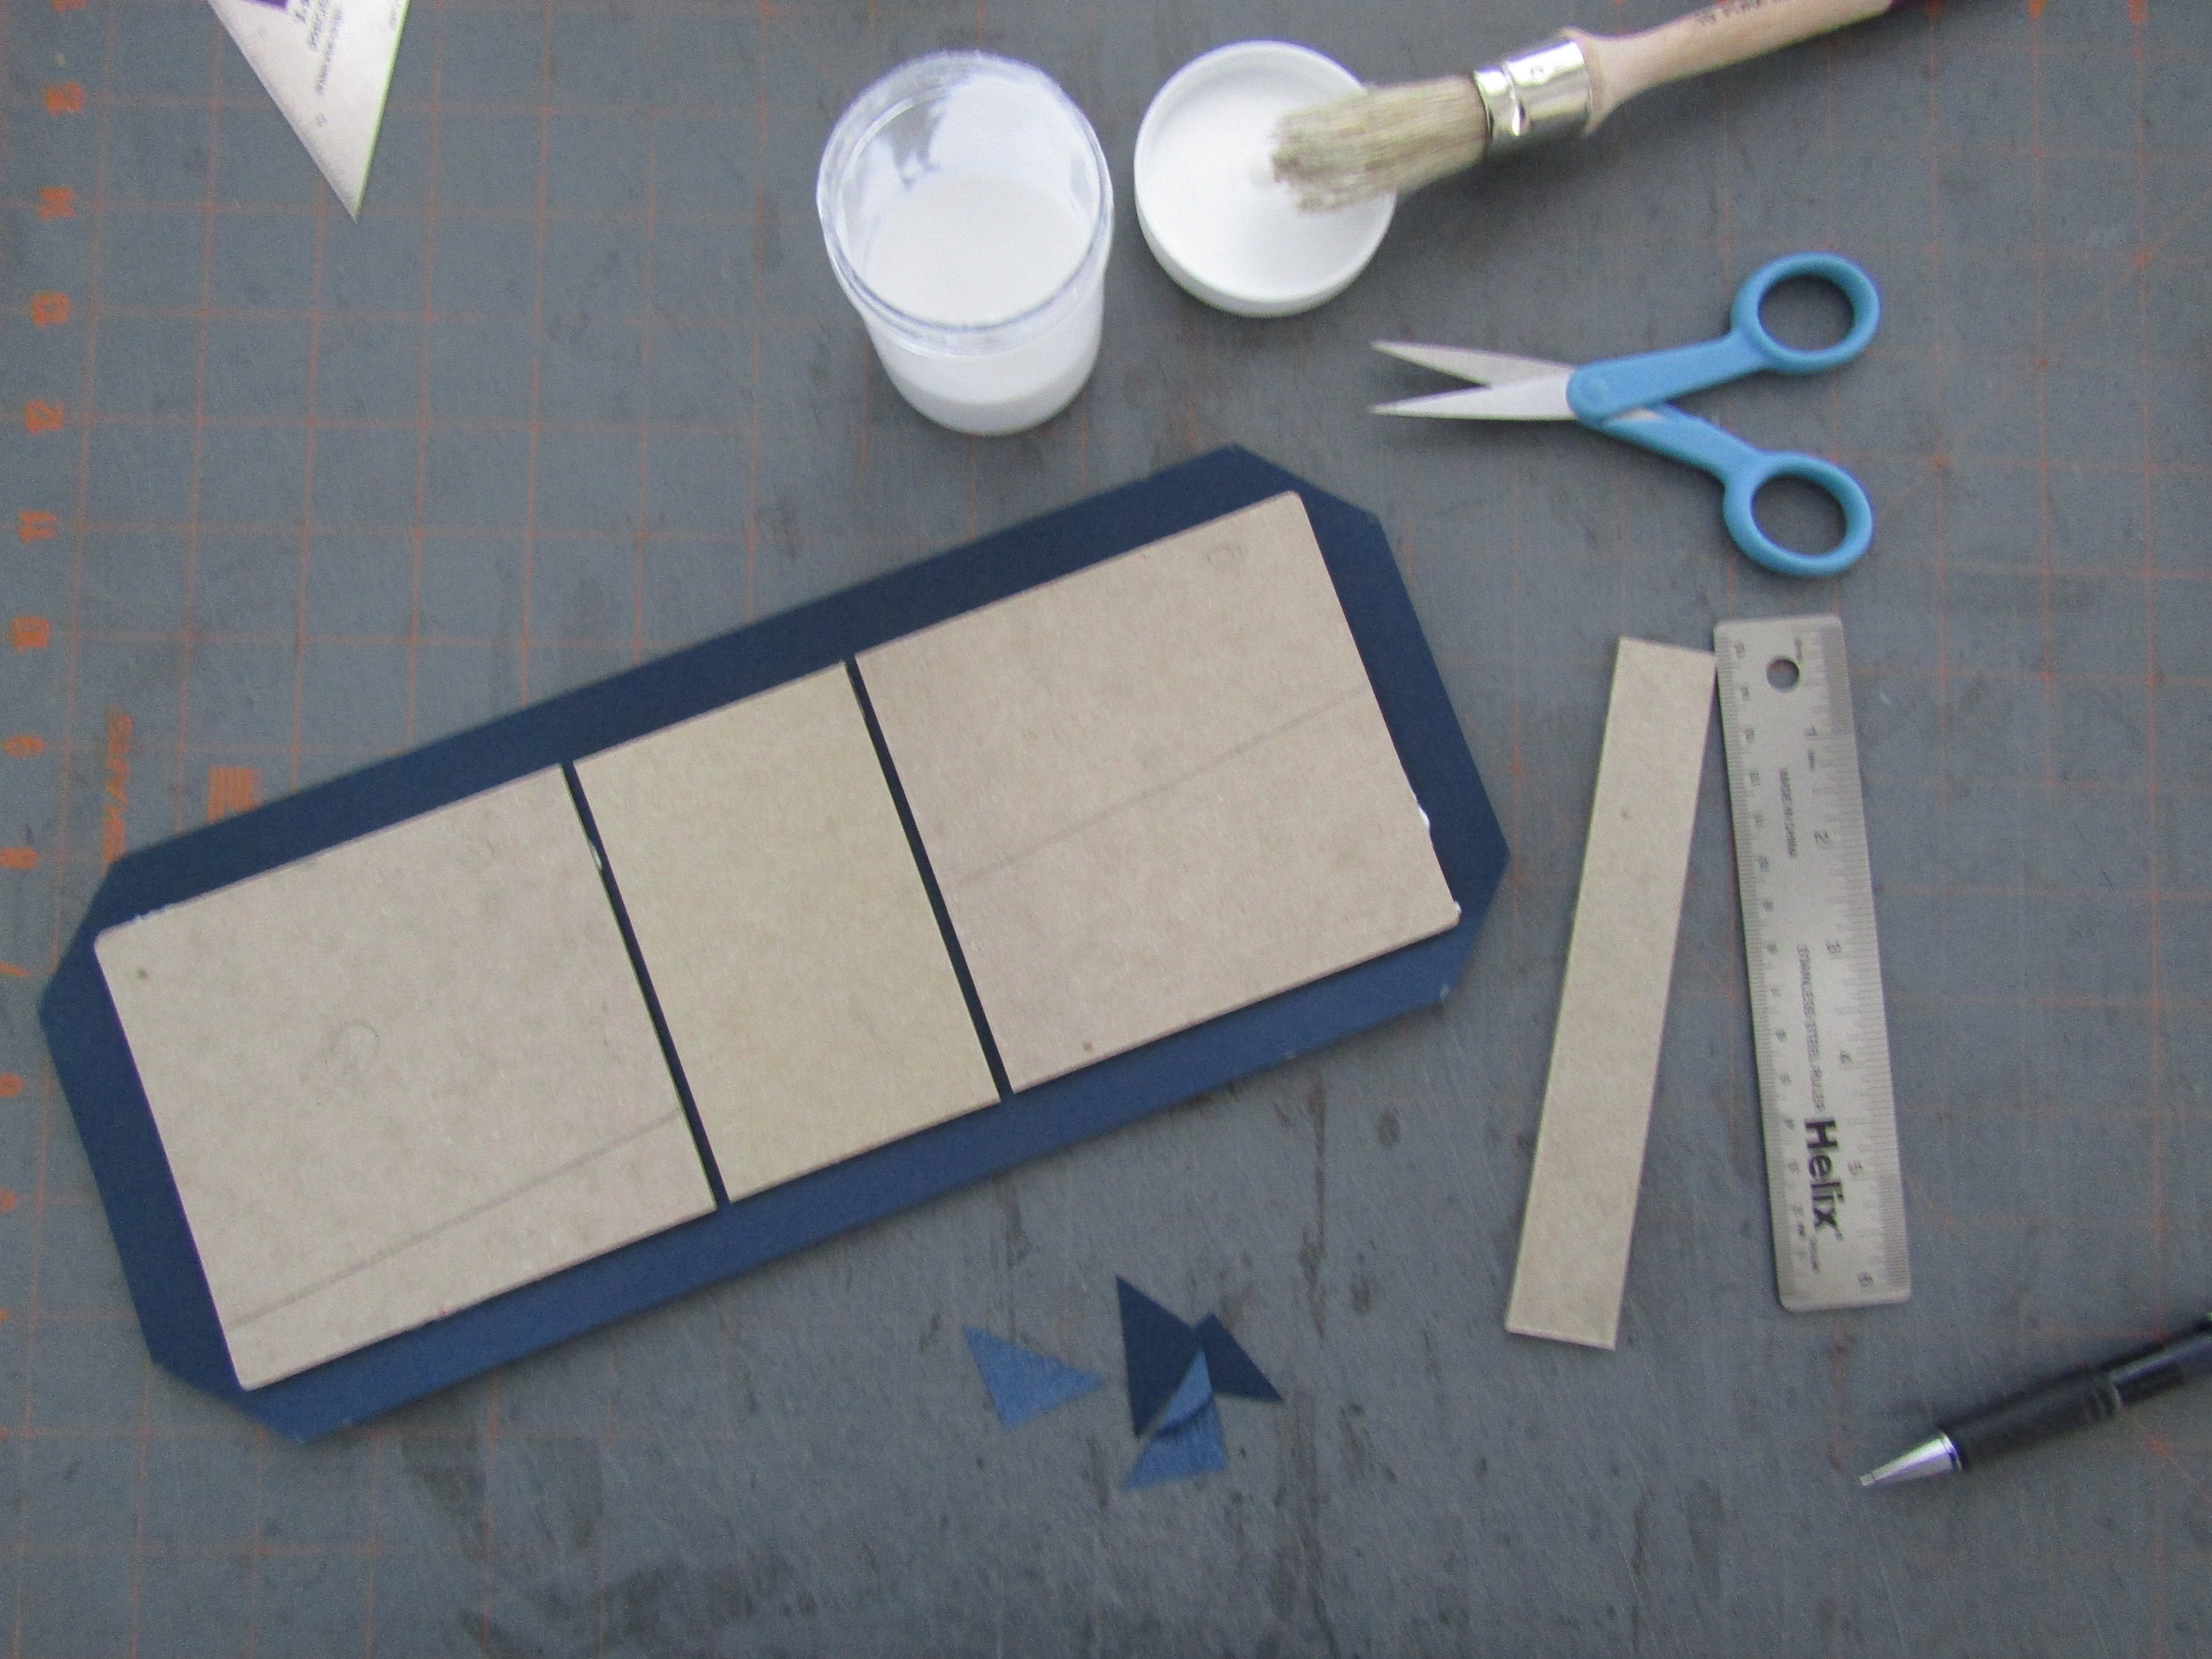
I cut a recessed area in the lid portion of the case before covering them. I did this for the letterpress printed relief prints I would place on the lid, once the boxes were completed. Lots of planning goes into making boxes.

I cut a recessed area in the lid portion of the case before covering them. I did this for the letterpress printed relief prints I would place on the lid, once the boxes were completed. Lots of planning goes into making boxes.

Covering the case. 

Covering the case. 

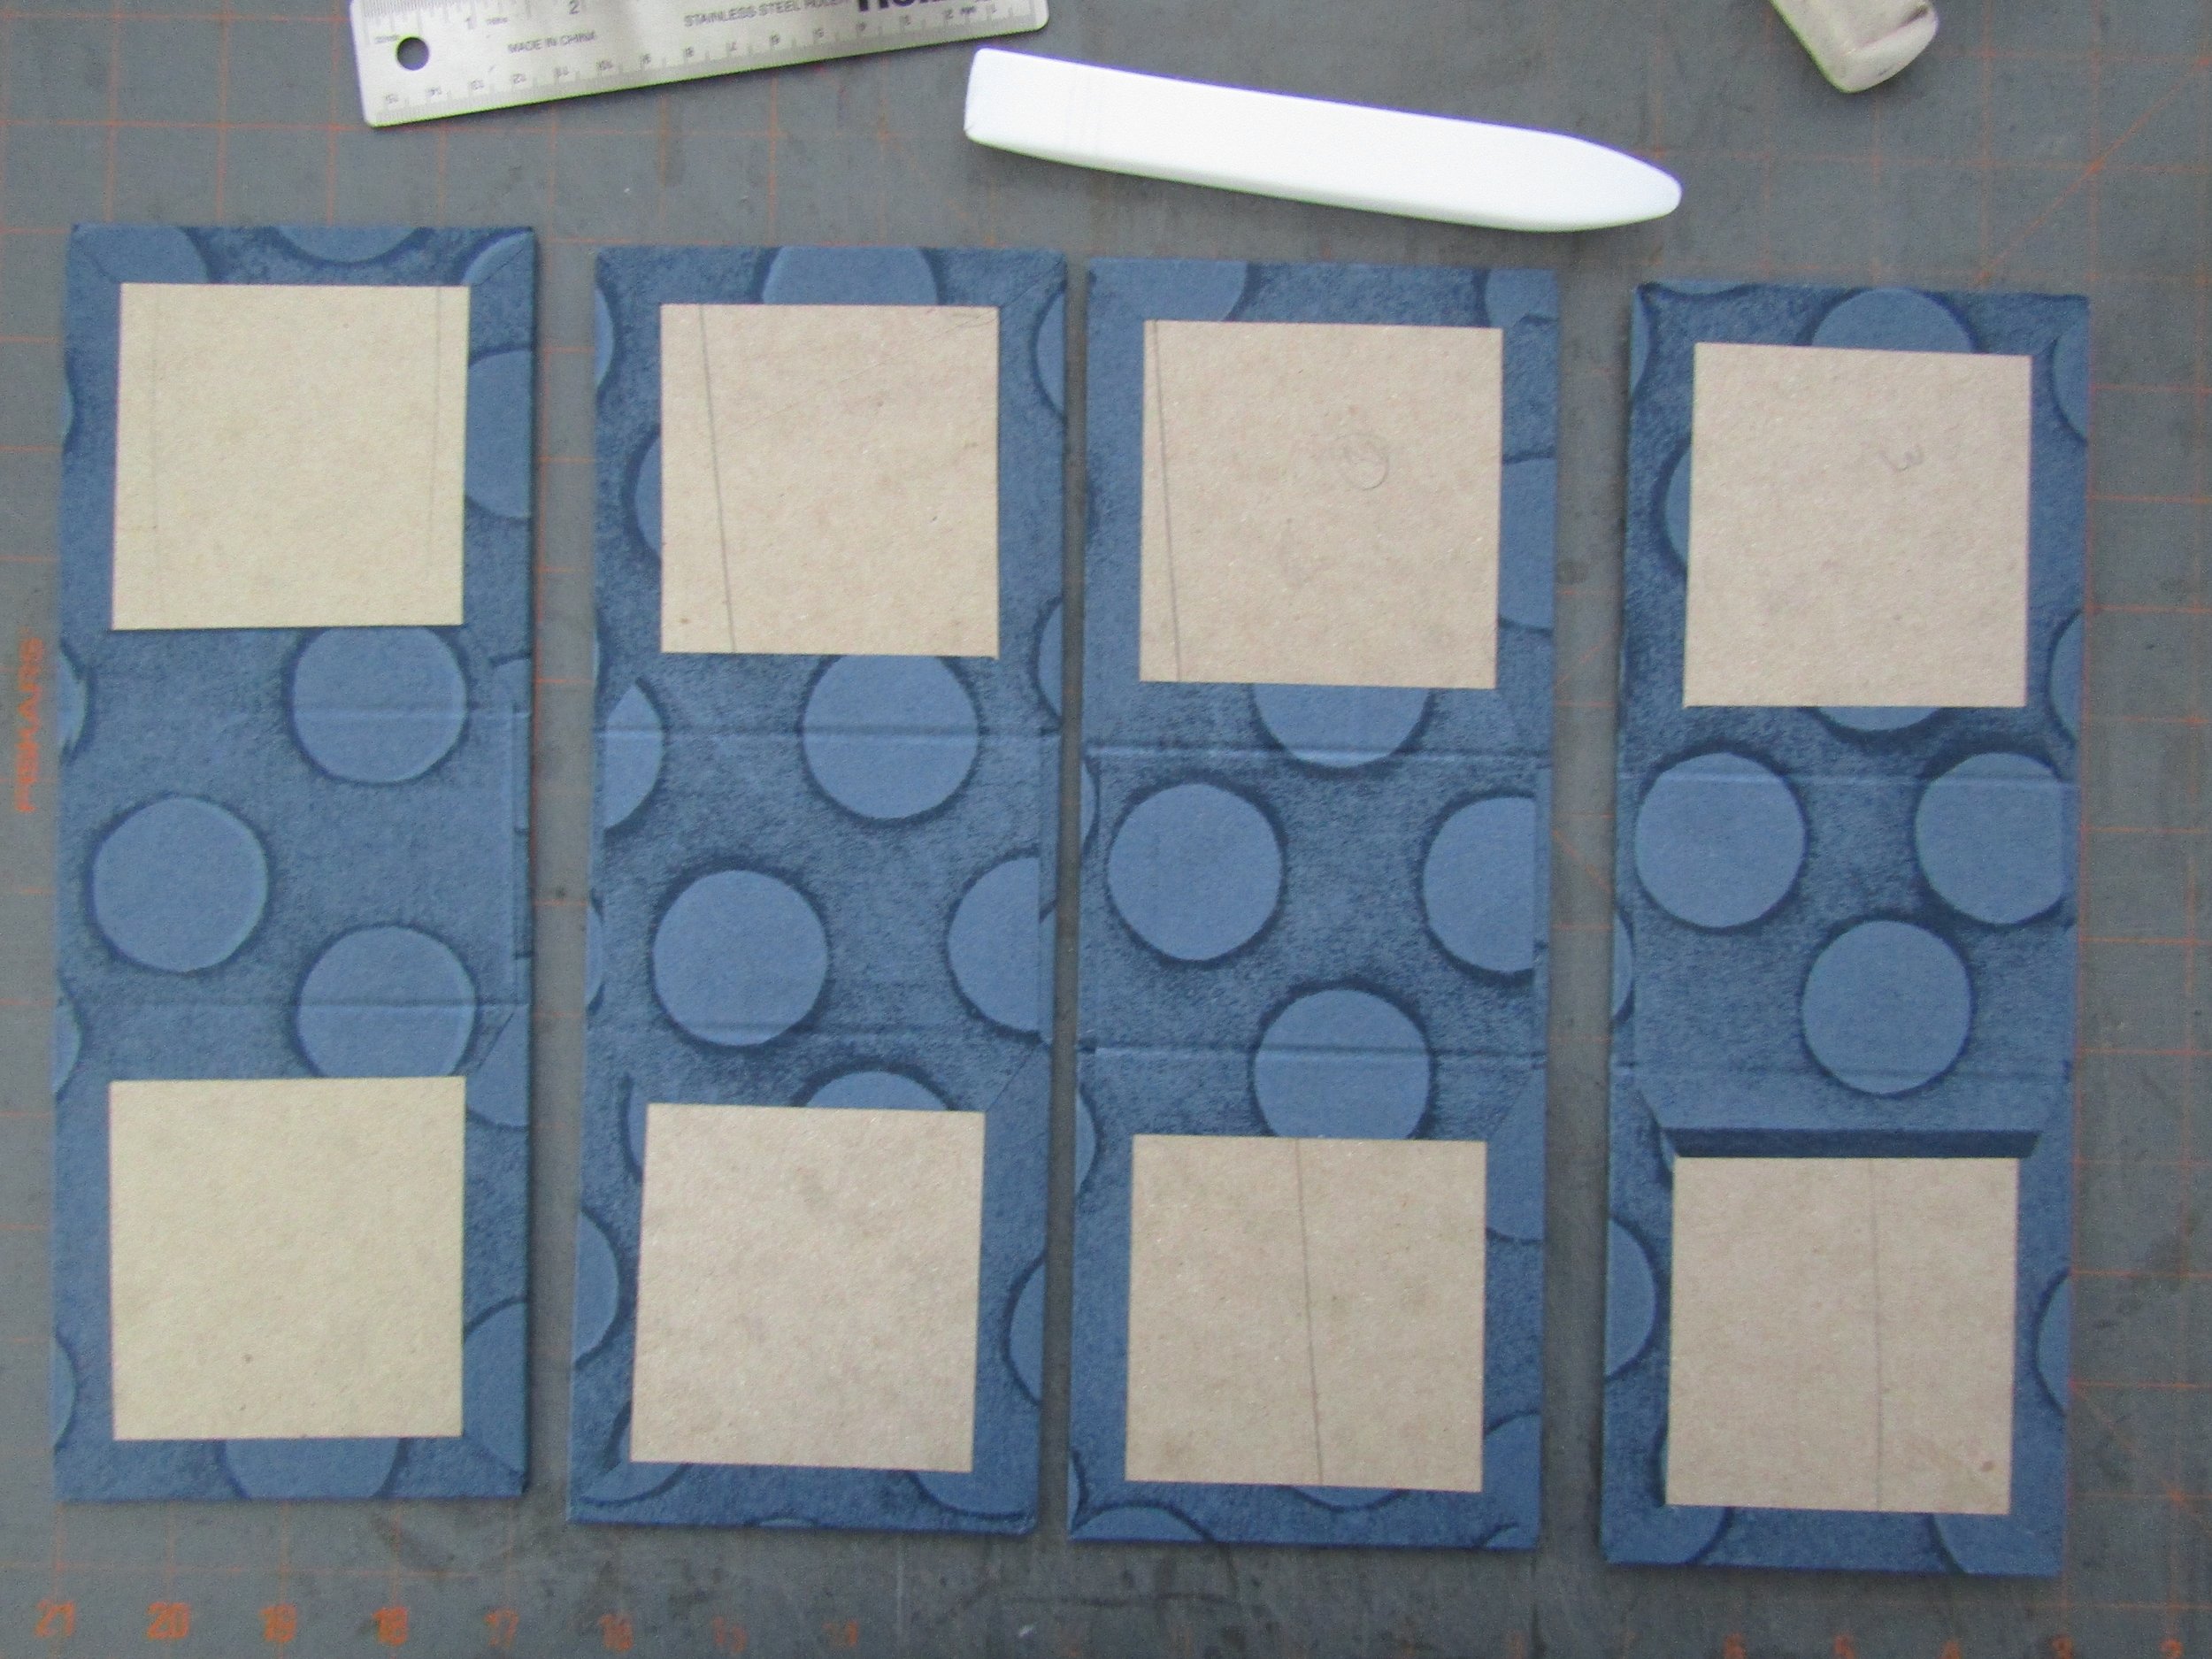
All four wraps are covered and the inner paper cover is applied over the hinge. The wraps and trays can be joined and the boxes completed!

All four wraps are covered and the inner paper cover is applied over the hinge. The wraps and trays can be joined and the boxes completed!

Relief prints addorn the lids (inside the recessed area).

Relief prints addorn the lids (inside the recessed area).

A peek inside - treasure chests for keepsakes!!

A peek inside - treasure chests for keepsakes!!

I had the urge to make some boxes. Valentines Day was approaching and boxes make great gifts at this time of year (or any time, for that matter). I enjoy the process; though it can be challenging. Here's a look at the various steps involved in making hinged boxes.

The trays are sanded and built using PVA. I now begin the really fun part - covering with various papers!

The trays are sanded and built using PVA. I now begin the really fun part - covering with various papers!

I wrapped the trays in a Japanese paper. This is the most tedious step in the process. 

I wrapped the trays in a Japanese paper. This is the most tedious step in the process. 

Case completed. I was really pleased with the pressure printed papers. The French paper was  nice to work with when covering the hinged covers.

Case completed. I was really pleased with the pressure printed papers. The French paper was  nice to work with when covering the hinged covers.

Joined and drying with weights.

Joined and drying with weights.

IMG_2498.JPG

Another Way to Print on Fabric - Tea Towels

I have covered the bed of the press with newsprint as a way to keep the towels clean while printing. I then set the blocks up using magnets - very simple. I ink the block using a hand brayer and am now ready to print.

I have covered the bed of the press with newsprint as a way to keep the towels clean while printing. I then set the blocks up using magnets - very simple. I ink the block using a hand brayer and am now ready to print.

The printed towel - such a delight to see this clear, clean print. I heat set the prints using my iron after a couple days of drying. They wash beautifully in cold water.

The printed towel - such a delight to see this clear, clean print. I heat set the prints using my iron after a couple days of drying. They wash beautifully in cold water.

I so love this image printed in yellow!

I so love this image printed in yellow!

I have recently discovered another way to use the many blocks I have carved and print on fabric. Tea towels are quite popular for use in the home. I began exploring ways to use my carved blocks and develop my own printed selection of tea towels. Needless to say, I am excited with these results!

The blue tape is how I mark the towels to register them with the inked blocks. 

The blue tape is how I mark the towels to register them with the inked blocks. 

I cover the towel arrangement with newsprint as a way of keeping it clean. I then roll the cylinder and rollers over this set-up and print.

I cover the towel arrangement with newsprint as a way of keeping it clean. I then roll the cylinder and rollers over this set-up and print.

This ginkgo leaf block is set up, inked, and ready to print.

This ginkgo leaf block is set up, inked, and ready to print.

A little hummingbird adorns this towel.

A little hummingbird adorns this towel.

Holiday Cards - From Prints to Snail Mail

Ornament image is transferred to block - ready to carve!

Ornament image is transferred to block - ready to carve!

Patterned 'trees' will adorn the third card.

Patterned 'trees' will adorn the third card.

Carving is complete.

Carving is complete.

I printed the bird in red on Lettra paper.

I printed the bird in red on Lettra paper.

I printed a red mat on Letrra paper for the patterned trees. They were printed in metallic gold ink as was all of the text.

I printed a red mat on Letrra paper for the patterned trees. They were printed in metallic gold ink as was all of the text.

Each card is printed; now to score, fold, and package!

Each card is printed; now to score, fold, and package!

I love receiving cards, so naturally designing and printing them is most satisfying. I produced three for the 2017 holiday season. Small carved blocks provided the imagery, which I combined with antique wood type for two cards. 12 pt Twentieth Century Modern type was used for the third card. I was delighted when a local shop that carries my work commissioned me to produce their greeting card. It goes without saying that snail mail is here to say!

A little bird will adorn this card; which will be my personal holiday card.

A little bird will adorn this card; which will be my personal holiday card.

Proofing the bird.

Proofing the bird.

I printed the ornament in red on chipboard. Here the block is set in place on my Vandercook.

I printed the ornament in red on chipboard. Here the block is set in place on my Vandercook.

Here I am printing wood type in the gold ink.

Here I am printing wood type in the gold ink.

Visual Index Handmade, a wonderful new store in Winston Salem, NC owned by the fabulous Toni Tronu purchased this card to use for their holiday greeting card. Here the cards are boxed up and ready to go. Needless to say, this purchase brou…

Visual Index Handmade, a wonderful new store in Winston Salem, NC owned by the fabulous Toni Tronu purchased this card to use for their holiday greeting card. Here the cards are boxed up and ready to go. Needless to say, this purchase brought me great joy!

Out of Africa Part 3 - Printing on Fabric

I have set up blocks on my Vandercook in order to print on fabric in the past.  I decided to do the same with the patterned blocks. I then used the fabric to create zipper bags. Needless to say, this was loads of fun and I am delighted with the results!

I ink the blocks using a brayer.

I ink the blocks using a brayer.

I have set up blocks on my Vandercook in order to print on fabric in the past.  I decided to do the same with the patterned blocks. I then used the fabric to create zipper pouches. Needless to say, this was loads of fun and I am delighted with the results!

Several prints cut and ready to sew. One is all sewn up!

Several prints cut and ready to sew. One is all sewn up!

Carved block set into press bed, inked up, and pulling a print on cotton muslin. The blue tape helps me with registering the fabric pieces.

Carved block set into press bed, inked up, and pulling a print on cotton muslin. The blue tape helps me with registering the fabric pieces.

Completed bags ready to sell. Notice that the back of the bags is a commercially printed fabric; they are lined with plain muslin. They are selling quite well and customers use them for a variety of purposes - art supplies, cosmetics, money, et…

Completed bags ready to sell. Notice that the back of the bags is a commercially printed fabric; they are lined with plain muslin. They are selling quite well and customers use them for a variety of purposes - art supplies, cosmetics, money, etc. 

Out of Africa Part 2 - Patterns Influenced by the Maasi

The Maasi women make these ornaments using delicate wire combined with various seed beads and metal disks.

The Maasi women make these ornaments using delicate wire combined with various seed beads and metal disks.

Proofing the first block I carved.

Proofing the first block I carved.

Carving the third block.

Carving the third block.

Once I had carved and proofed each of these blocks I printed them in a variety of colors on French paper and chipboard. I was pleased with the results and used them as covers for single and multiple pamphlet journals. Take a look.

I so love the look of my press inked up and printing1

I so love the look of my press inked up and printing1

A sampling of the prints. I used a lovely brown and green color - so exciting how each block looked on the two types of paper.

A sampling of the prints. I used a lovely brown and green color - so exciting how each block looked on the two types of paper.

An assortment of three section pamphlets all sewn up!

An assortment of three section pamphlets all sewn up!

I was attracted to the delicate patterns of the beaded items made by the Maasi women and purchased a few to bring home. I completed a suite of carved blocks based on these objects in addition to fabric I had purchased while traveling in Ghana in 2013. I then experimented with printing these blocks on both paper and cloth. I am still exploring the blocks using them in various ways. It has been a rewarding process. Here is a sampling of the results.

Fabrics from Ghana, purchased in 2013 while travelling there. 

Fabrics from Ghana, purchased in 2013 while travelling there. 

Here is a proof of the second block I carved.

Here is a proof of the second block I carved.

This is a proof of the third block; my favorite.

This is a proof of the third block; my favorite.

Printing on French paper.

Printing on French paper.

A completed three section pamphlet journal using "The Rope" stitch.

A completed three section pamphlet journal using "The Rope" stitch.

I will now share printing on cotton muslin - the results were quite satisfying!

Out of Africa Part 1 - Drawings

IMG_2074.JPG

I traveled to Tanzania this past June. It was a most inspiring journey. We took safari's on the Serengeti (the Endless Plain) and in the Selous Reserve (located in Southeastern Tanzania). Here are some of the pictures from these experiences and the drawings they inspired. 

This is one of my favorite pictures from the trip. I used it as a source for a drawing - do you see the little bird in the upper right area? 

This is one of my favorite pictures from the trip. I used it as a source for a drawing - do you see the little bird in the upper right area?


Sleeping lion with bird.

Sleeping lion with bird.

I watched this Crown Crane for quite a while in the Ngorongoro Crater. Of course I had to draw one of these beautiful Secretary birds!

I watched this Crown Crane for quite a while in the Ngorongoro Crater. Of course I had to draw one of these beautiful Secretary birds!

This was a most amazing creature to observe and draw.

This was a most amazing creature to observe and draw.

Lilac Breasted Roller

Lilac Breasted Roller

This is a small portion of the amazing and beautiful animals I witnessed while on this journey - time will tell what types of prints occur as a result of this experience!

IMG_2066.JPG
I combined various pictures I took of zebras and acacia trees for this drawing.

I combined various pictures I took of zebras and acacia trees for this drawing.

I so loved these beautiful creatures!

I so loved these beautiful creatures!

I just had to put the little bird on the giraffe's back - something that often happens. They eat insects off of the giraffes - while 'hitching' a ride!

I just had to put the little bird on the giraffe's back - something that often happens. They eat insects off of the giraffes - while 'hitching' a ride!

I observed Bee Eaters on the banks of the Rufij River.

I observed Bee Eaters on the banks of the Rufij River.

The numerous birds I saw inspired these drawings. 

The numerous birds I saw inspired these drawings. 

Pamphlet Journals Inspired by the Garden

Printing the dragonfly and calla lilly. 

Printing the dragonfly and calla lilly.


Once the prints were dry and ready to handle, I began assembling the pamphlets.

Once the prints were dry and ready to handle, I began assembling the pamphlets.

I was quite pleased with the quality of the prints on the French paper!

I was quite pleased with the quality of the prints on the French paper!

I decided it would be fun to use some of the blocks I had carved for Garden Reverie as cover imagery for blank pamphlet journals. I printed them on French paper and sewed them up with waxed linen thread. Here is a look at the process. 

Printing the tulips - one of my personal favorites!

Printing the tulips - one of my personal favorites!

These are single section pamphlets.  I used variations of the chain stitch when sewing them together.

These are single section pamphlets.  I used variations of the chain stitch when sewing them together.

All sewn up!

All sewn up!

A Dragonfly and Coneflower in a Tunnel Book

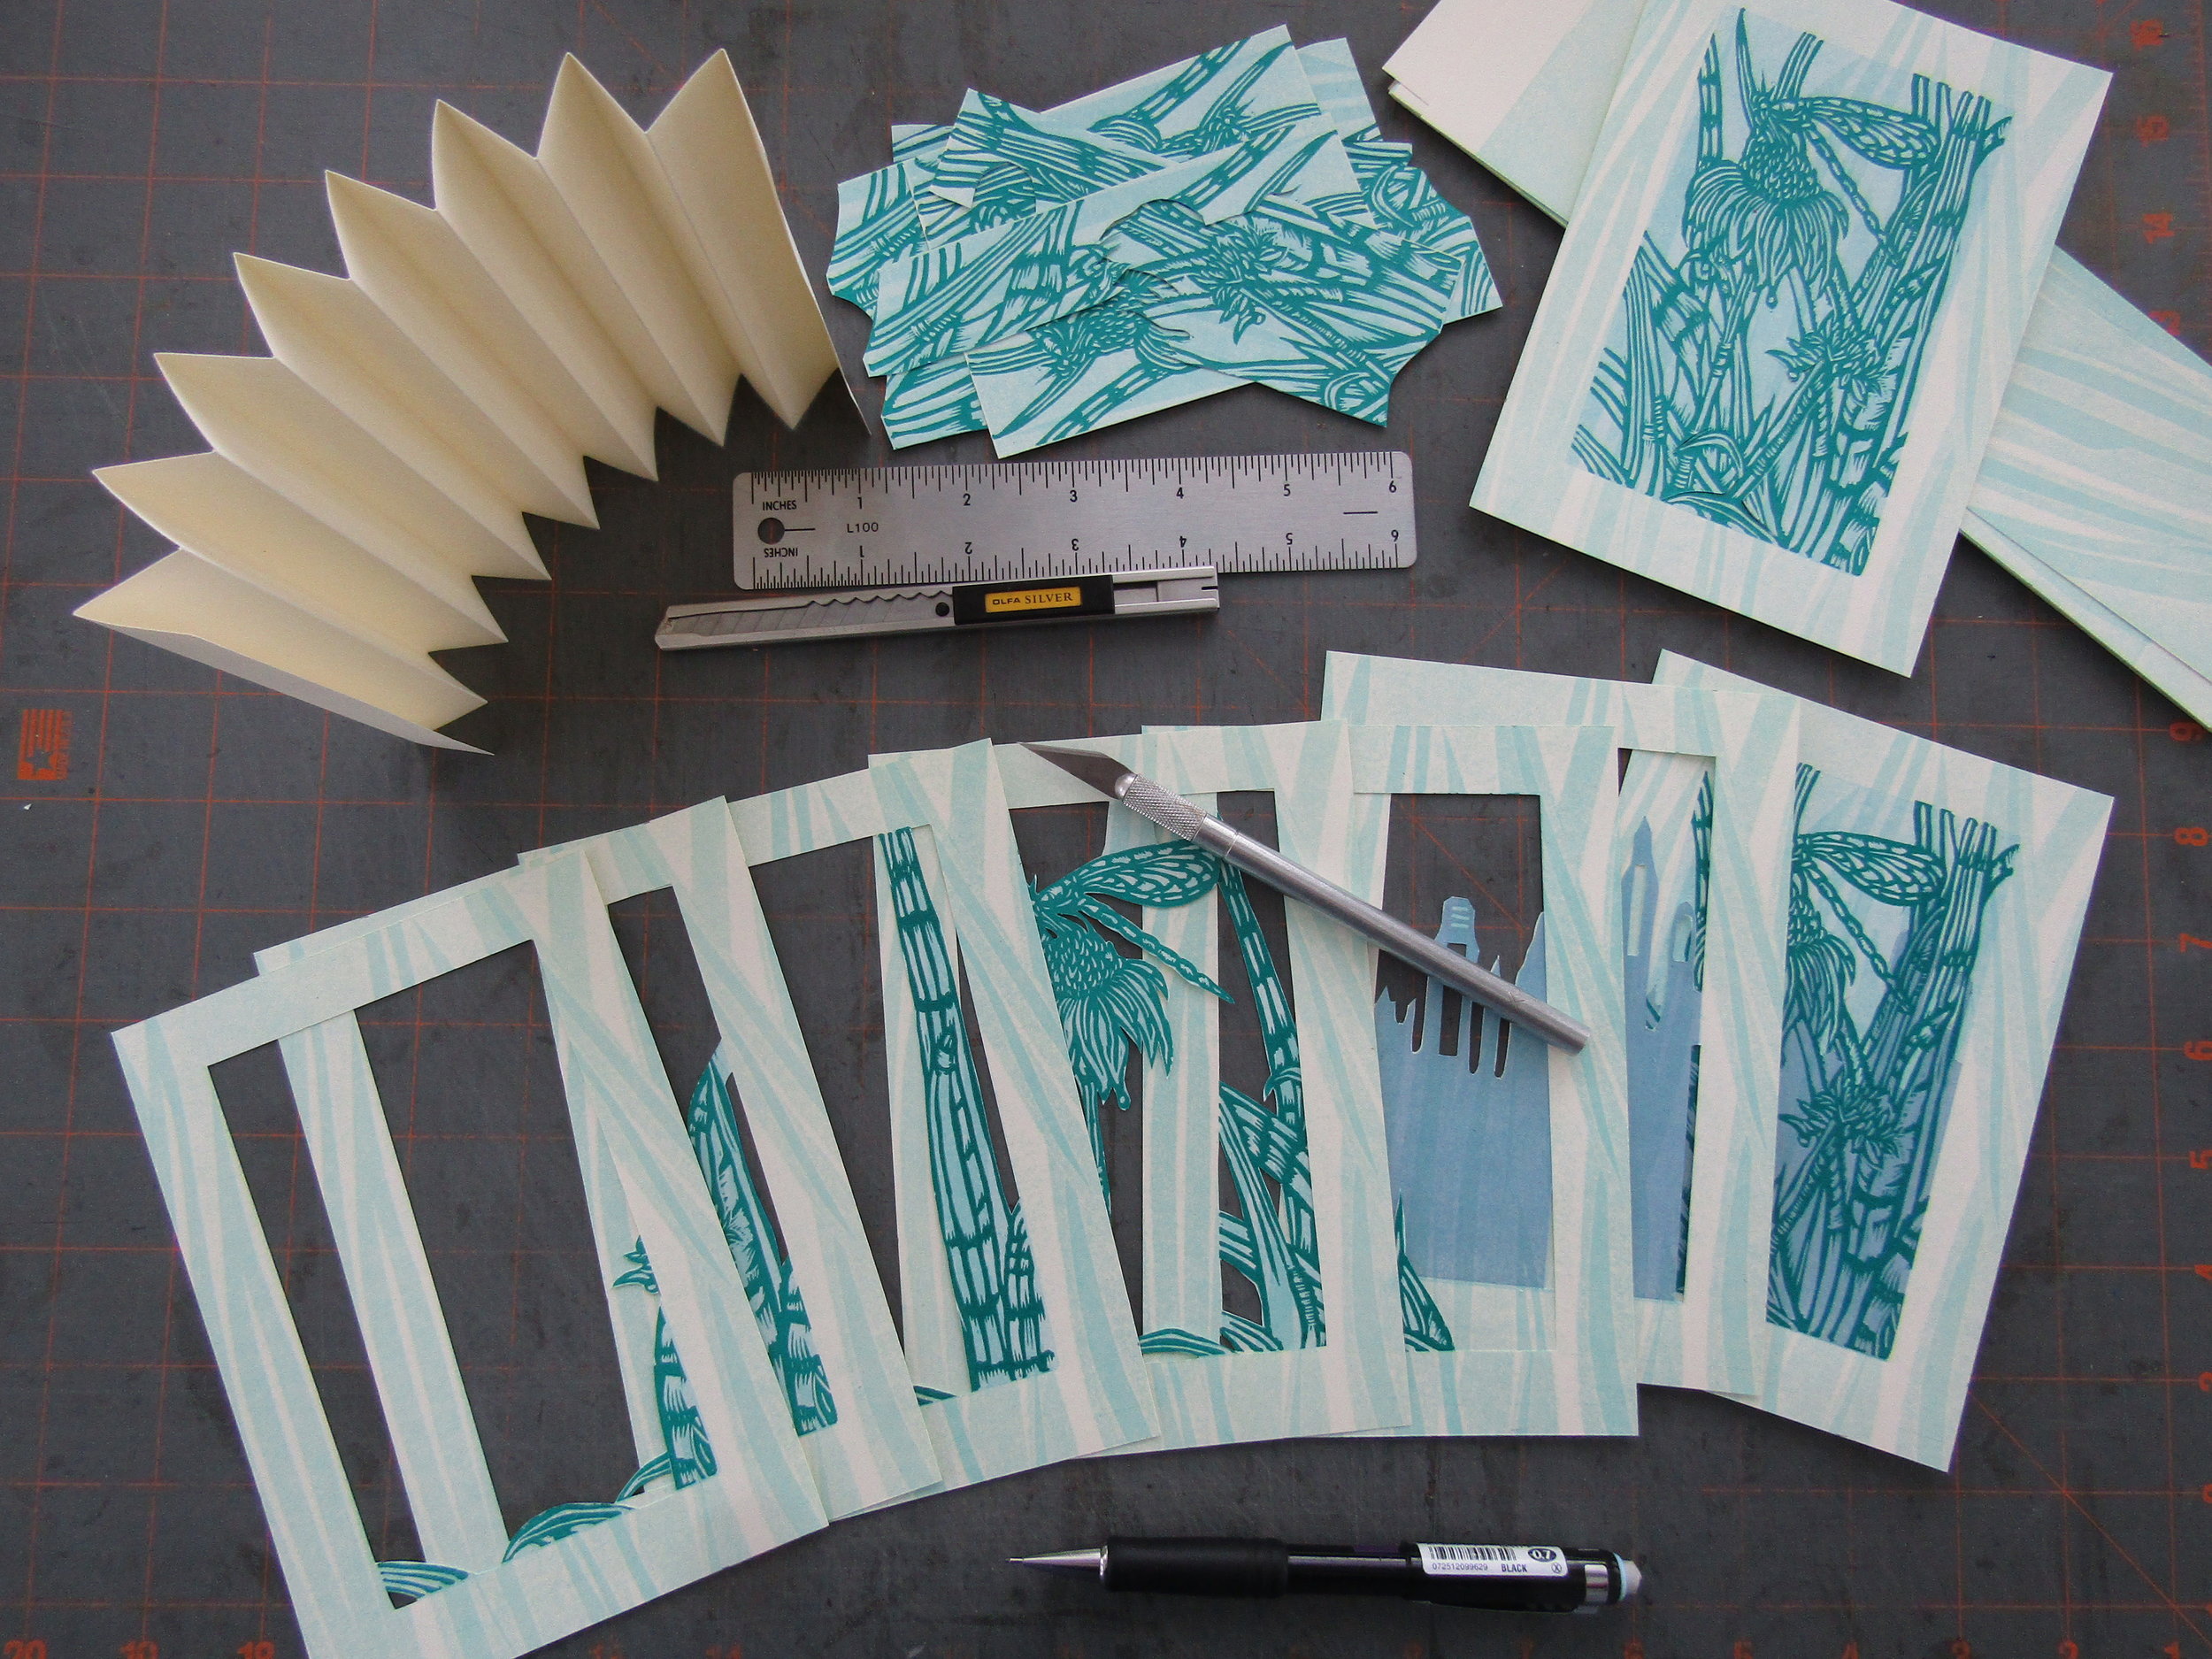
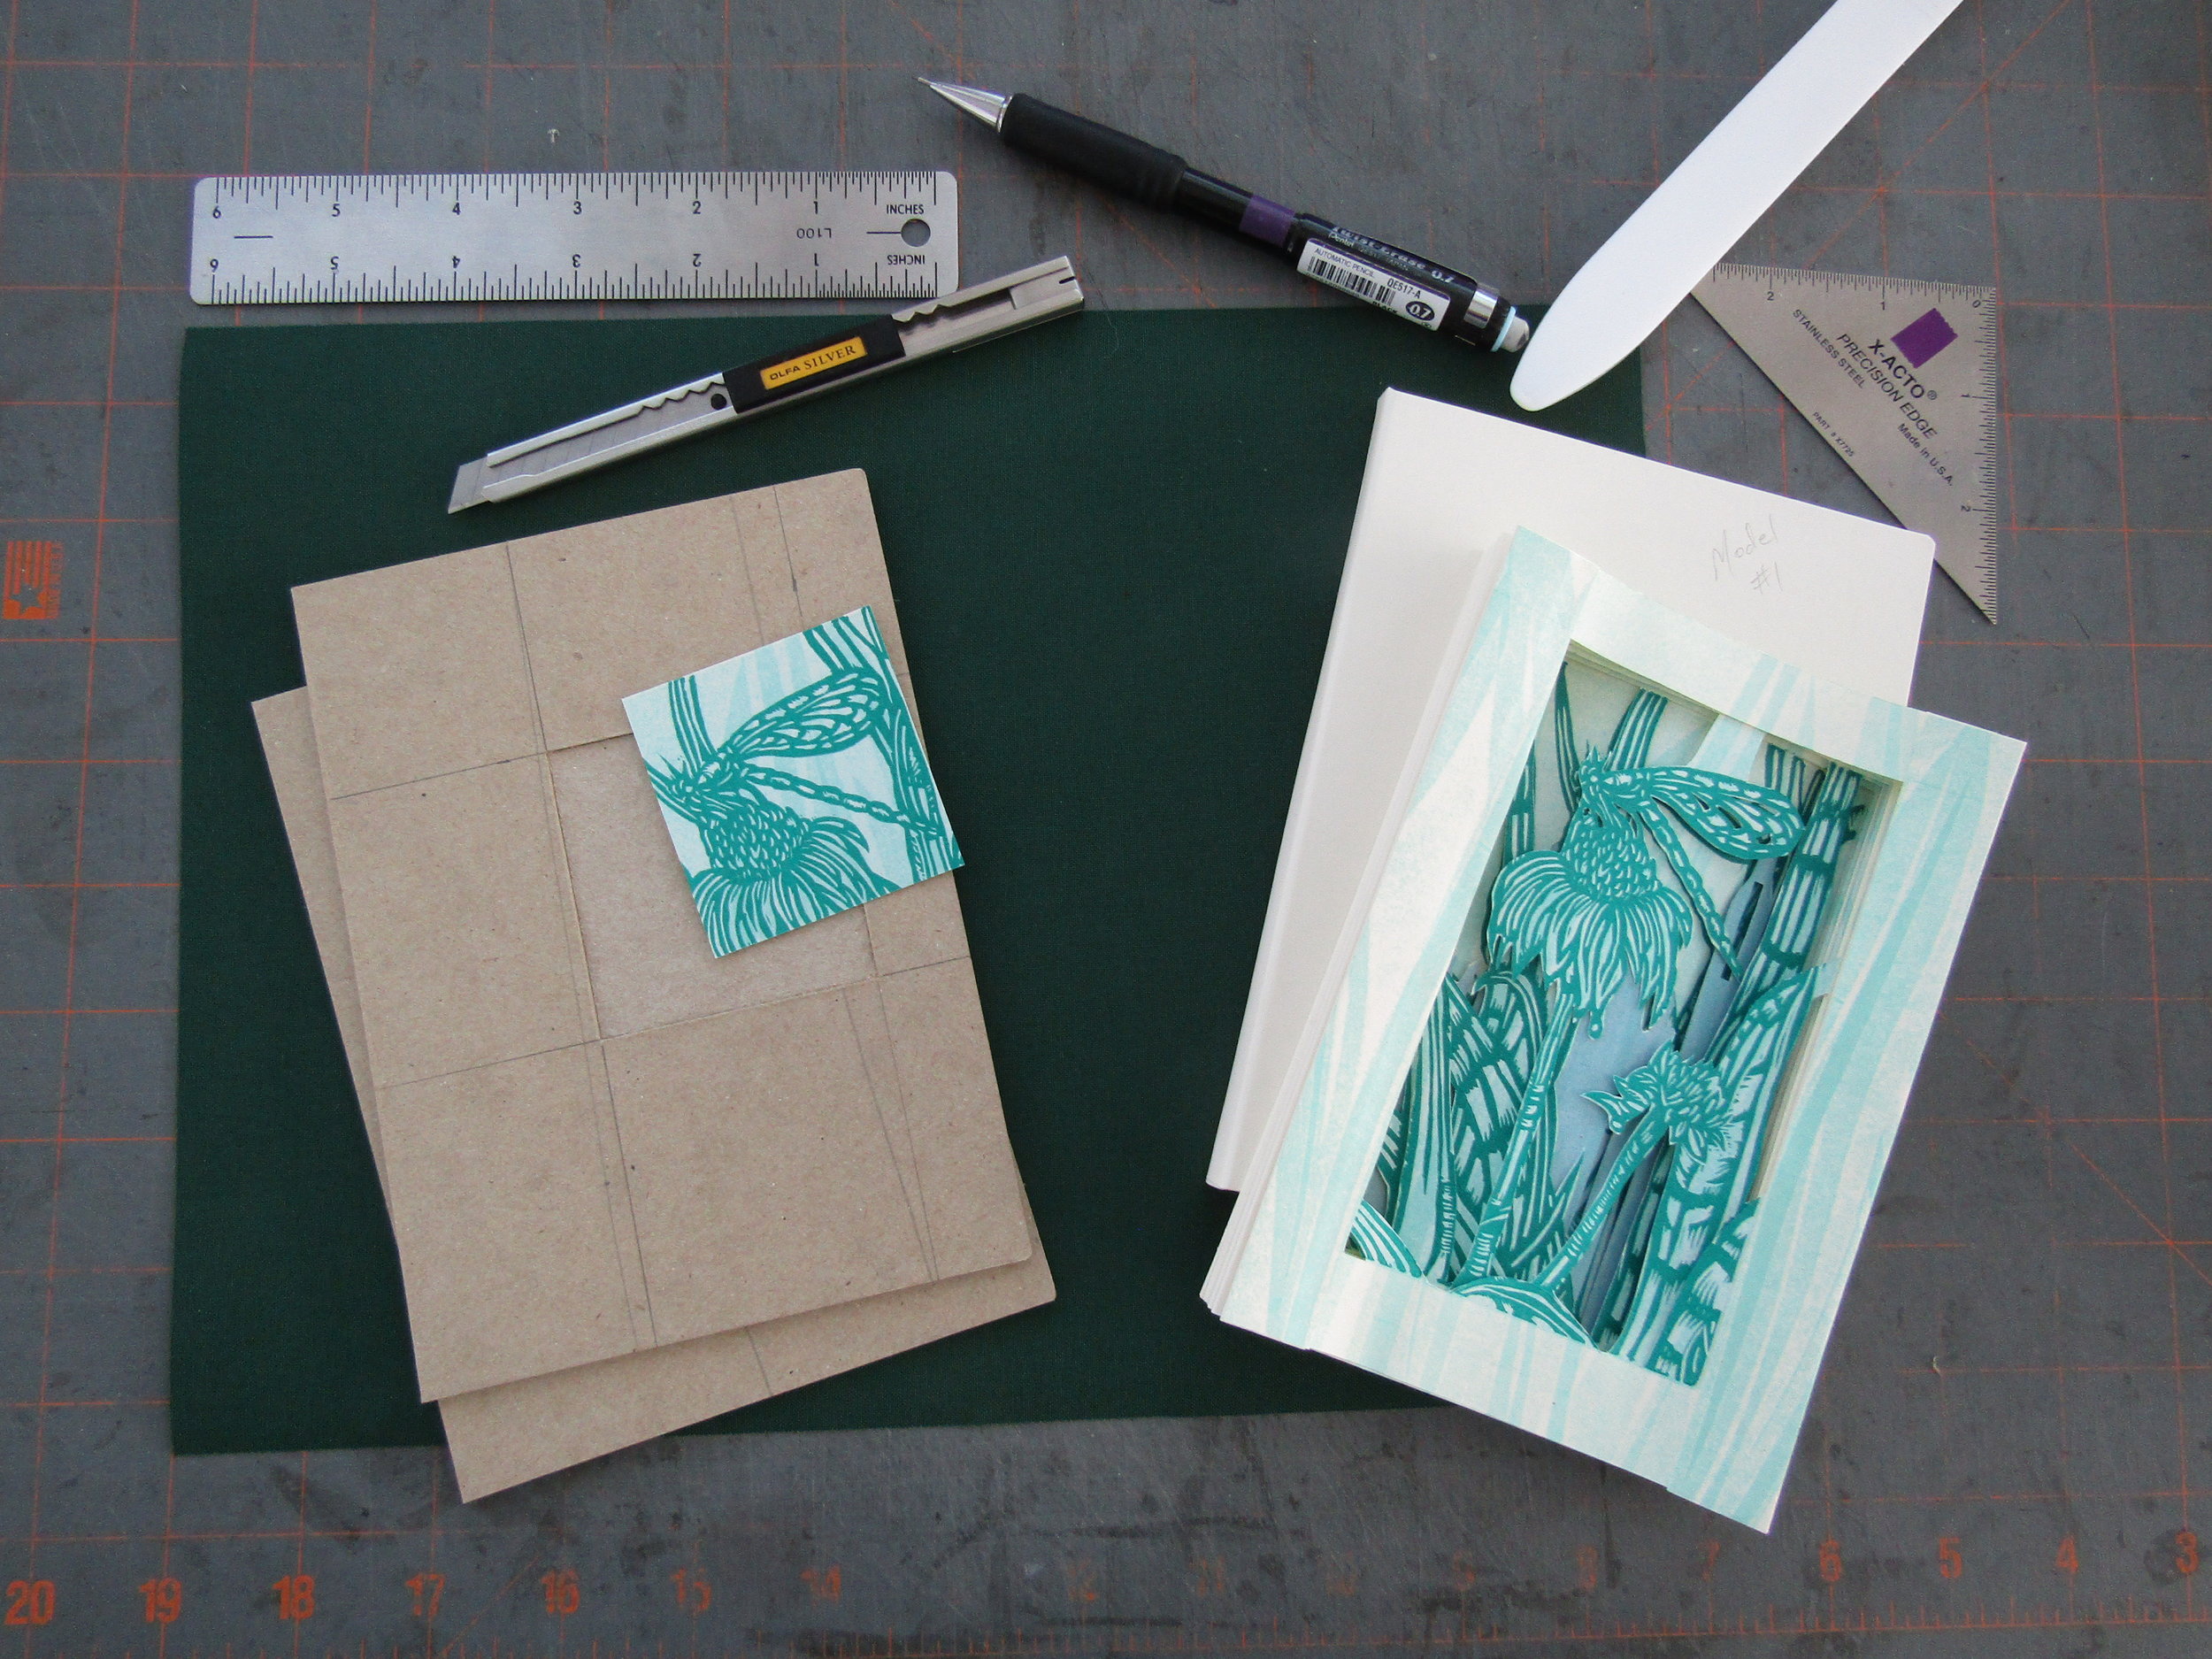
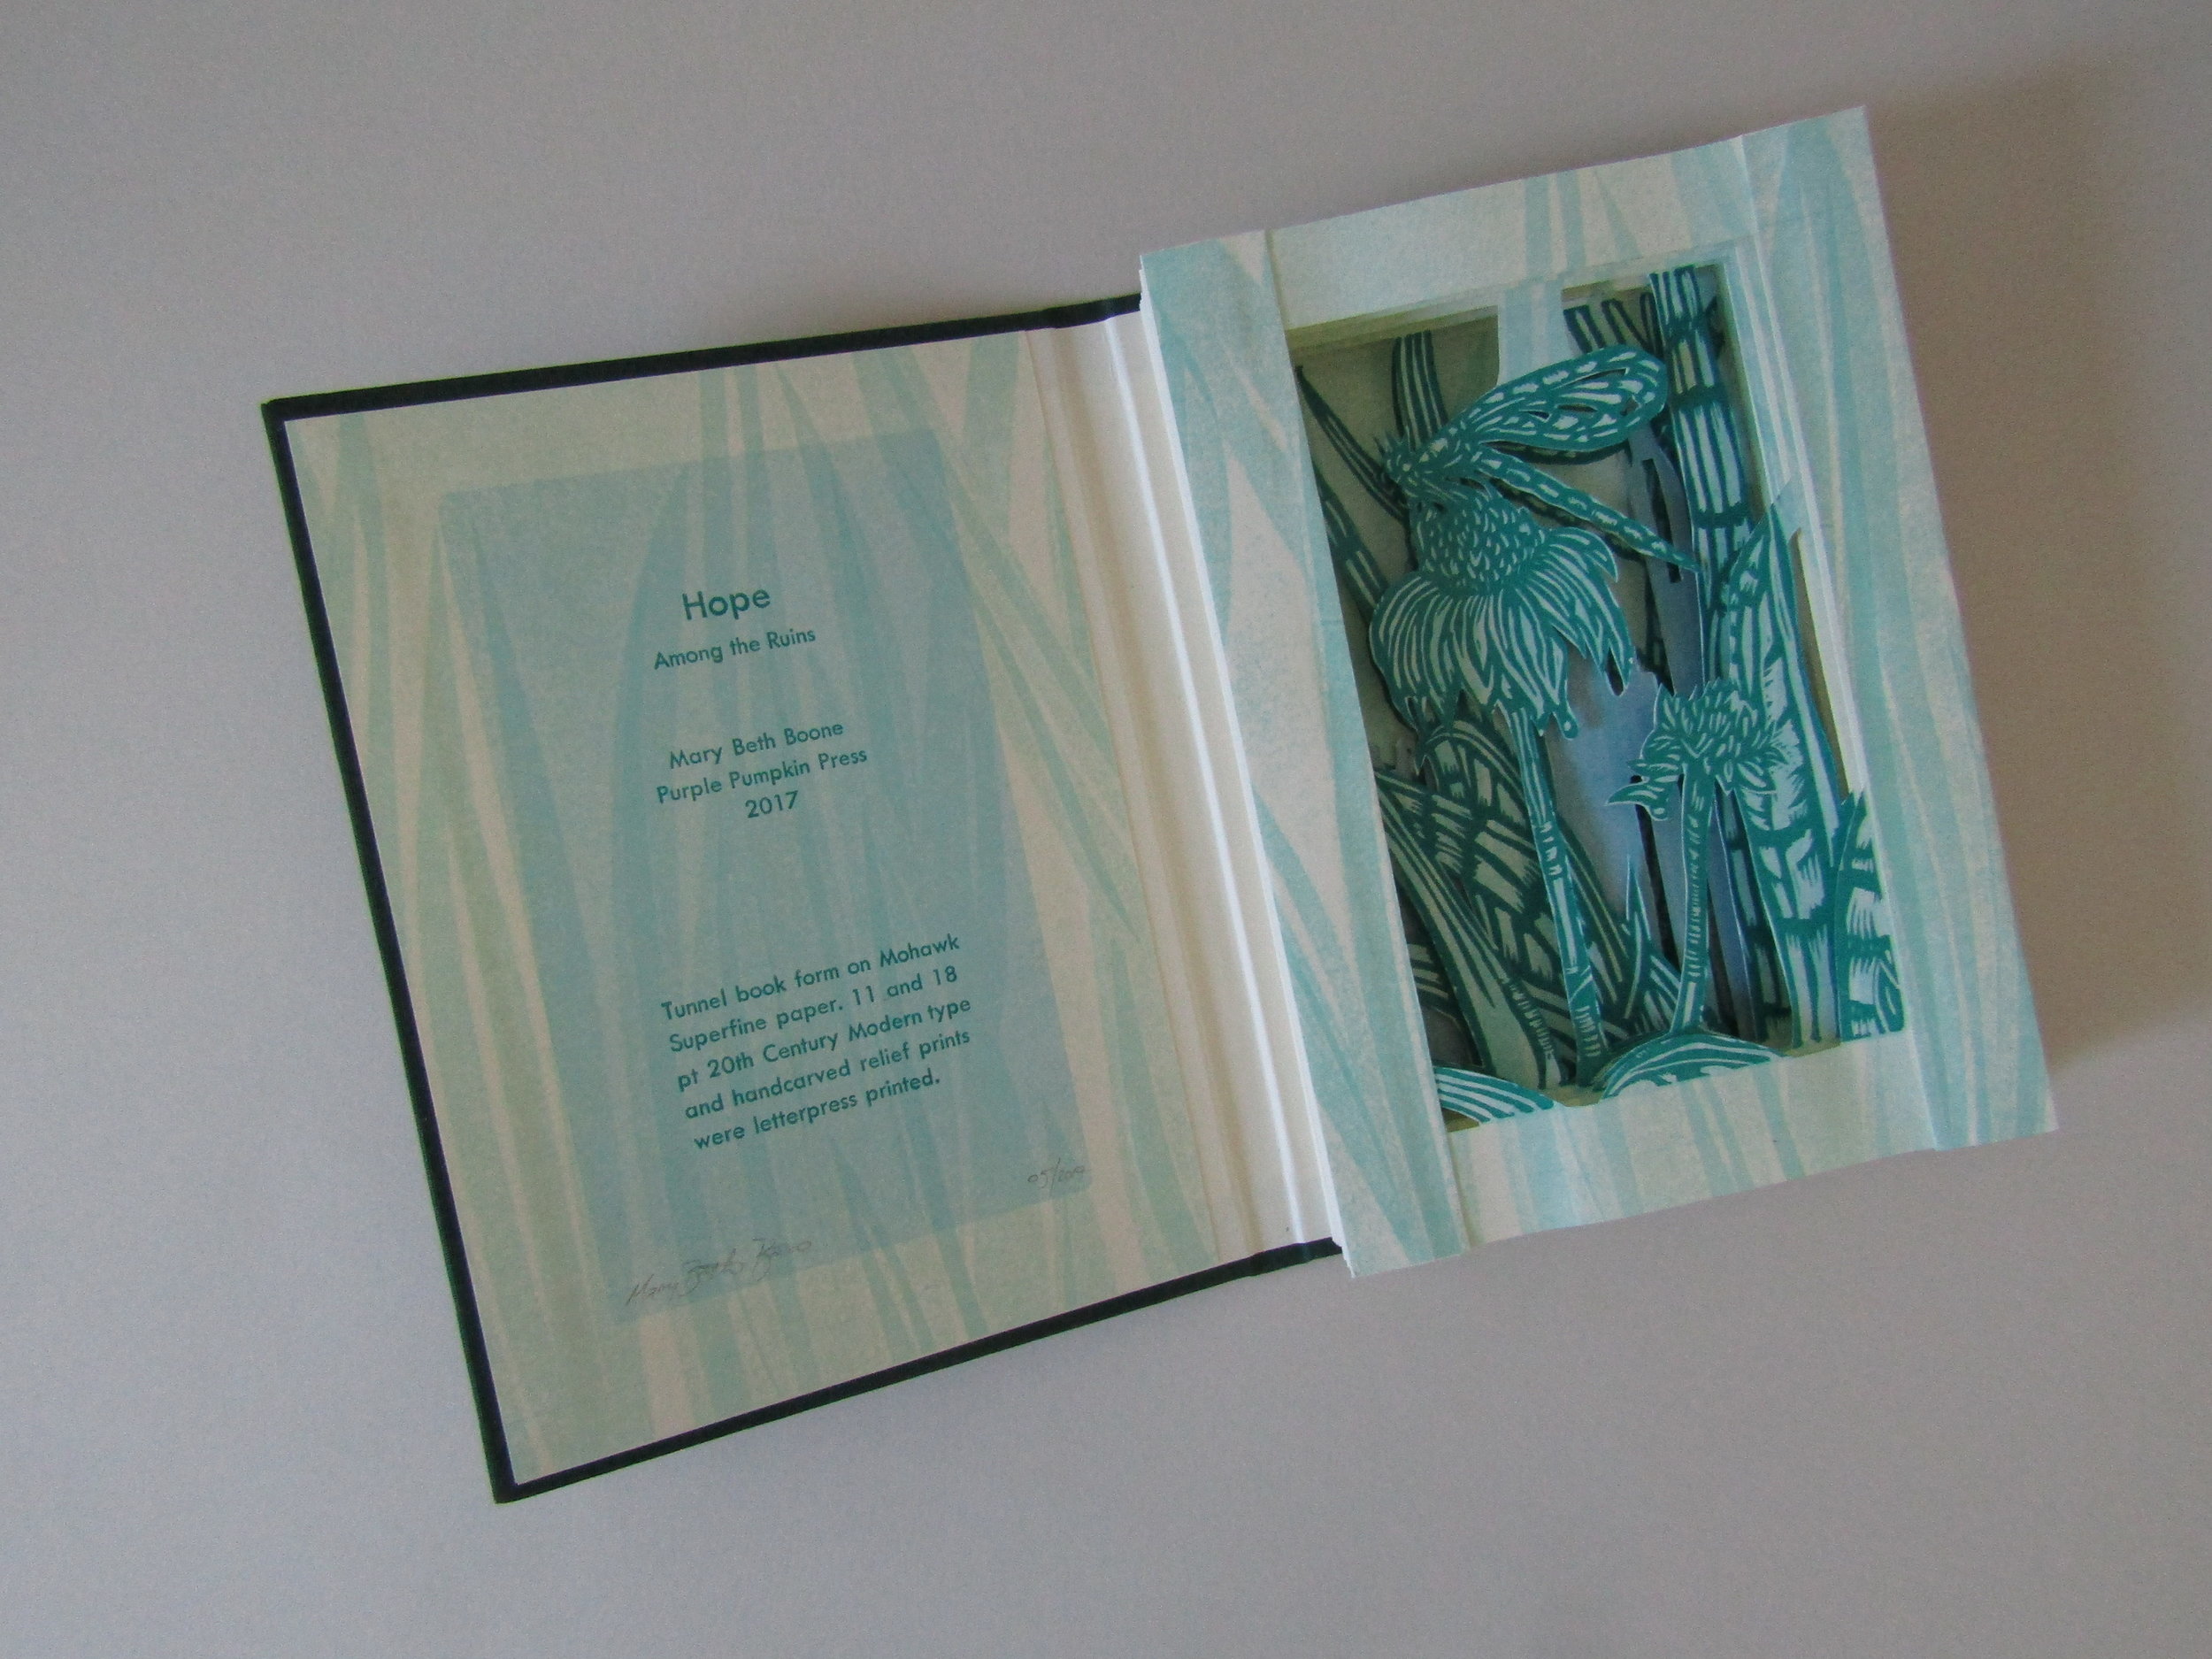
I decided to create a tunnel book for the Book and Print Collective show, which was exhibited at the Transylvania County Public Library in Brevard, North Carolina. I entitled the book Hope Among the Ruins. The focal point of the book is a dragonfly on a coneflower. I am attracted to dragonflies for many reasons; one being that they are a symbol for longevity. Here are some images showing how I approached this piece.

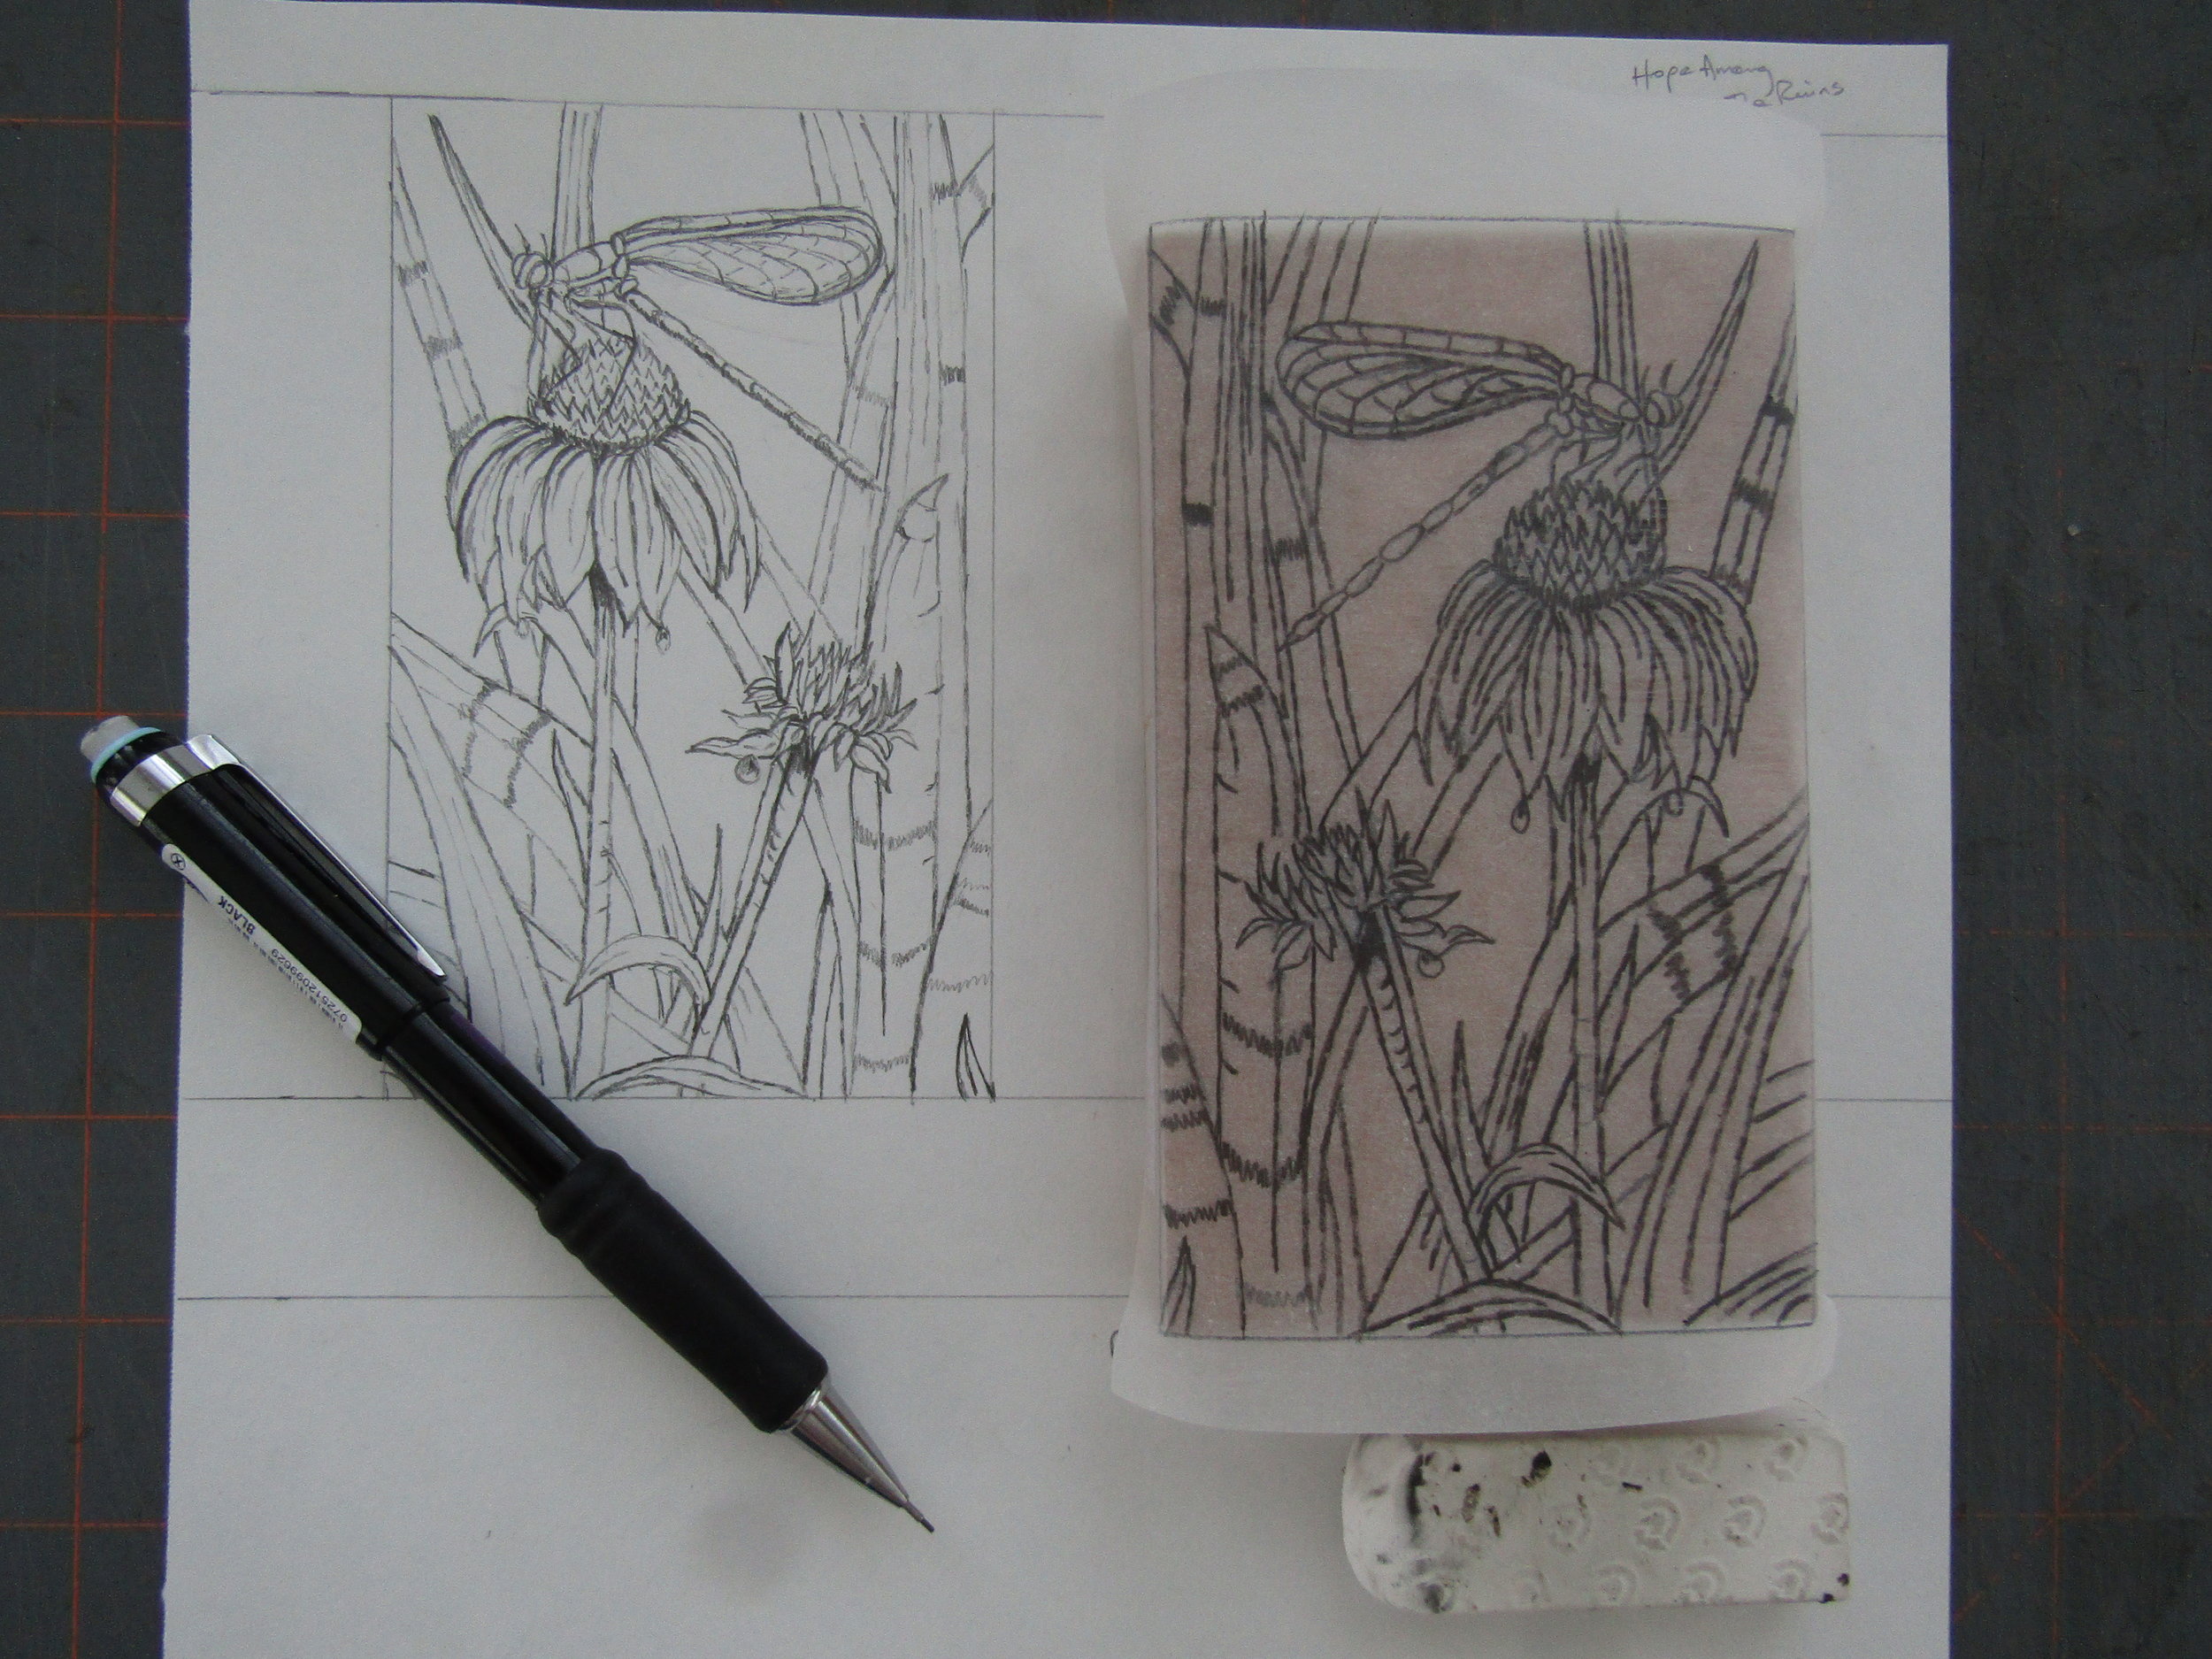
Transferring the drawing to a linoleum block. Photographs I took of my gardens were the sources for the drawings.

Transferring the drawing to a linoleum block. Photographs I took of my gardens were the sources for the drawings.

I also carved a block using an image of iris leaves. I wanted multiple layers to use for the book pages.

I also carved a block using an image of iris leaves. I wanted multiple layers to use for the book pages.

Proof of the dragonfly and coneflower block.

Proof of the dragonfly and coneflower block.

I printed the blocks on pressure prints of iris leaves. 

I printed the blocks on pressure prints of iris leaves. 

Once I had the blocks printed; I began constructing the book. It is always exciting to cut and layer the pages for a tunnel book!

Once I had the blocks printed; I began constructing the book. It is always exciting to cut and layer the pages for a tunnel book!

I used a case binding covered in Iris book cloth for the book's exterior. I carved a square recessed area on the front, which I adorned with portion of the dragonfly print.

I used a case binding covered in Iris book cloth for the book's exterior. I carved a square recessed area on the front, which I adorned with portion of the dragonfly print.

Opened completed book.

Opened completed book.

Carving the block.

Carving the block.

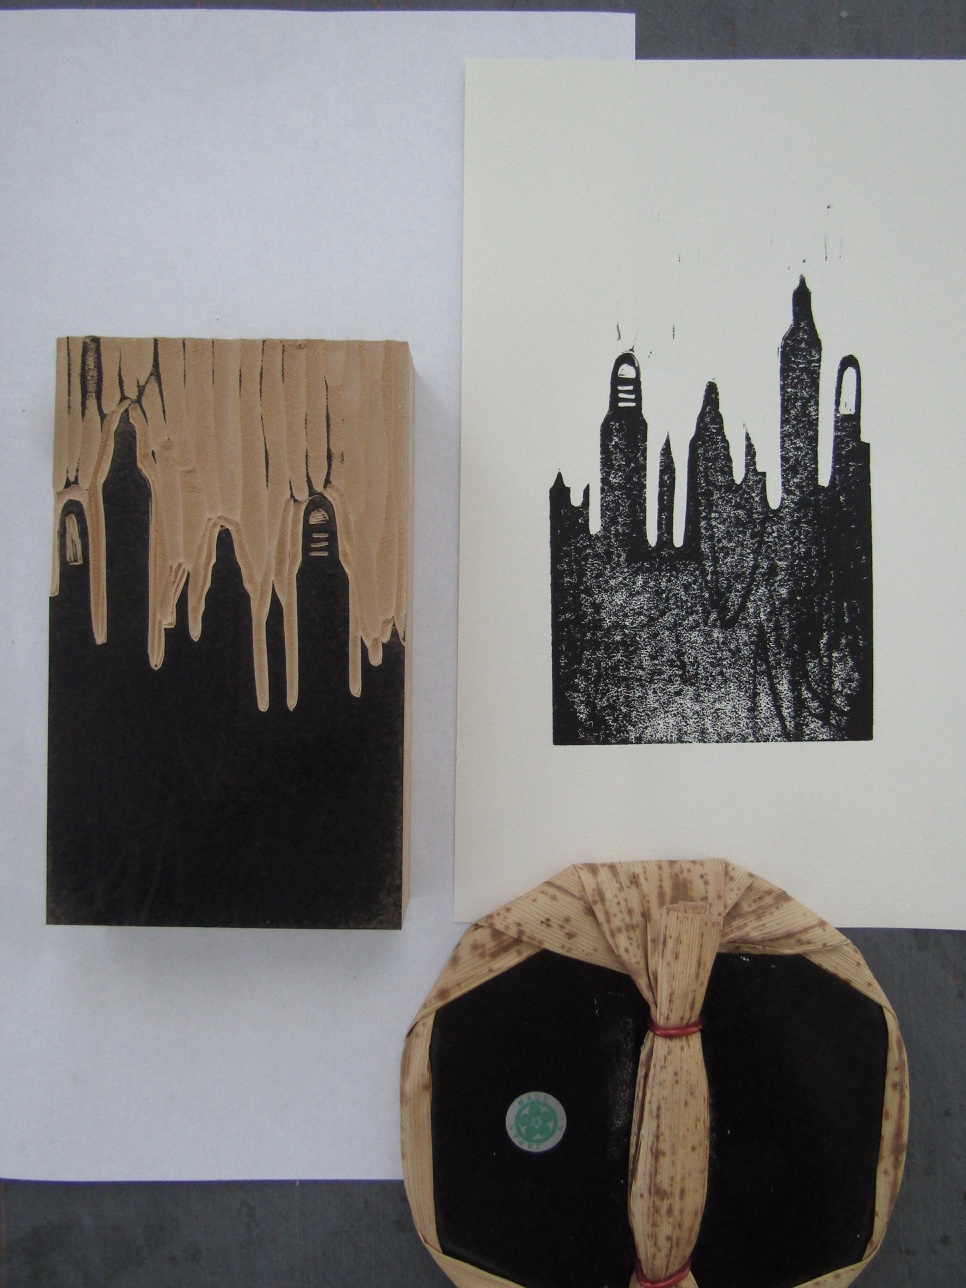
This is a proof of a third block of a skyline. I used this to represent the concept of 'ruins'.

This is a proof of a third block of a skyline. I used this to represent the concept of 'ruins'.

Ptinting on the Vandercook - what a beautiful teal!

Ptinting on the Vandercook - what a beautiful teal!

Cityscape block printed on the iris leaves.

Cityscape block printed on the iris leaves.

Pages are cut, layered, and assembled.

Pages are cut, layered, and assembled.

Closed completed book.

Closed completed book.

Standing and opened book. All of the components came together in a satisfying way. I will explore other ideas focused on the idea of hope found in the natural world!

Standing and opened book. All of the components came together in a satisfying way. I will explore other ideas focused on the idea of hope found in the natural world!

Garden Reverie - Drum Leaf Book and Hinged Box

I began by completing a series of drawings based on photographs I had taken of my gardens. 

I began by completing a series of drawings based on photographs I had taken of my gardens. 

Carving a dragonfly in the calla lilies.

Carving a dragonfly in the calla lilies.

Dragonfly proof.

Dragonfly proof.

After proofing; I began printing each one on my Vandercook. Each print had three runs; one pressure print of leaves in a pale green, then a yellow mat. The third run was of the relief print, which I printed in a dark green color.

After proofing; I began printing each one on my Vandercook. Each print had three runs; one pressure print of leaves in a pale green, then a yellow mat. The third run was of the relief print, which I printed in a dark green color.

I wrote a poem entitled "Garden Reverie". I set it in 12 pt Garamond and printed the text on the pressure printed image. Here is the form set on the press and ready for printing.

I wrote a poem entitled "Garden Reverie". I set it in 12 pt Garamond and printed the text on the pressure printed image. Here is the form set on the press and ready for printing.

After all of the relief prints and text pages were printed; I began binding them into a Drum Leaf binding. I had printed all of these on Monawk Superfine paper; which I attached (using PVA) to Stonehenge paper. This caused the pages to be thicker when brought together into the binding. Here are some images of making the book,

The pages are folded and weighted. A piece of Japanese paper is adhered to the spine. This will be hidden when the cover boards and outer spine are added. 

The pages are folded and weighted. A piece of Japanese paper is adhered to the spine. This will be hidden when the cover boards and outer spine are added. 

Here are the cover boards with a recessed area on the front cover. I used a beautiful green book cloth. I cut a small portion of this print to use on the cover.

Here are the cover boards with a recessed area on the front cover. I used a beautiful green book cloth. I cut a small portion of this print to use on the cover.

I am now at the final step - making the hinged box. I cut a small opening in the end of the box tray to help in lifting the book out of the box. 

I am now at the final step - making the hinged box. I cut a small opening in the end of the box tray to help in lifting the book out of the box. 

View of book interior.

View of book interior.

I recently completed a new artist book entitled Garden Reverie. It is a Drum Leaf book housed in a hinged box. The book is composed of relief prints and a short poem written about the images. The prints and poem set in Garamond were letterpress printed. As with most projects; I learned a great deal. Here is a look at the process from start to finish.

After  completing several drawings, I chose nine for the book. I then began transferring each drawing to a block which I carved for printing. I particularly liked this one of a chickadee in our fig tree. 

After  completing several drawings, I chose nine for the book. I then began transferring each drawing to a block which I carved for printing. I particularly liked this one of a chickadee in our fig tree. 

 I proofed each block before printing the book on my letterpress. Here is a proof of the chickadee and fig tree image.

 I proofed each block before printing the book on my letterpress. Here is a proof of the chickadee and fig tree image.

I love this print of tulips in the garden!

I love this print of tulips in the garden!

Print of a monarch butterfly in zinnias. 

Print of a monarch butterfly in zinnias. 

Image of the printed poem.

Image of the printed poem.

Once the spine was dry; I cut the pages down to size on my guillotine cutter. The inner book is completed. I am now ready to complete the cover and hinged box for housing the book.

Once the spine was dry; I cut the pages down to size on my guillotine cutter. The inner book is completed. I am now ready to complete the cover and hinged box for housing the book.

Cover boards completed and attached to inner book pages. I used the pressure printed Mohawk Superfine for the book's outer spine.

Cover boards completed and attached to inner book pages. I used the pressure printed Mohawk Superfine for the book's outer spine.

Covering the case for the box. I used the green book cloth for the box as well.

Covering the case for the box. I used the green book cloth for the box as well.

Finished book and box.

Finished book and box.

It was a very involved project, but worth the many steps along the way to completion. I was so pleased with how all of the elements came together and hope to explore this idea in future prints and books - my Garden Reverie!

Printing Cards of Hope - the Mindful Series

Completing sketches for the relief blocks.

Completing sketches for the relief blocks.

Carving a small block based on the sketch of the poppy pods.

Carving a small block based on the sketch of the poppy pods.

Printing the feather. 

Printing the feather. 

The cards are printed! Notice that I used my new sans serif Twentieth Century Modern alphabet. I like the combination of the modern/simpler type with these images. 

The cards are printed! Notice that I used my new sans serif Twentieth Century Modern alphabet. I like the combination of the modern/simpler type with these images. 

Little bits of nature providing inspiration in my studio - my 'inspiration tray'.

Little bits of nature providing inspiration in my studio - my 'inspiration tray'.

I recently completed a suite of cards which I entitled the Mindful Series. Working on these tiny prints was a way to consider and ponder the attributes I aspire to. I want to be kind, hopeful, a good listener, and believe that I can help to make the world a better place. I began by completing drawings of bits of nature (found on the 'inspiration tray' in my studio). I then completed a linocut from selected drawings, added bits of text and printed the cards on my Vandercook Sp 15. Take a look at the process - a very therapeutic way to deal with my concerns and hopes for the world. 

All the blocks carved and proofed; ready to print! 

All the blocks carved and proofed; ready to print! 

I printed the shell on a small mat of orange. 

I printed the shell on a small mat of orange. 

I find designing and printing cards a rewarding process. I love that customers buy these 'messages of hope' to send to their friends and family. Just another way of making the 'world a better place'.

A Suite of Reliquary Assemblages

Drawing images for the relief prints.

Drawing images for the relief prints.

Carving the cicada.

Carving the cicada.

Printing on my Vandercook; I printed the insects on a handmade cotton rag paper. 

Printing on my Vandercook; I printed the insects on a handmade cotton rag paper. 

I constructed a tunnel book using layers from each print. Here is the cicada tunnel book underway. I cut away layers for each insect for each tunnel book. 

I constructed a tunnel book using layers from each print. Here is the cicada tunnel book underway. I cut away layers for each insect for each tunnel book. 

Here is a close-up of the butterfly tunnel book - note the cut layers.

Here is a close-up of the butterfly tunnel book - note the cut layers.

Each box had a mica window.

Each box had a mica window.

Adding the feet to the Cicada reliquary.

Adding the feet to the Cicada reliquary.

Completed Butterfly and Dragonfly reliquaries.

Completed Butterfly and Dragonfly reliquaries.

Completed Cicada and Bee reliquaries.

Completed Cicada and Bee reliquaries.

I often find bits of insects while gardening; and am attracted to their ephemeral beauty. I have collected numerous insects and their wings over the years; which I often use in my books and boxes. I recently completed a group of reliquaries inspired by these 'garden remnants'. I began by selecting a butterfly, cicada, dragonfly, and bee from my collection. I completed a group of small prints which I then used as the focus of the reliquaries. 

Drawings transferred to blocks, now ready to carve. 

Drawings transferred to blocks, now ready to carve.


Pressure plates. I printed papers to use in the reliquaries using these plates. 

Pressure plates. I printed papers to use in the reliquaries using these plates.


Insect prints completed, pressure prints completed (on Niddeggen paper). I will now begin designing and building the reliquaries. I love playing around with the various components!

Insect prints completed, pressure prints completed (on Niddeggen paper). I will now begin designing and building the reliquaries. I love playing around with the various components!

Here are the completed cicada and dragonfly tunnel books.

Here are the completed cicada and dragonfly tunnel books.

Next, I built a box using Davey board for each book.

Next, I built a box using Davey board for each book.

I then constructed a case binding for the boxes; covered them with pressure printed papers and a printed cover;  gave them a base covered with cork paper; and added vintage button closures and feet! Whew! 

I then constructed a case binding for the boxes; covered them with pressure printed papers and a printed cover;  gave them a base covered with cork paper; and added vintage button closures and feet! Whew! 

I couldn't resist adding a window at the top of each piece - I placed  actual wings behind a piece of mica.

I couldn't resist adding a window at the top of each piece - I placed  actual wings behind a piece of mica.

Dragonfly reliquary with the door opened.

Dragonfly reliquary with the door opened.

Top of the Cicada reliquary - I just love how the windows enhance the finished piece.

Top of the Cicada reliquary - I just love how the windows enhance the finished piece.

I learned so much constructing these pieces bringing together my love for nature, letterpress printing, and book arts! Additionally, the Cicada Reliquary was juried into Pop-Up Now II at 23 Sandy Gallery in Portland, Oregon; and was purchased by Ohio University!

Garden Vignettes - A Suite of Tunnel Books Inspired By My Gardens

These four prints were the images that would become the 'Garden Vignettes'. I love the blues!

These four prints were the images that would become the 'Garden Vignettes'. I love the blues!

Cutting away spaces within the prints to create the pages for each book. 

Cutting away spaces within the prints to create the pages for each book. 

Finch in the Garden is completed. I will make a few adjustments for the books, but am excited with this result!

Finch in the Garden is completed. I will make a few adjustments for the books, but am excited with this result!

Models for the book covers. The one on the right worked the best (the spine is a bit deeper and the cover is a bit wider). 

A completed closed cover.

A completed closed cover.

Colophon and a bit of collaged embellishment have been added to Finch in the Garden; now to assemble and add the wrap.

Colophon and a bit of collaged embellishment have been added to Finch in the Garden; now to assemble and add the wrap.

I completed a group of small relief prints based on 'happenings' in my gardens. I then used them in a group of small tunnel books with case bindings. It proved to be a beneficial way to bring image and book form together.

I printed numerous prints, since I would need at least five prints of each image for each tunnel book.

I printed numerous prints, since I would need at least five prints of each image for each tunnel book.

After cutting separate pages for each book I experimented with various papers for the sides of the books. Accordion folded pages are used for this. Bugra paper worked the best so I used it. I was then ready to glue and assemble the first b…

After cutting separate pages for each book I experimented with various papers for the sides of the books. Accordion folded pages are used for this. Bugra paper worked the best so I used it. I was then ready to glue and assemble the first book; which served as a model.

Four are assembled - so pleased! I must now design a cover for the books. I plan on using a case binding. I will explore sizes and materials through building a model (or two).

Four are assembled - so pleased! I must now design a cover for the books. I plan on using a case binding. I will explore sizes and materials through building a model (or two).

I chose a delicate pattern in a Japanese paper for the covers. The blues were exactly what I wanted to match the blues of the garden prints.

I chose a delicate pattern in a Japanese paper for the covers. The blues were exactly what I wanted to match the blues of the garden prints.

I have completed a book using each image. I then set a bit of type in 12pt. Garamond for the colophon and 'belly' wrap for the books.

I have completed a book using each image. I then set a bit of type in 12pt. Garamond for the colophon and 'belly' wrap for the books.

Printing the colophon on Mohawk Superfine. I will also use this paper for the 'belly' wrap.

Printing the colophon on Mohawk Superfine. I will also use this paper for the 'belly' wrap.

Working out the dimensions for and assembling a wrap.

Working out the dimensions for and assembling a wrap.

I  like how the 'belly' wrap holds the little books together and gives them a finished presentation.

I  like how the 'belly' wrap holds the little books together and gives them a finished presentation.

Using Fabric to Cover Books and Boxes Part 2: Hinged Boxes

Trays constructed; now for a bit of sanding and then to cover and assemble!

Trays constructed; now for a bit of sanding and then to cover and assemble!

I used the golden dragonfly patterned fabric with this interior and case.

I used the golden dragonfly patterned fabric with this interior and case.

An all important step in  making a box  - nipping - applying a bit of pressure when joining the box to the case (what will become the box cover).

An all important step in  making a box  - nipping - applying a bit of pressure when joining the box to the case (what will become the box cover).

Designing and building boxes is another way that I use fabric I have backed with Kozo paper. I enjoy personalizing boxes in this way.

I wrapped this tray in Bugra paper - the color works well with these fabrics.

I wrapped this tray in Bugra paper - the color works well with these fabrics.

Playing around with another color combination - so much fun!

Playing around with another color combination - so much fun!

They are almost finished. I am letting them dry with weights. This step helps secure the joining of the tray and case. The papers in the foreground will be cut down and applied to inside of the box top. 

They are almost finished. I am letting them dry with weights. This step helps secure the joining of the tray and case. The papers in the foreground will be cut down and applied to inside of the box top.


They are  finished; ready to hold special objects and mementoes!

They are  finished; ready to hold special objects and mementoes!

Using Fabric to Cover Books and Boxes Part I: Coptic Books

Fabric backed with kozo paper; ready to use!

Fabric backed with kozo paper; ready to use!

Carving recessed areas in the Davey board for windows.

Carving recessed areas in the Davey board for windows.

Working on a second cover using the blue dragonfly imagery.

Working on a second cover using the blue dragonfly imagery.

Sewing - adding the last section! I love how the stitching looks on the book's spine!

Sewing - adding the last section! I love how the stitching looks on the book's spine!

Adding the back cover; this book is almost finished!

Adding the back cover; this book is almost finished!

I sometimes back fabric and then use it to cover books or boxes. I recently completed a suite of Coptic books and hinged boxes covered with fabrics purchased while traveling in Paris. 

I will focus on designing and sewing the Coptic books in this post.


Selecting bits of ephemera to use with the books.

Selecting bits of ephemera to use with the books.

Covered book exterior using dragonfly fabric and ephemera; interior covered with cork paper. 

Covered book exterior using dragonfly fabric and ephemera; interior covered with cork paper.


Multiple books of various sizes - text blocks cut and folded! I am now ready for sewing.

Multiple books of various sizes - text blocks cut and folded! I am now ready for sewing.

Starting to sew a Coptic book - using four needles! 

Starting to sew a Coptic book - using four needles!


Completed books using vintage buttons and waxed linen thread for closures!

Completed books using vintage buttons and waxed linen thread for closures!