Reliquaries - Bringing Prints, Books, and Boxes Together

After finding these feathers I decided to create a reliquary honoring these two birds that frequent my gardens. I began by sketching images to use in small tunnel books. I then transferred the drawings to small blocks for carving.

After finding these feathers I decided to create a reliquary honoring these two birds that frequent my gardens. I began by sketching images to use in small tunnel books. I then transferred the drawings to small blocks for carving.

I also printed numerous pressure prints to use in these pieces. This image shows the bird prints, a selection of the pressure prints, and other items I was considering for use in the reliquaries.

I also printed numerous pressure prints to use in these pieces. This image shows the bird prints, a selection of the pressure prints, and other items I was considering for use in the reliquaries.

Assembling the book.

Assembling the book.

I was now ready to begin the processes of covering the boxes, adding the hinged ‘doors’ and other embellishments and components.

The hinged ‘doors’ were covered with pressure printed papers and a print of each bird was placed into a recessed area on the door.

The hinged ‘doors’ were covered with pressure printed papers and a print of each bird was placed into a recessed area on the door.

Components for the Goldfinch reliquary.

Components for the Goldfinch reliquary.

Back view of the Wren Reliquary.

Back view of the Wren Reliquary.

Front view of the Goldfinch Reliquary.

Front view of the Goldfinch Reliquary.

Interior detail.

Interior detail.

I frequently find bird feathers while gardening. Two of my finds inspired these pieces. A beautiful goldfinch feather and little wren feathers were the beginning of these boxed works. Here is a look at the processes I used to complete the Goldfinch Reliquary and the Wren Reliquary.

The wren is carved and ready for printing.

The wren is carved and ready for printing.

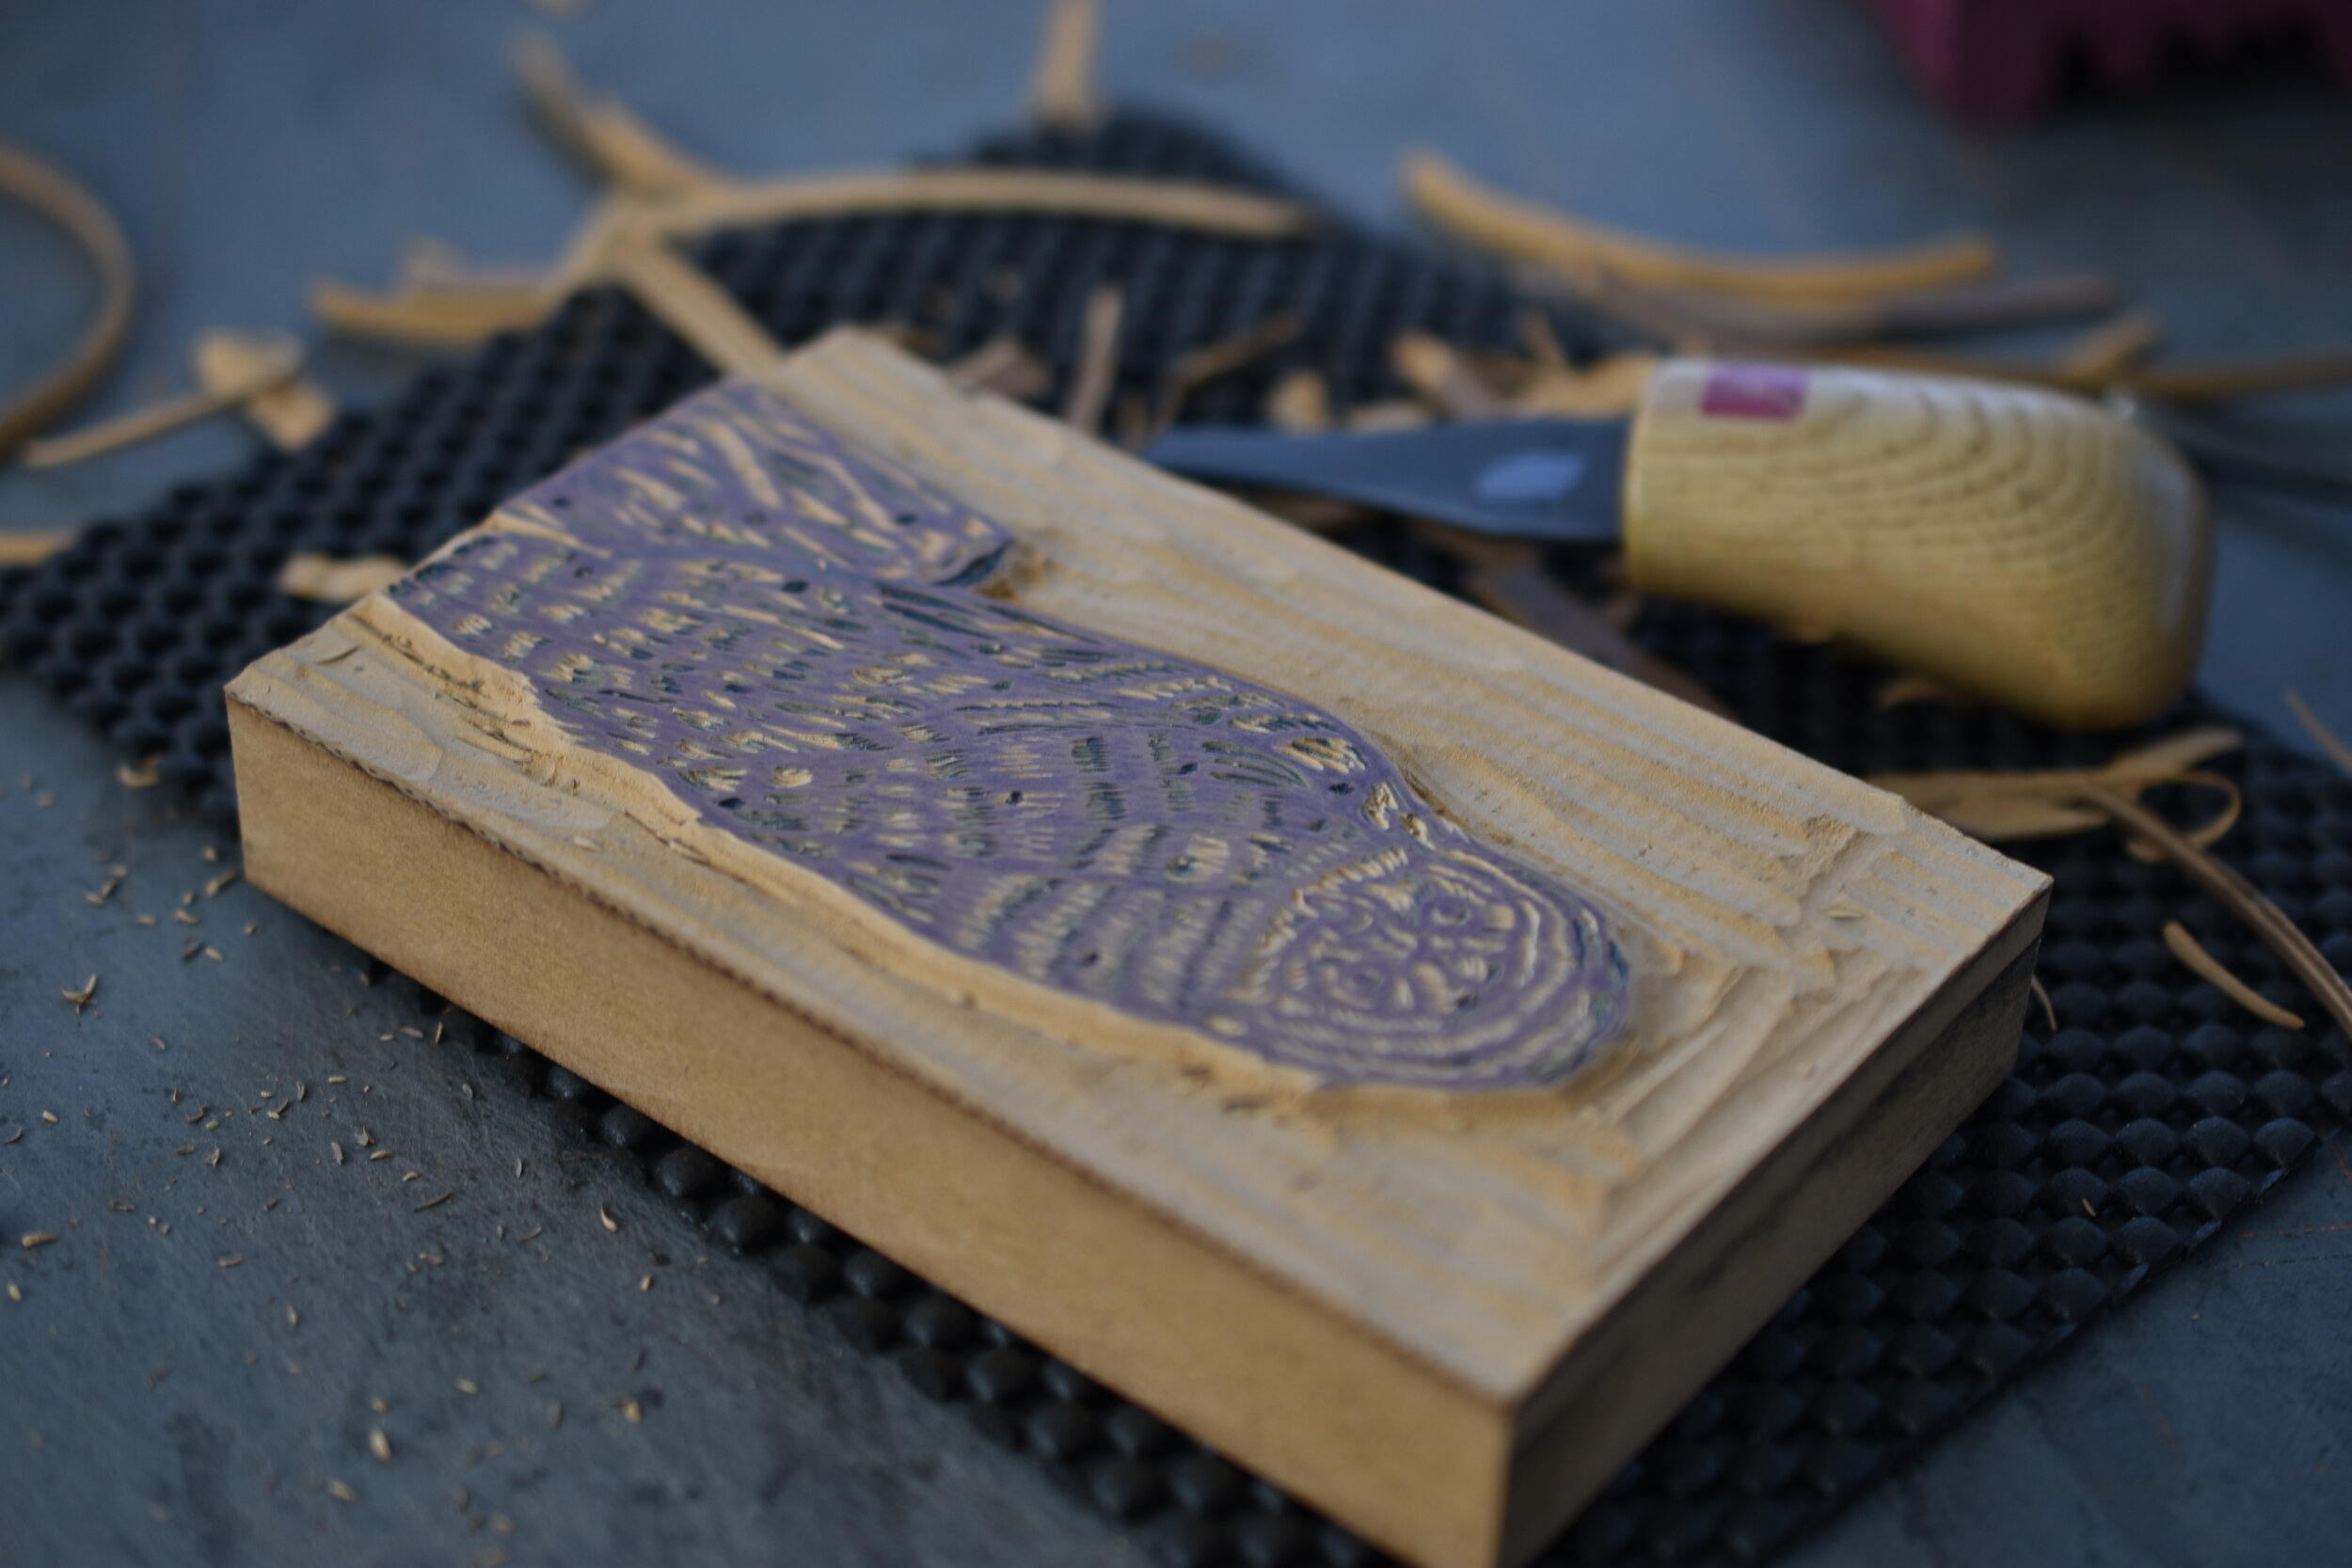
The goldfinch is carved.

The goldfinch is carved.

The cut pages for the goldfinch tunnel book. The folded accordion papers will be the sides of this book, allowing for the layering of the cut pages.

The cut pages for the goldfinch tunnel book. The folded accordion papers will be the sides of this book, allowing for the layering of the cut pages.

I placed the completed tunnel books  in Davey board boxes.

I placed the completed tunnel books in Davey board boxes.

I placed a cover with a mica window on each boxed book. This allows the viewer to look into the layered images.

I placed a cover with a mica window on each boxed book. This allows the viewer to look into the layered images.

Components for the Wren reliquary. Note that a recessed area with actual feathers and a mica window was placed on the back of the reliquary. Vintage buttons were used as closures and feet.

Components for the Wren reliquary. Note that a recessed area with actual feathers and a mica window was placed on the back of the reliquary. Vintage buttons were used as closures and feet.

Wren Reliquary - front view. I so love the buttons I used for the feet!

Wren Reliquary - front view. I so love the buttons I used for the feet!

Opened - interior detail.

Opened - interior detail.

Back of the Goldfinch Reliquary. I have always cherished this feather and was glad to use it in this piece!

Back of the Goldfinch Reliquary. I have always cherished this feather and was glad to use it in this piece!

It took numerous steps and processes to complete these pieces. They were a labor of love celebrating two of my favorite birds - the Goldfinch and Wren.

Exploring Backyard Birds Through Drawings, Prints, Handmade Books, and Boxes

I transferred all eight drawings to linoleum blocks and carved the entire suite of blocks. I selected the Crow, Goldfinch, Cardinal, and Downy Woodpecker to print. I will print the other four birds at a later time.

I transferred all eight drawings to linoleum blocks and carved the entire suite of blocks. I selected the Crow, Goldfinch, Cardinal, and Downy Woodpecker to print. I will print the other four birds at a later time.

Carved Goldfinch

Carved Goldfinch

Carved Downy Woodpecker

Carved Downy Woodpecker

Detail of  printed goldfinch.

Detail of printed goldfinch.

Part I A Suite of Small Prints

I pursued a body of work throughout the months of July, August, and September. I focused on birds I see regularly in our gardens. Most of the completed pieces will be submitted to the Winter Show 2020 at the Green Hill Center in Greensboro. I am thrilled to be a part of this exhibition. I began by completing a group of eight drawings.

Carved Crow

Carved Crow

Carving the Cardinal.

Carving the Cardinal.

Goldfinch block locked in press for printing.

Goldfinch block locked in press for printing.

These four prints are printed on Japanese paper which I made several years ago. I am so pleased with this group of prints. Each one is a two block print. The first block provided the green background mat for the bird print.

These four prints are printed on Japanese paper which I made several years ago. I am so pleased with this group of prints. Each one is a two block print. The first block provided the green background mat for the bird print.

Bugs Galore...new cards!

Line drawing of dragonfly.

Line drawing of dragonfly.

I completed four insect drawings - two each of dragonflies and butterflies. I then traced each one in order to transfer them to the linoleum blocks for carving.

I completed four insect drawings - two each of dragonflies and butterflies. I then traced each one in order to transfer them to the linoleum blocks for carving.

Carving one of the dragonflies.

Carving one of the dragonflies.

Printing one of the dragonflies. I printed the dragonflies on a teal colored mat. I printed the butterflies on a warm orange hue.

Printing one of the dragonflies. I printed the dragonflies on a teal colored mat. I printed the butterflies on a warm orange hue.

I was pleased with the completed suite of cards. Reach out to friends or family with a handmade greeting card - the best way to stay in touch!

I spent time working in our gardens during the summer. Insects were abundant; particularly the butterflies and dragonflies. I printed new cards based on these inspiring creatures.

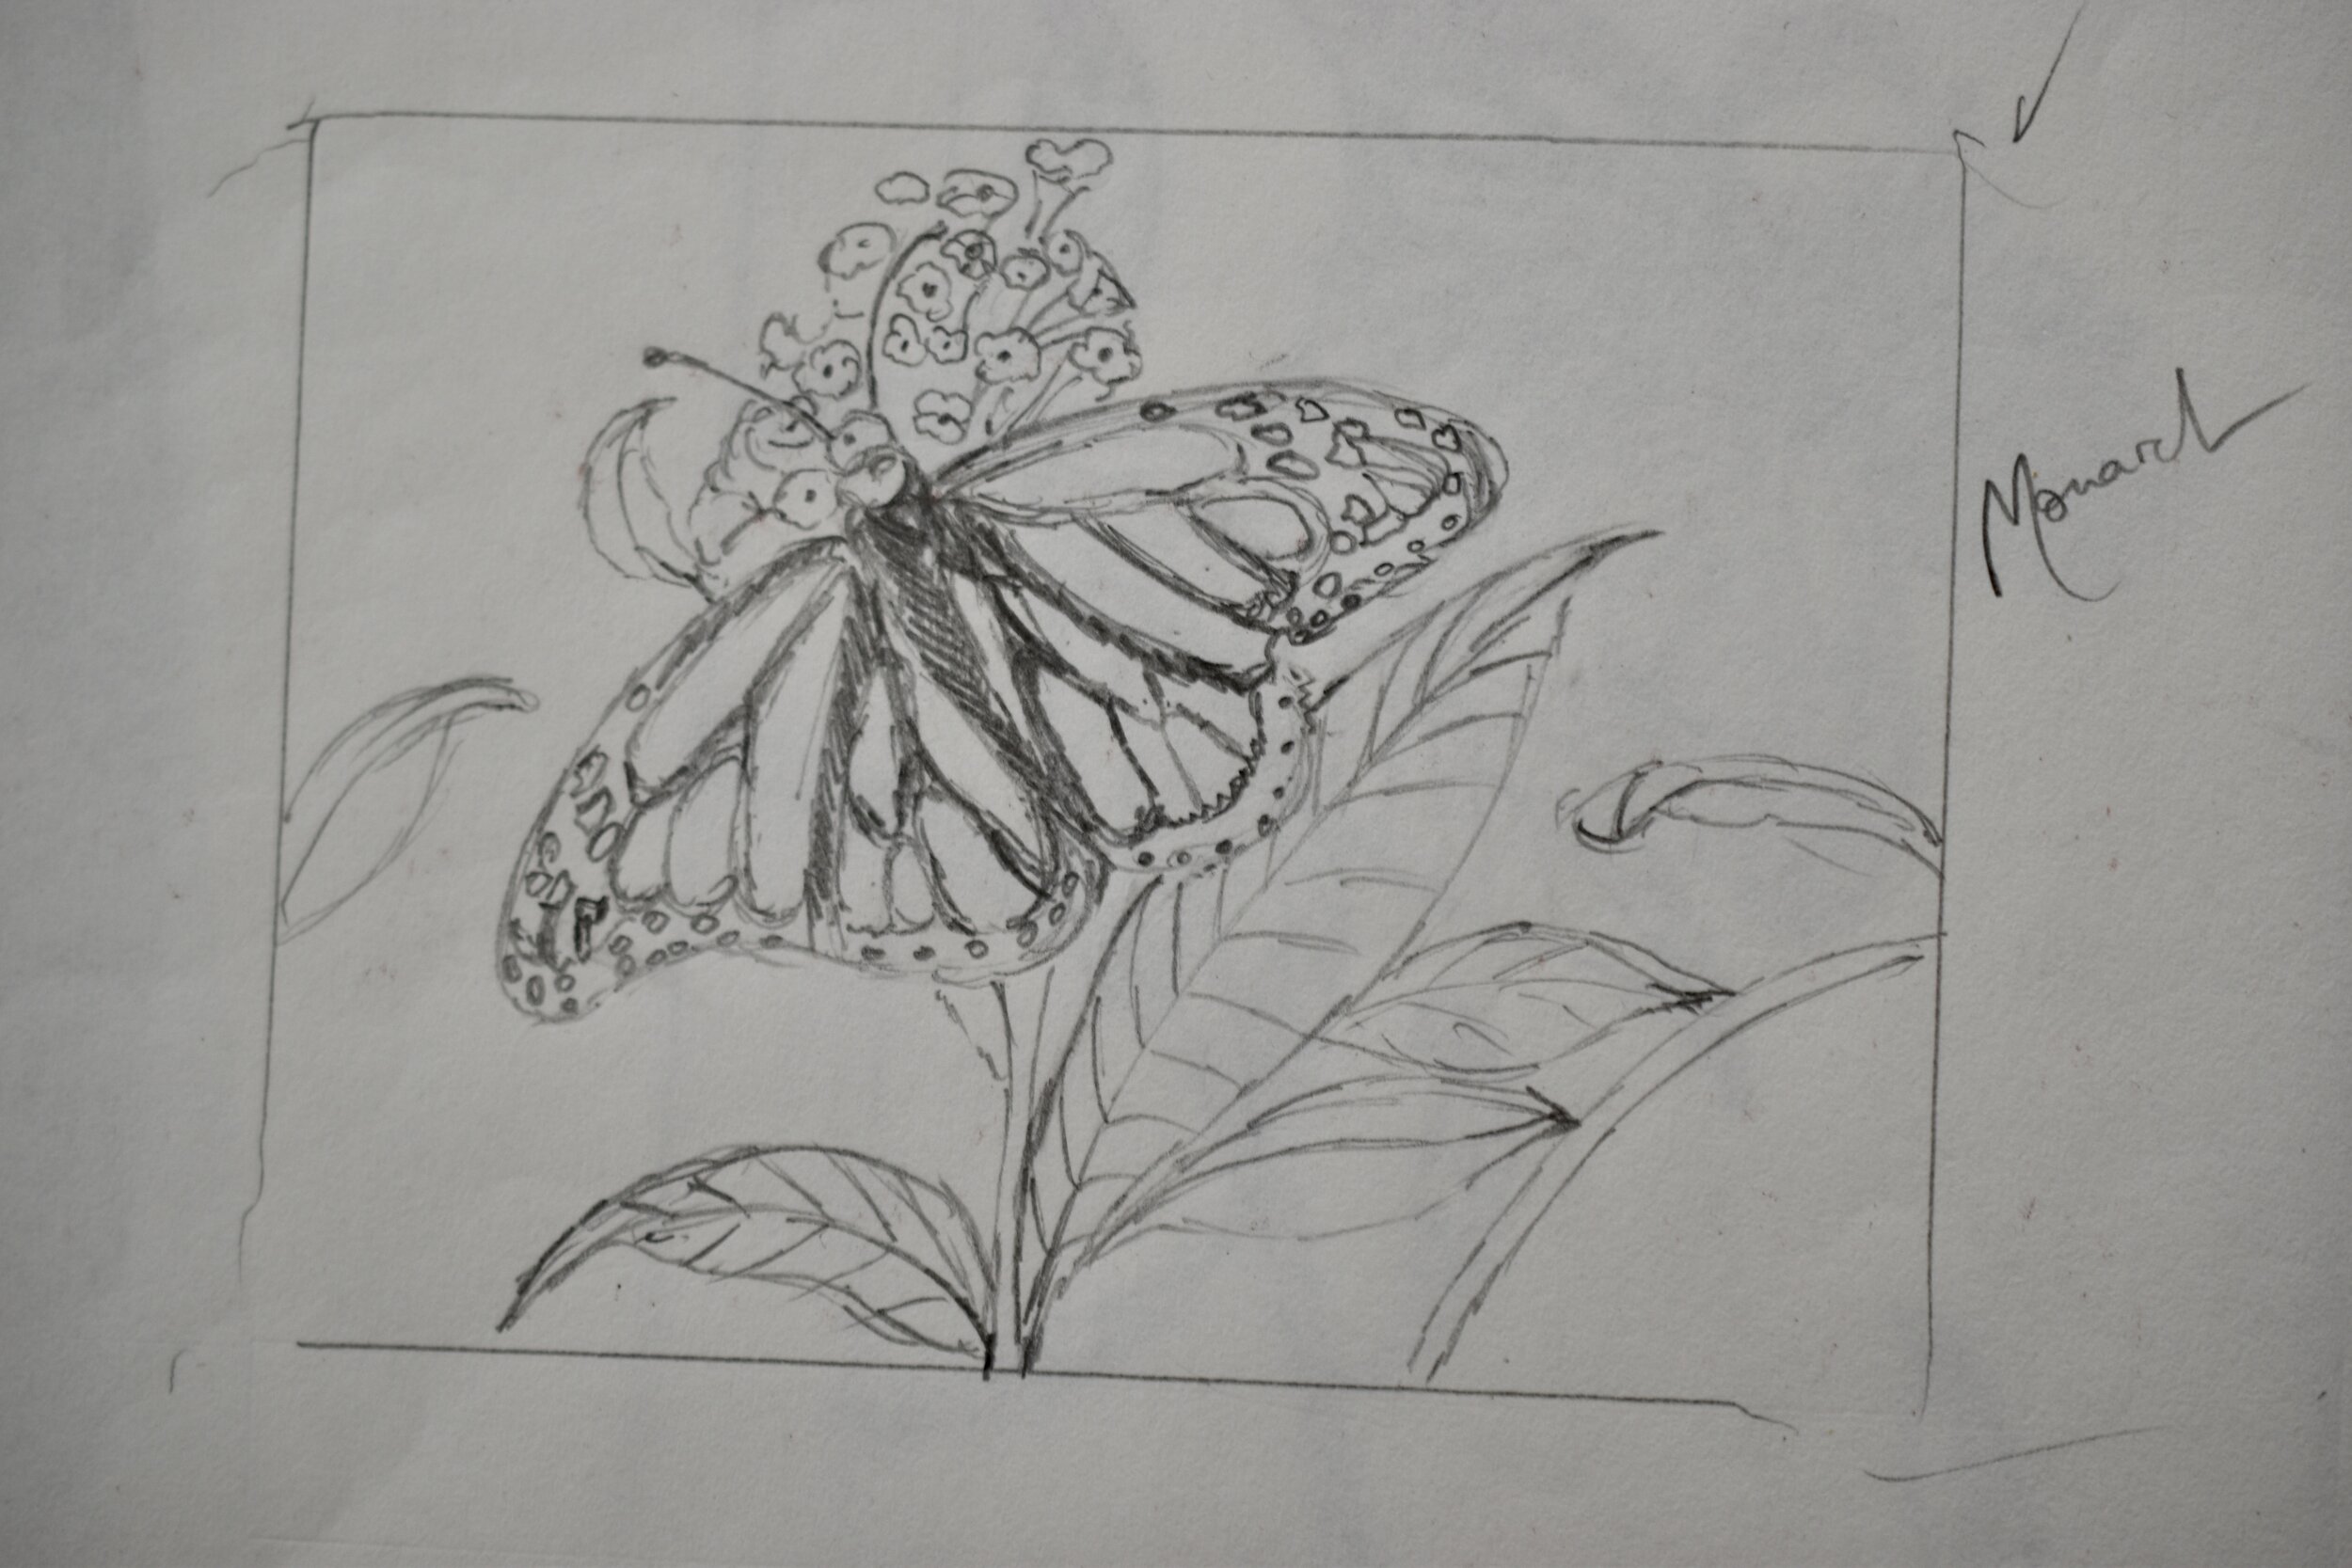
Line drawing of Monarch butterfly.

Line drawing of Monarch butterfly.

Carving the Monarch butterfly.

Carving the Monarch butterfly.

Once all four blocks were carved; I then printed them on Lettra paper.

Printing the Buckeye butterfly.

Printing the Buckeye butterfly.

ACAEF588-0A4D-420F-A63D-A8D3EA8C72DA_1_201_a.jpeg

A New Suite of Pamphlet Covers

I recently carved a trio of blocks to use for printing pamphlet covers. Our gardens inspired the images. I am pleased with the blocks and prints as well as the sewn pamphlets. I hope to eventually carve additional blocks to add to this series.

I began by sketching with pencil. This first drawing was based on poppies in our gardens during the Spring.

I began by sketching with pencil. This first drawing was based on poppies in our gardens during the Spring.

The third drawing was based on the numerous finches that inhabit our gardens.

The third drawing was based on the numerous finches that inhabit our gardens.

I go over each drawing with a Sharpie pen before carving the image into the block.

I go over each drawing with a Sharpie pen before carving the image into the block.

With each drawing I played around with the space incorporating borders or dividing the space into units. My intent was that the space of the print would fall across the front, back, and spine of the sewn pamphlets. It was a new challenge to think of the completed prints in this manner.

I transferred the completed drawings to the blocks and then carved each block.


A second drawing was based on blueberries. Our bushes never yield all that many blueberries since most are eaten by birds!

A second drawing was based on blueberries. Our bushes never yield all that many blueberries since most are eaten by birds!

I traced the poppy drawing using a soft lead mechanical pencil, and taped it with the drawing face down to a linoleum block. I rubbed across the back of the drawing with a teflon bone folder to transfer it to the block. This method of transferring w…

I traced the poppy drawing using a soft lead mechanical pencil, and taped it with the drawing face down to a linoleum block. I rubbed across the back of the drawing with a teflon bone folder to transfer it to the block. This method of transferring works beautifully.

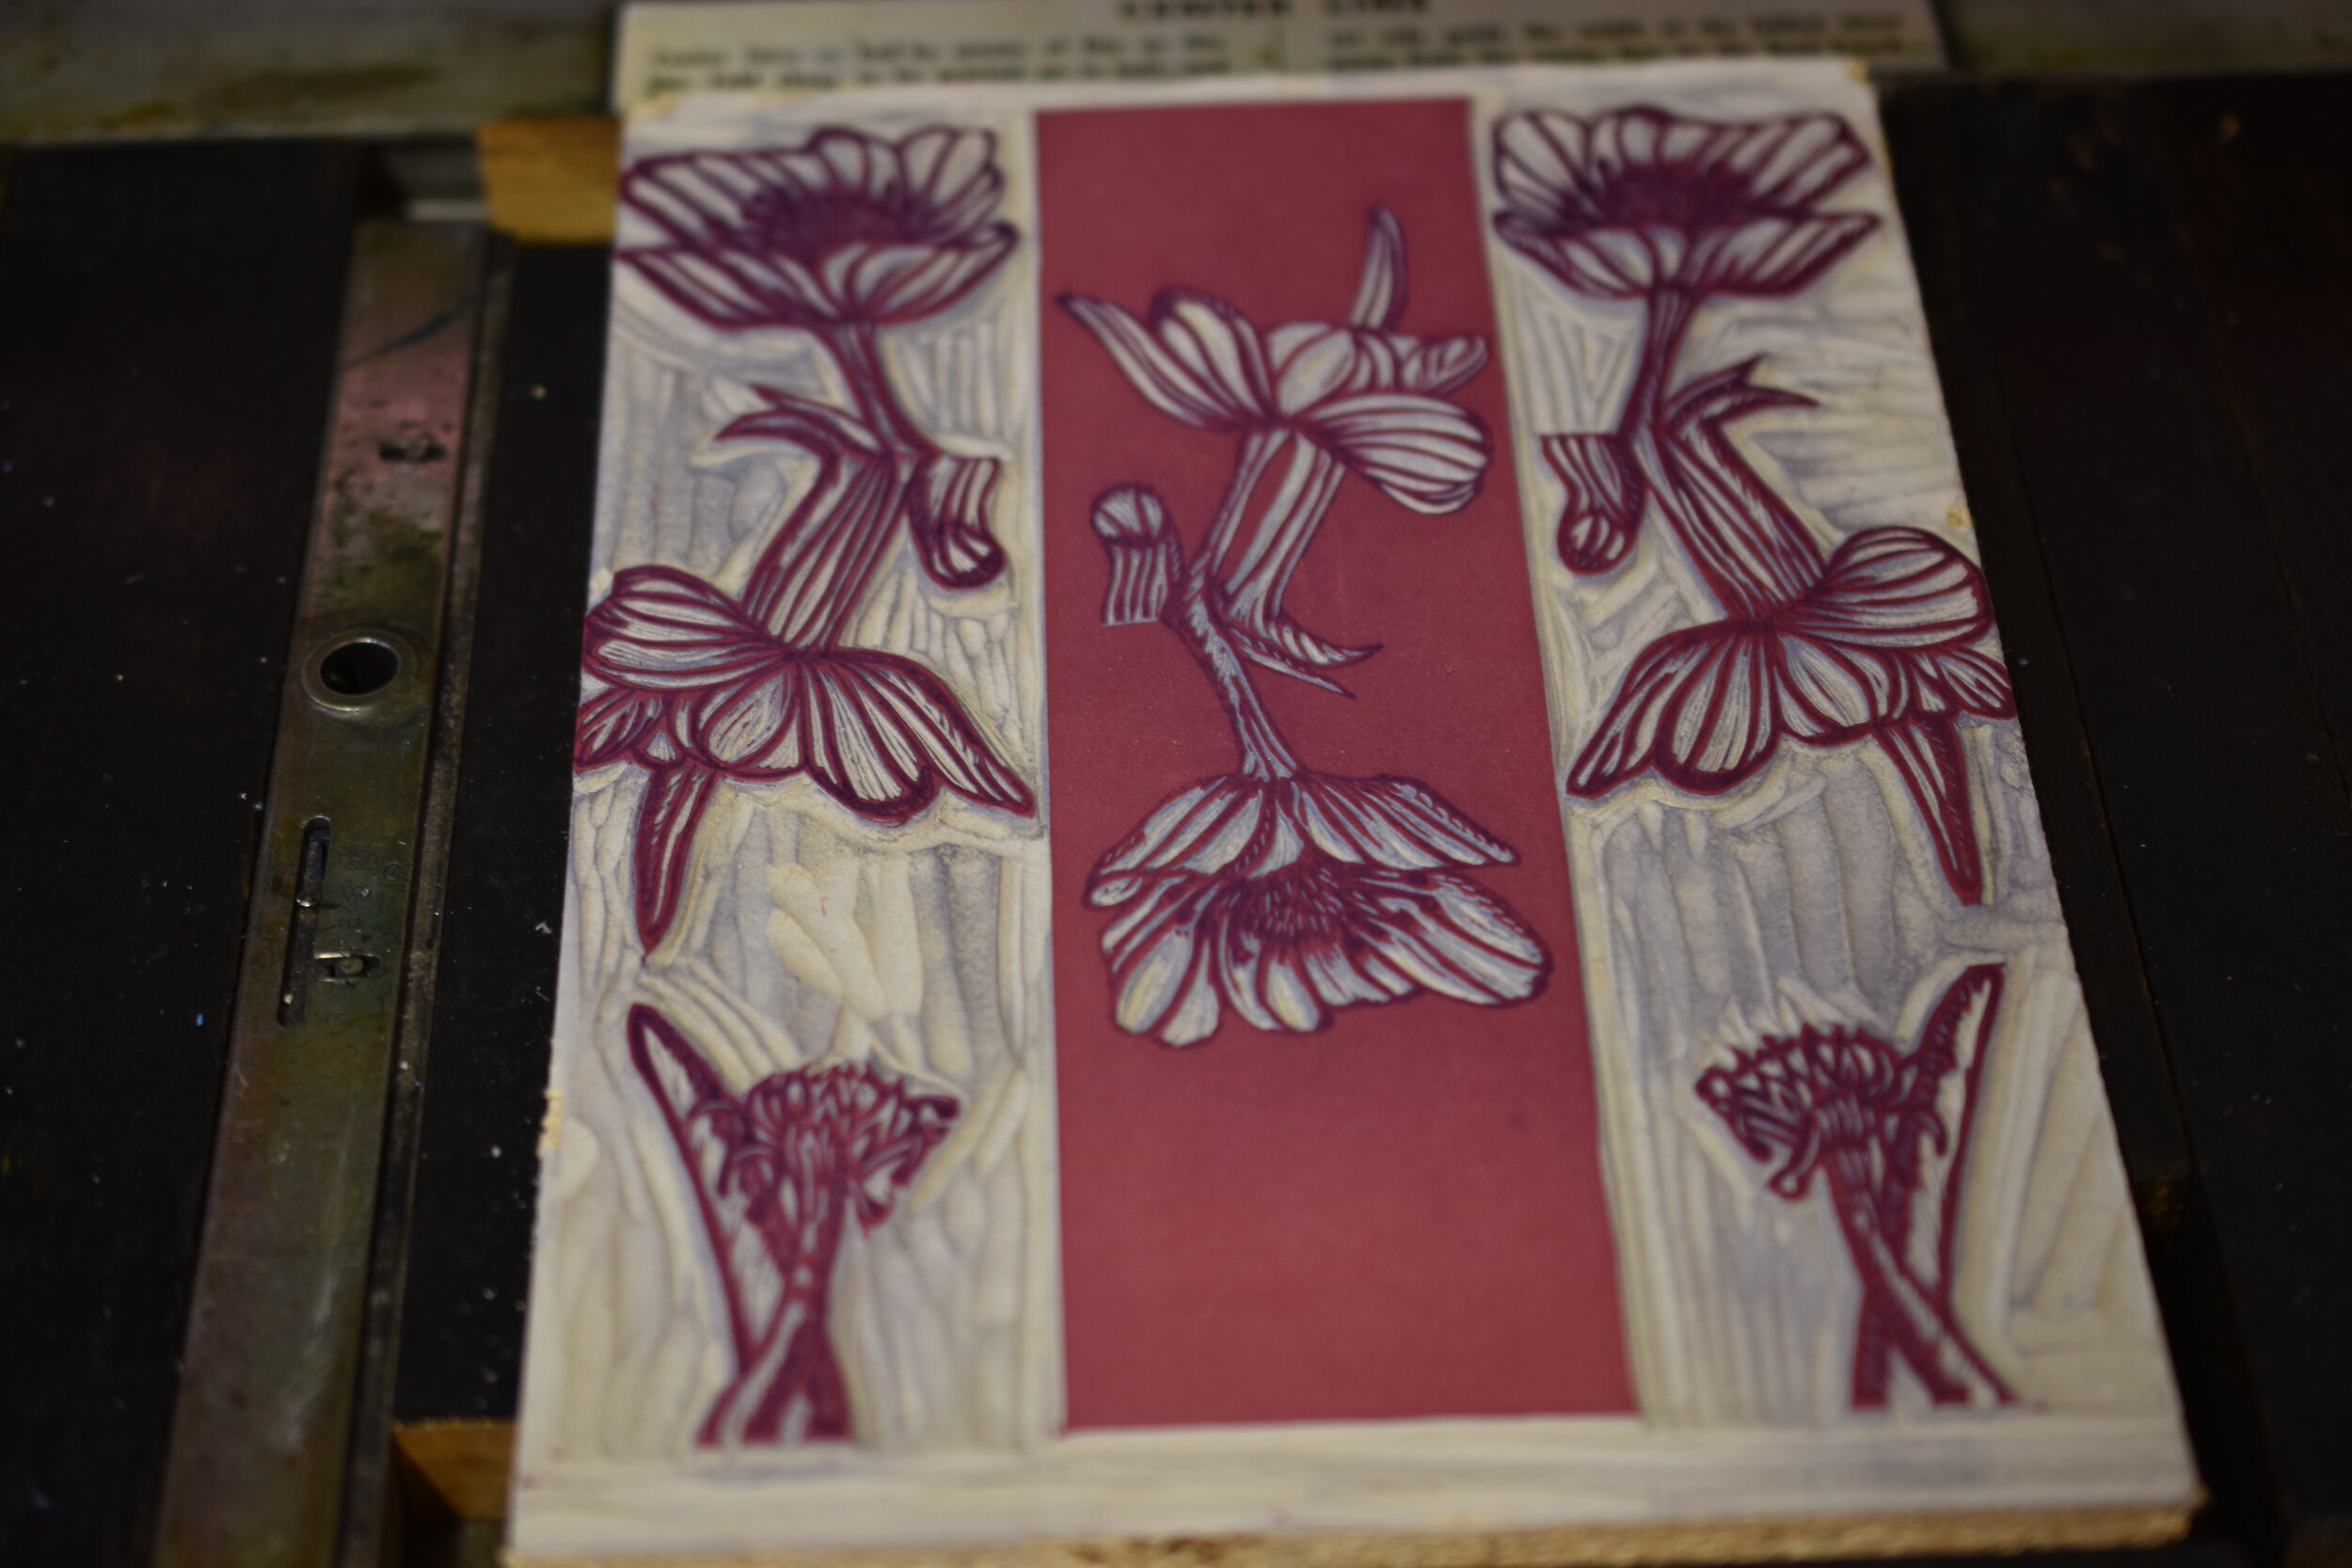
I printed the poppy image using a red hue - rubine red, trans white, and a bit of yellow ink.

I printed the poppy image using a red hue - rubine red, trans white, and a bit of yellow ink.

Printing the finch and flowers. The color was a mixture of trans white, yellow, and warm red. This color looks great on this creamy white cover weight from French paper.

Printing the finch and flowers. The color was a mixture of trans white, yellow, and warm red. This color looks great on this creamy white cover weight from French paper.

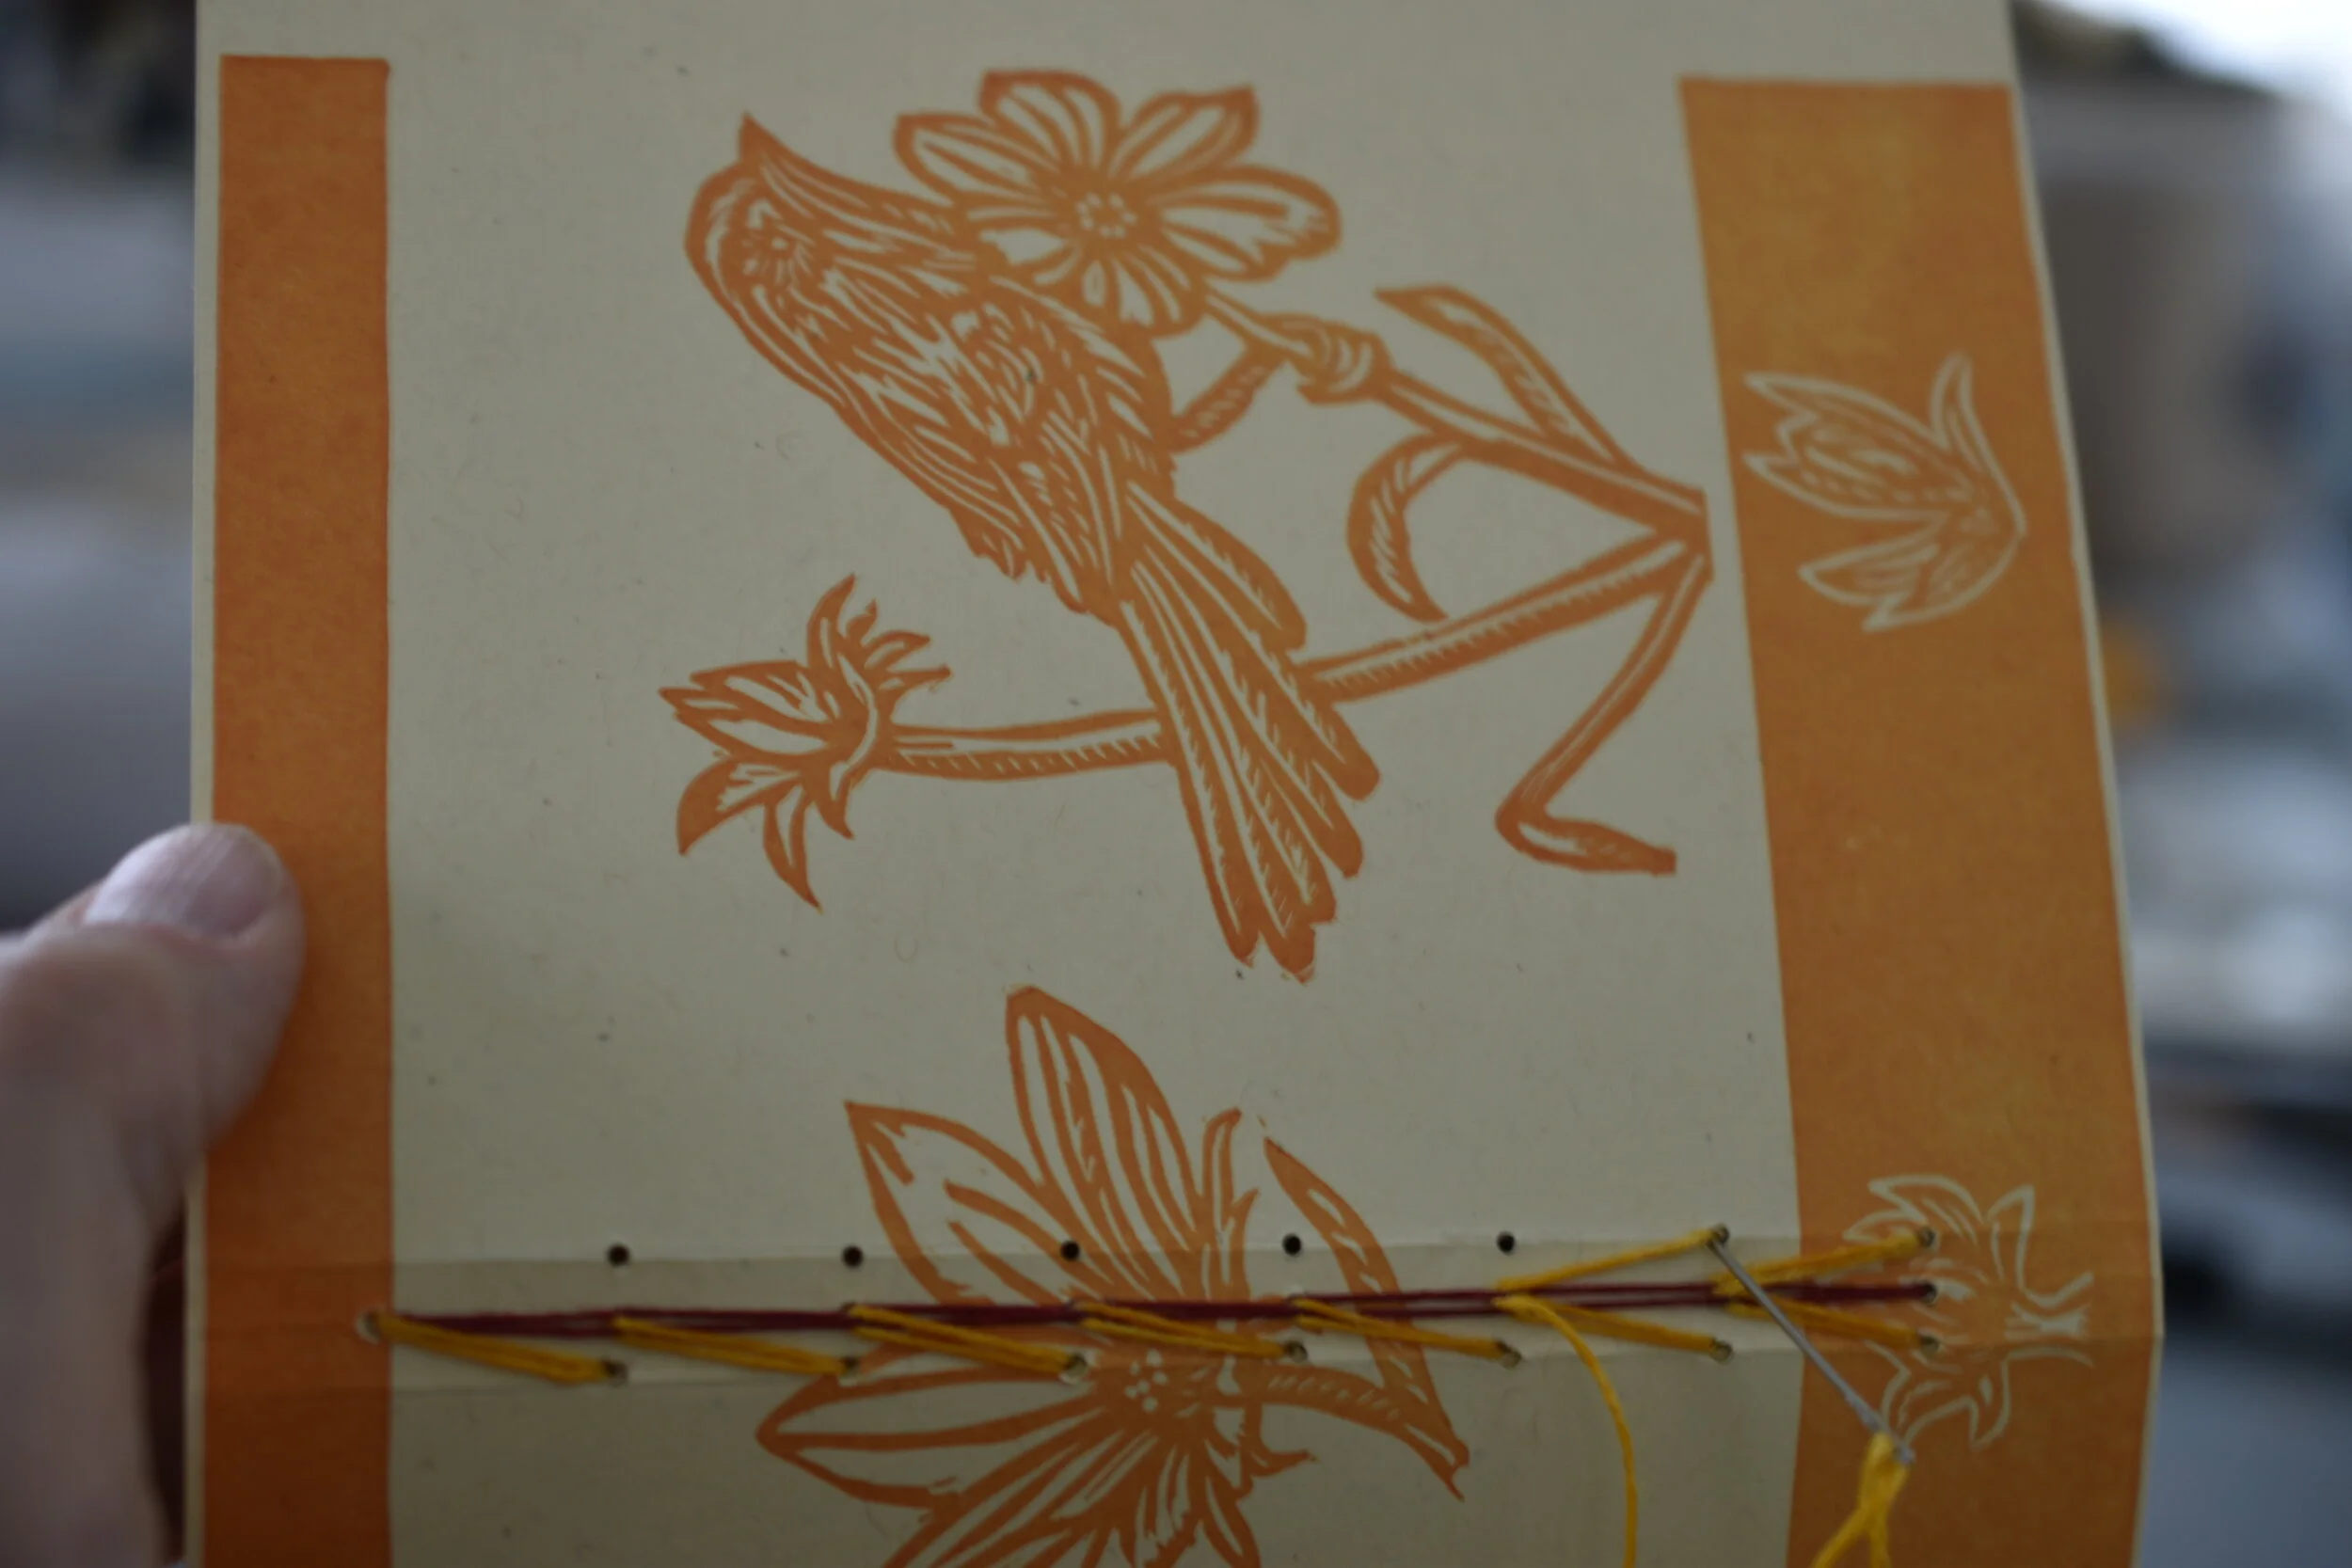
The blueberry block is my favorite; being partial to blue! I am sewing up this journal using the triple chain.

The blueberry block is my favorite; being partial to blue! I am sewing up this journal using the triple chain.

It was such a pleasure sewing up these prints and seeing how the spacing of the images worked on the covers. This sewing pattern is called the triple chain. All of these journals are three section pamphlets.

It was such a pleasure sewing up these prints and seeing how the spacing of the images worked on the covers. This sewing pattern is called the triple chain. All of these journals are three section pamphlets.

This sewing pattern is called the Coil Spring.

This sewing pattern is called the Coil Spring.

The covers of the sewn pamphlets on various papers. The white and cream are a cover weight by French paper. The brown is chip board.

The covers of the sewn pamphlets on various papers. The white and cream are a cover weight by French paper. The brown is chip board.

Spines of sewn and completed pamphlets - joy, joy, joy!!!

Spines of sewn and completed pamphlets - joy, joy, joy!!!

Blue Sky Botanicals

3E82D0D3-82AE-4CFF-93EC-B55F609F73C2.jpeg
Sketches based on various flowers in our gardens - tulips, daffodils, poppies, and gaillardia daisies inspired the images for the cards.

Sketches based on various flowers in our gardens - tulips, daffodils, poppies, and gaillardia daisies inspired the images for the cards.

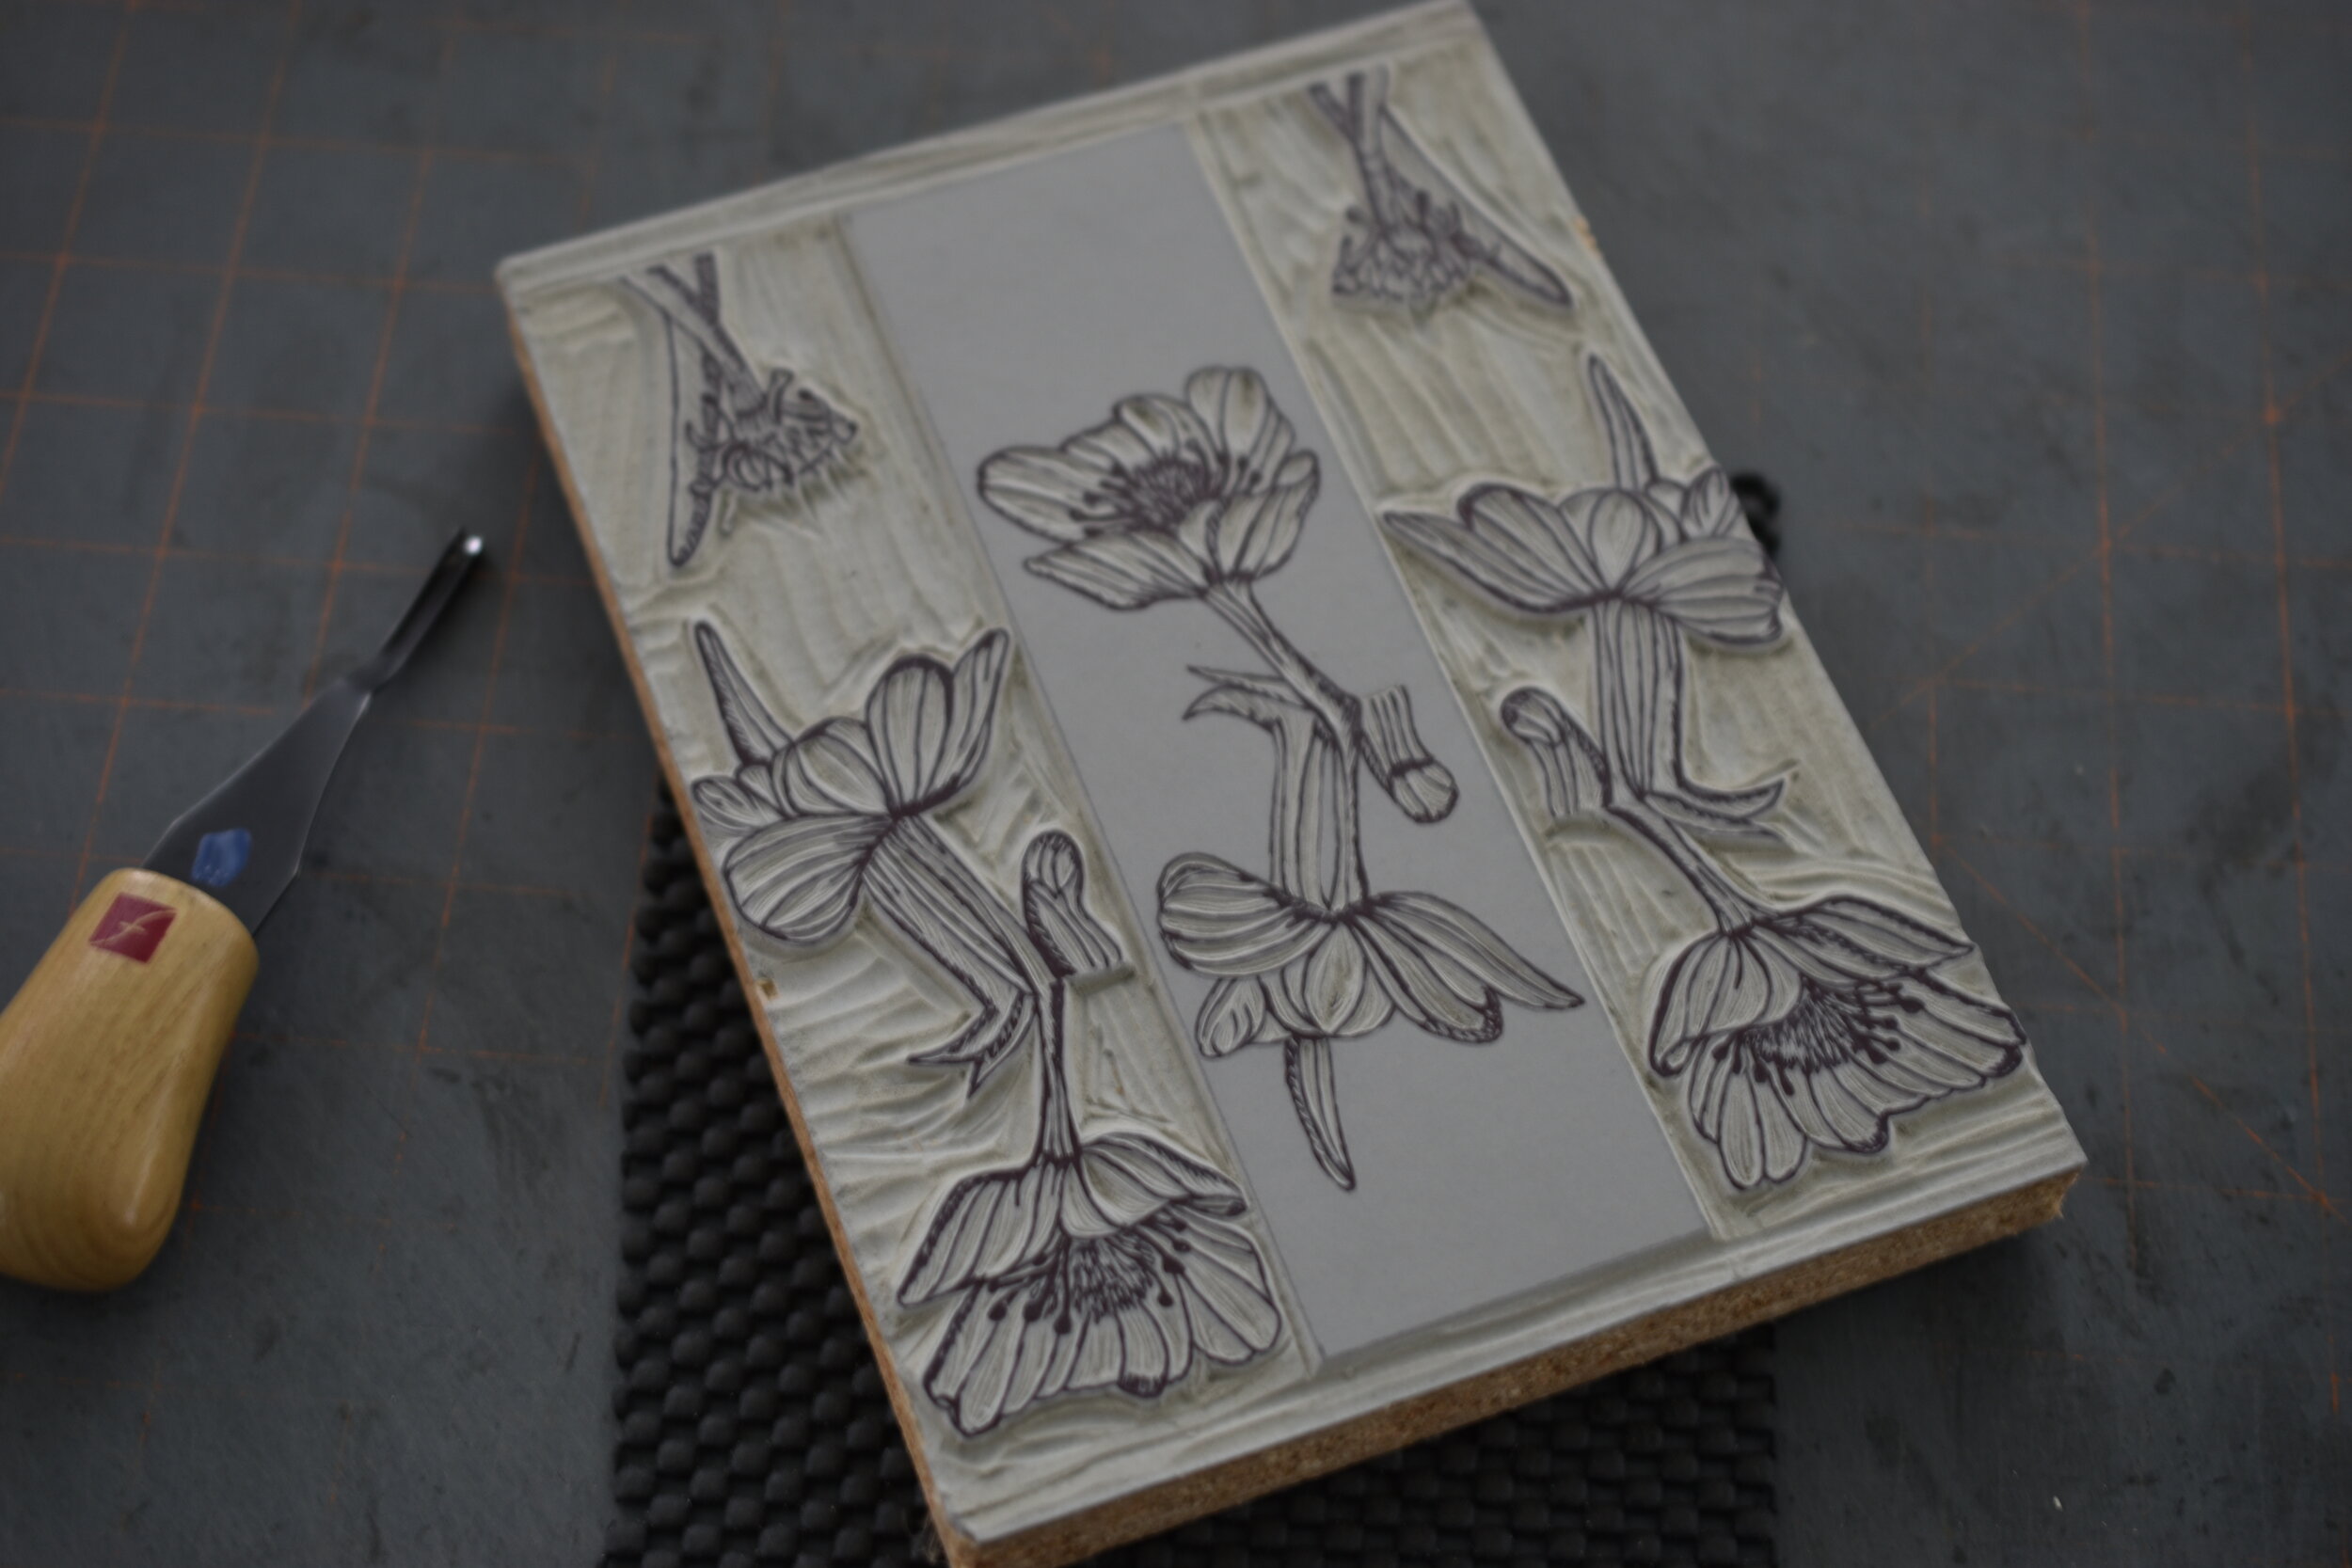
The drawings were transferred to the linoleum blocks. I am ready to begin carving.

The drawings were transferred to the linoleum blocks. I am ready to begin carving.

Carving the gaillardia.

Carving the gaillardia.

I printed the cards on Lettra paper. I printed a blue mat which served as a background for each botanical. The intense blue spring skies inspired the color.

I printed the cards on Lettra paper. I printed a blue mat which served as a background for each botanical. The intense blue spring skies inspired the color.

The four printed botanicals.

The four printed botanicals.

This set of cards was inspired by Spring. It was such a glorious time in our gardens. I spent quite a bit of time working outside. The constant emergence of flowers and plants was most inspiring.

5D892CCC-2406-43F3-81CD-22FF63EAA361.jpeg
Carving the poppy.

Carving the poppy.

The four flowers are carved and proofed. I am ready to print!

The four flowers are carved and proofed. I am ready to print!

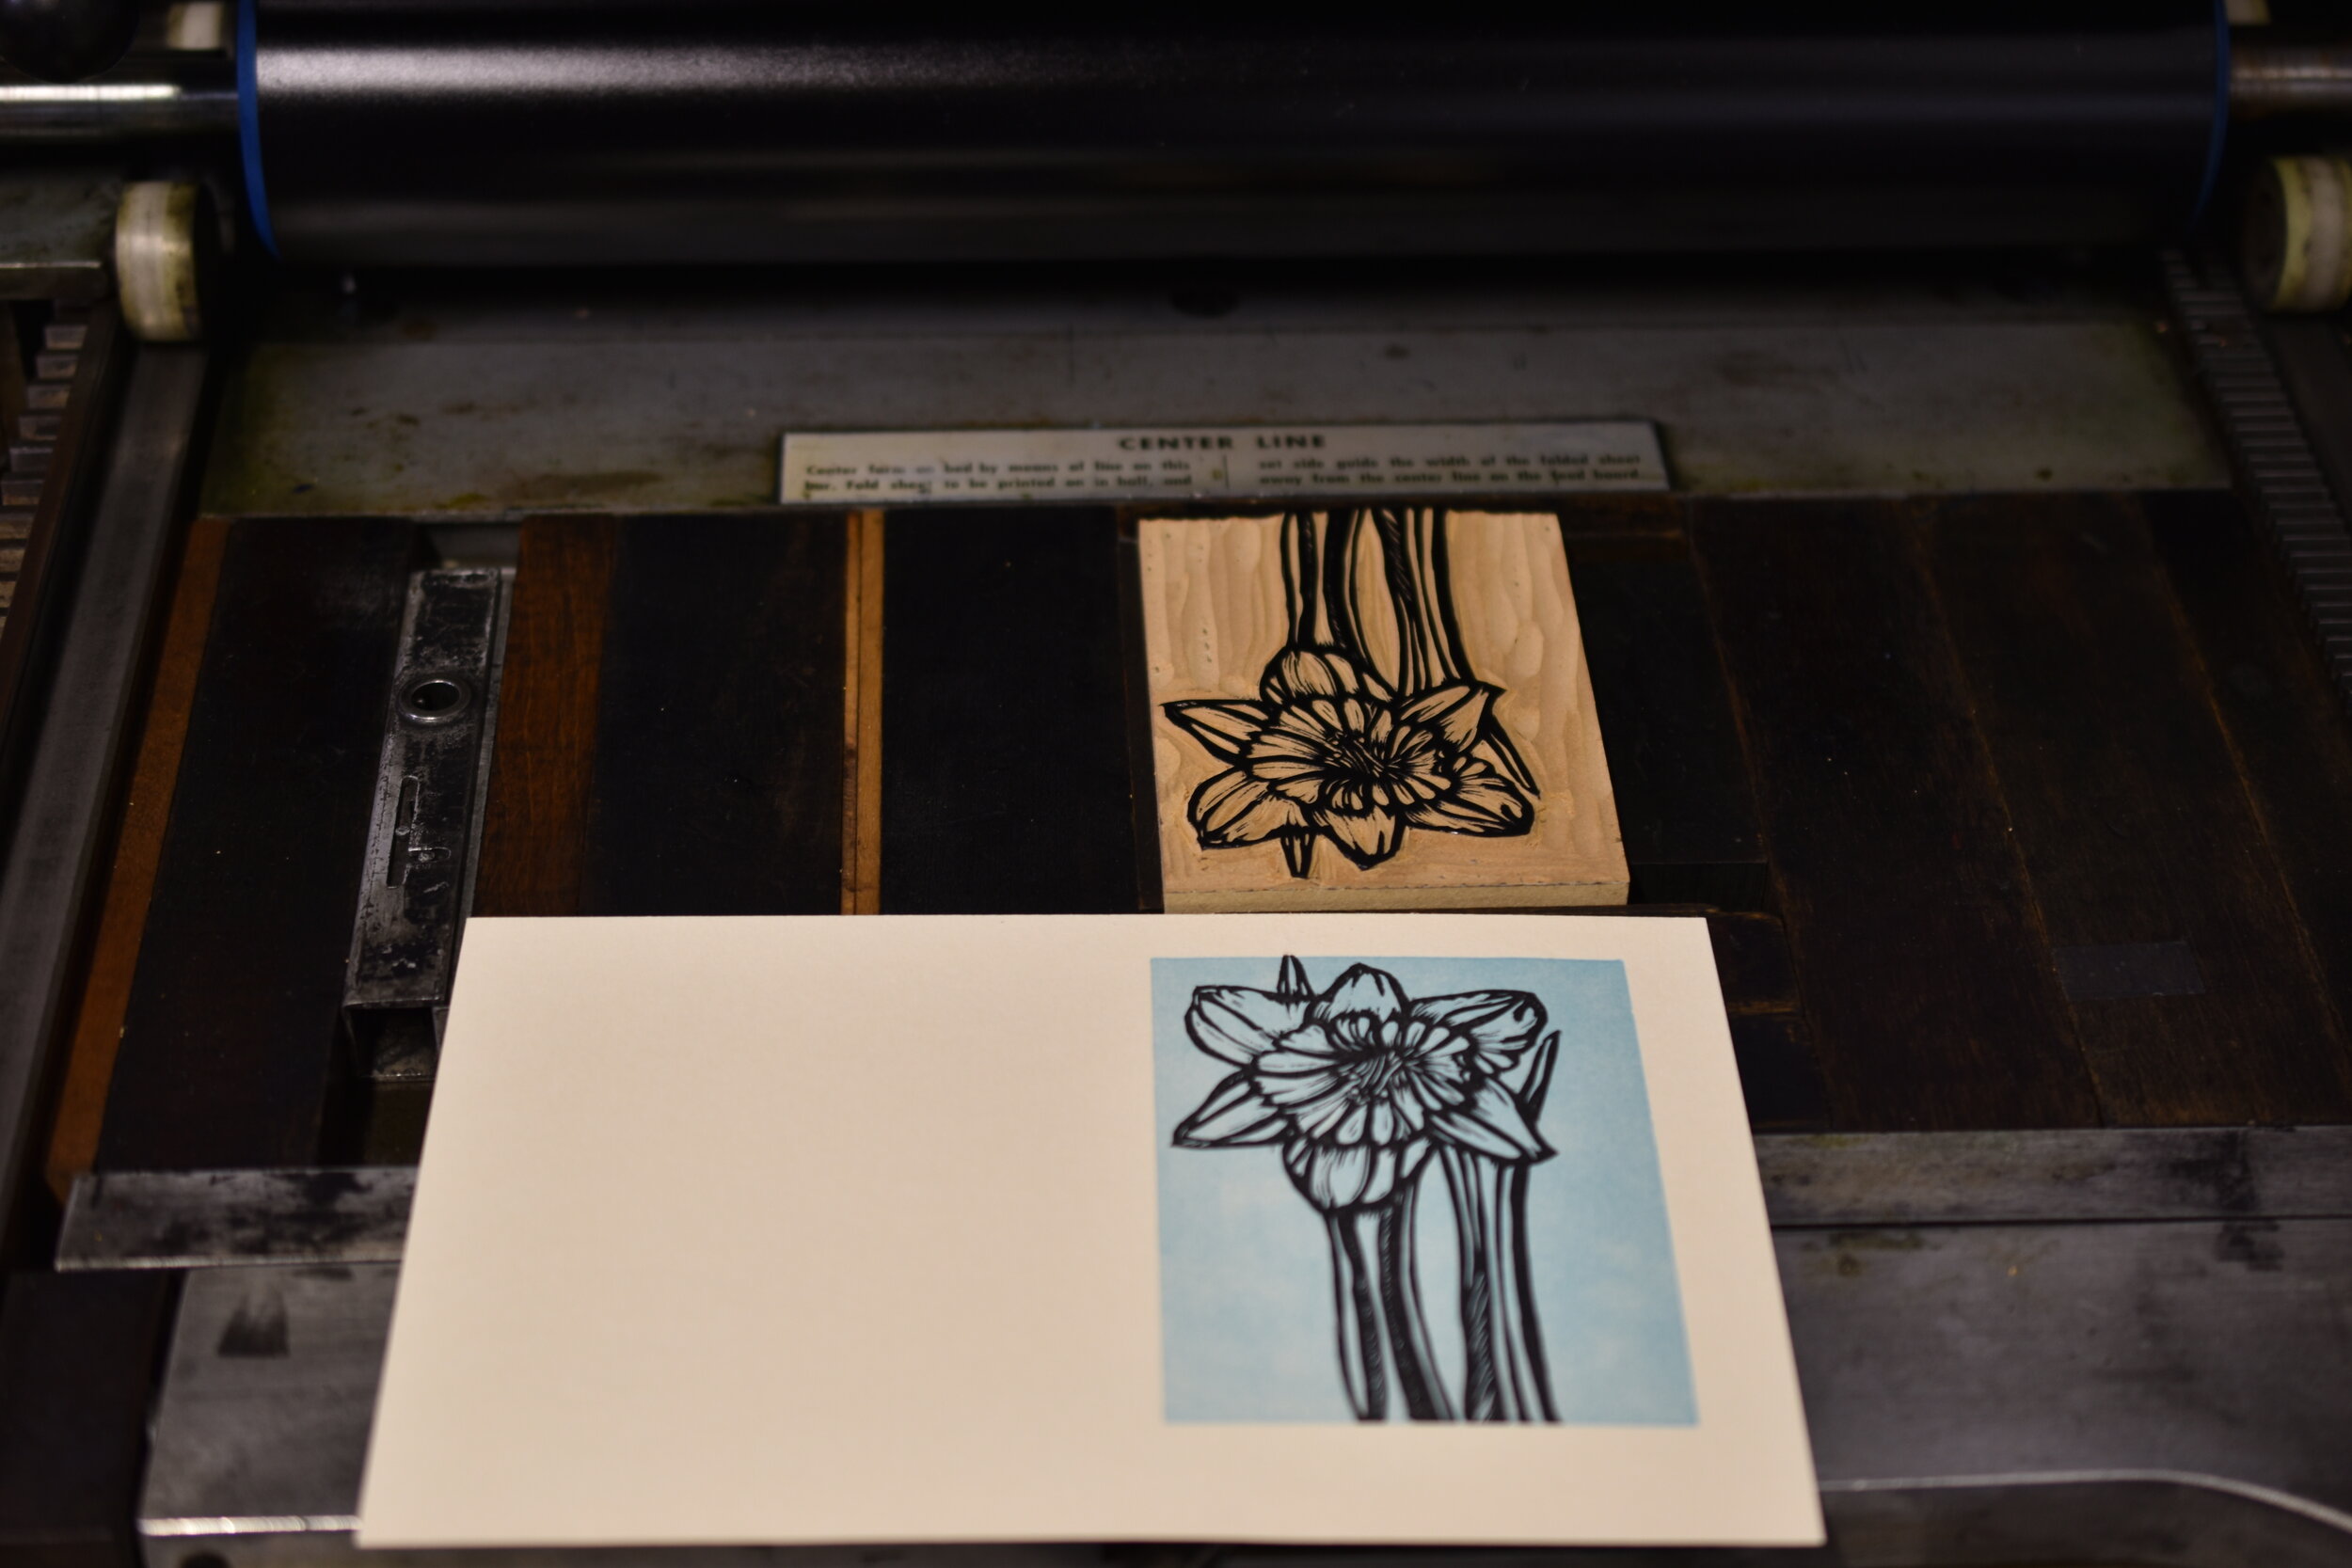
Printing the daffodil.

Printing the daffodil.

Designing and printing these cards was a soothing process during the onset of Spring as well as the Pandemic. Our gardens have never been more beautiful. This was due to the abundance of rain and the cool temperatures of the season.

Now it is time to score, fold, and package these ‘Blue Sky Botanicals’!


Greeting Cards Inspired by Covid19

I used 24 pt Garamond metal type for the text with an antique ornament. This card resulted from not being able to visit family and friends and having to social distance.

I used 24 pt Garamond metal type for the text with an antique ornament. This card resulted from not being able to visit family and friends and having to social distance.

Ornament used to print mail box and ‘flying’ letters.

Ornament used to print mail box and ‘flying’ letters.

I love this image. The metal and wood forms with the wooden heart are set up in the press bed and inked up for printing. Letterpress printing is so addictive!

I love this image. The metal and wood forms with the wooden heart are set up in the press bed and inked up for printing. Letterpress printing is so addictive!

The imagery for the next two cards came from reduction relief prints combined with metal type.

The message is clear - stay home! Twentieth Century Modern metal type was used for the text.

The message is clear - stay home! Twentieth Century Modern metal type was used for the text.

I printed a blue mat after carving what was to remain white.

I printed a blue mat after carving what was to remain white.

The second color was a chartreuse green. It prints darker when printed on the blue ink.

The second color was a chartreuse green. It prints darker when printed on the blue ink.

The idea for the fourth card came from one of my favorite movies - The Wizard of Oz. Dorothy Knew - There’s no place like home’!

D689A318-C31B-4F07-AB8E-38ACDE6781FF_1_201_a.jpeg
I have carved away what will remain light pink. I am now ready to print the second color, a deep shade of pink.

I have carved away what will remain light pink. I am now ready to print the second color, a deep shade of pink.

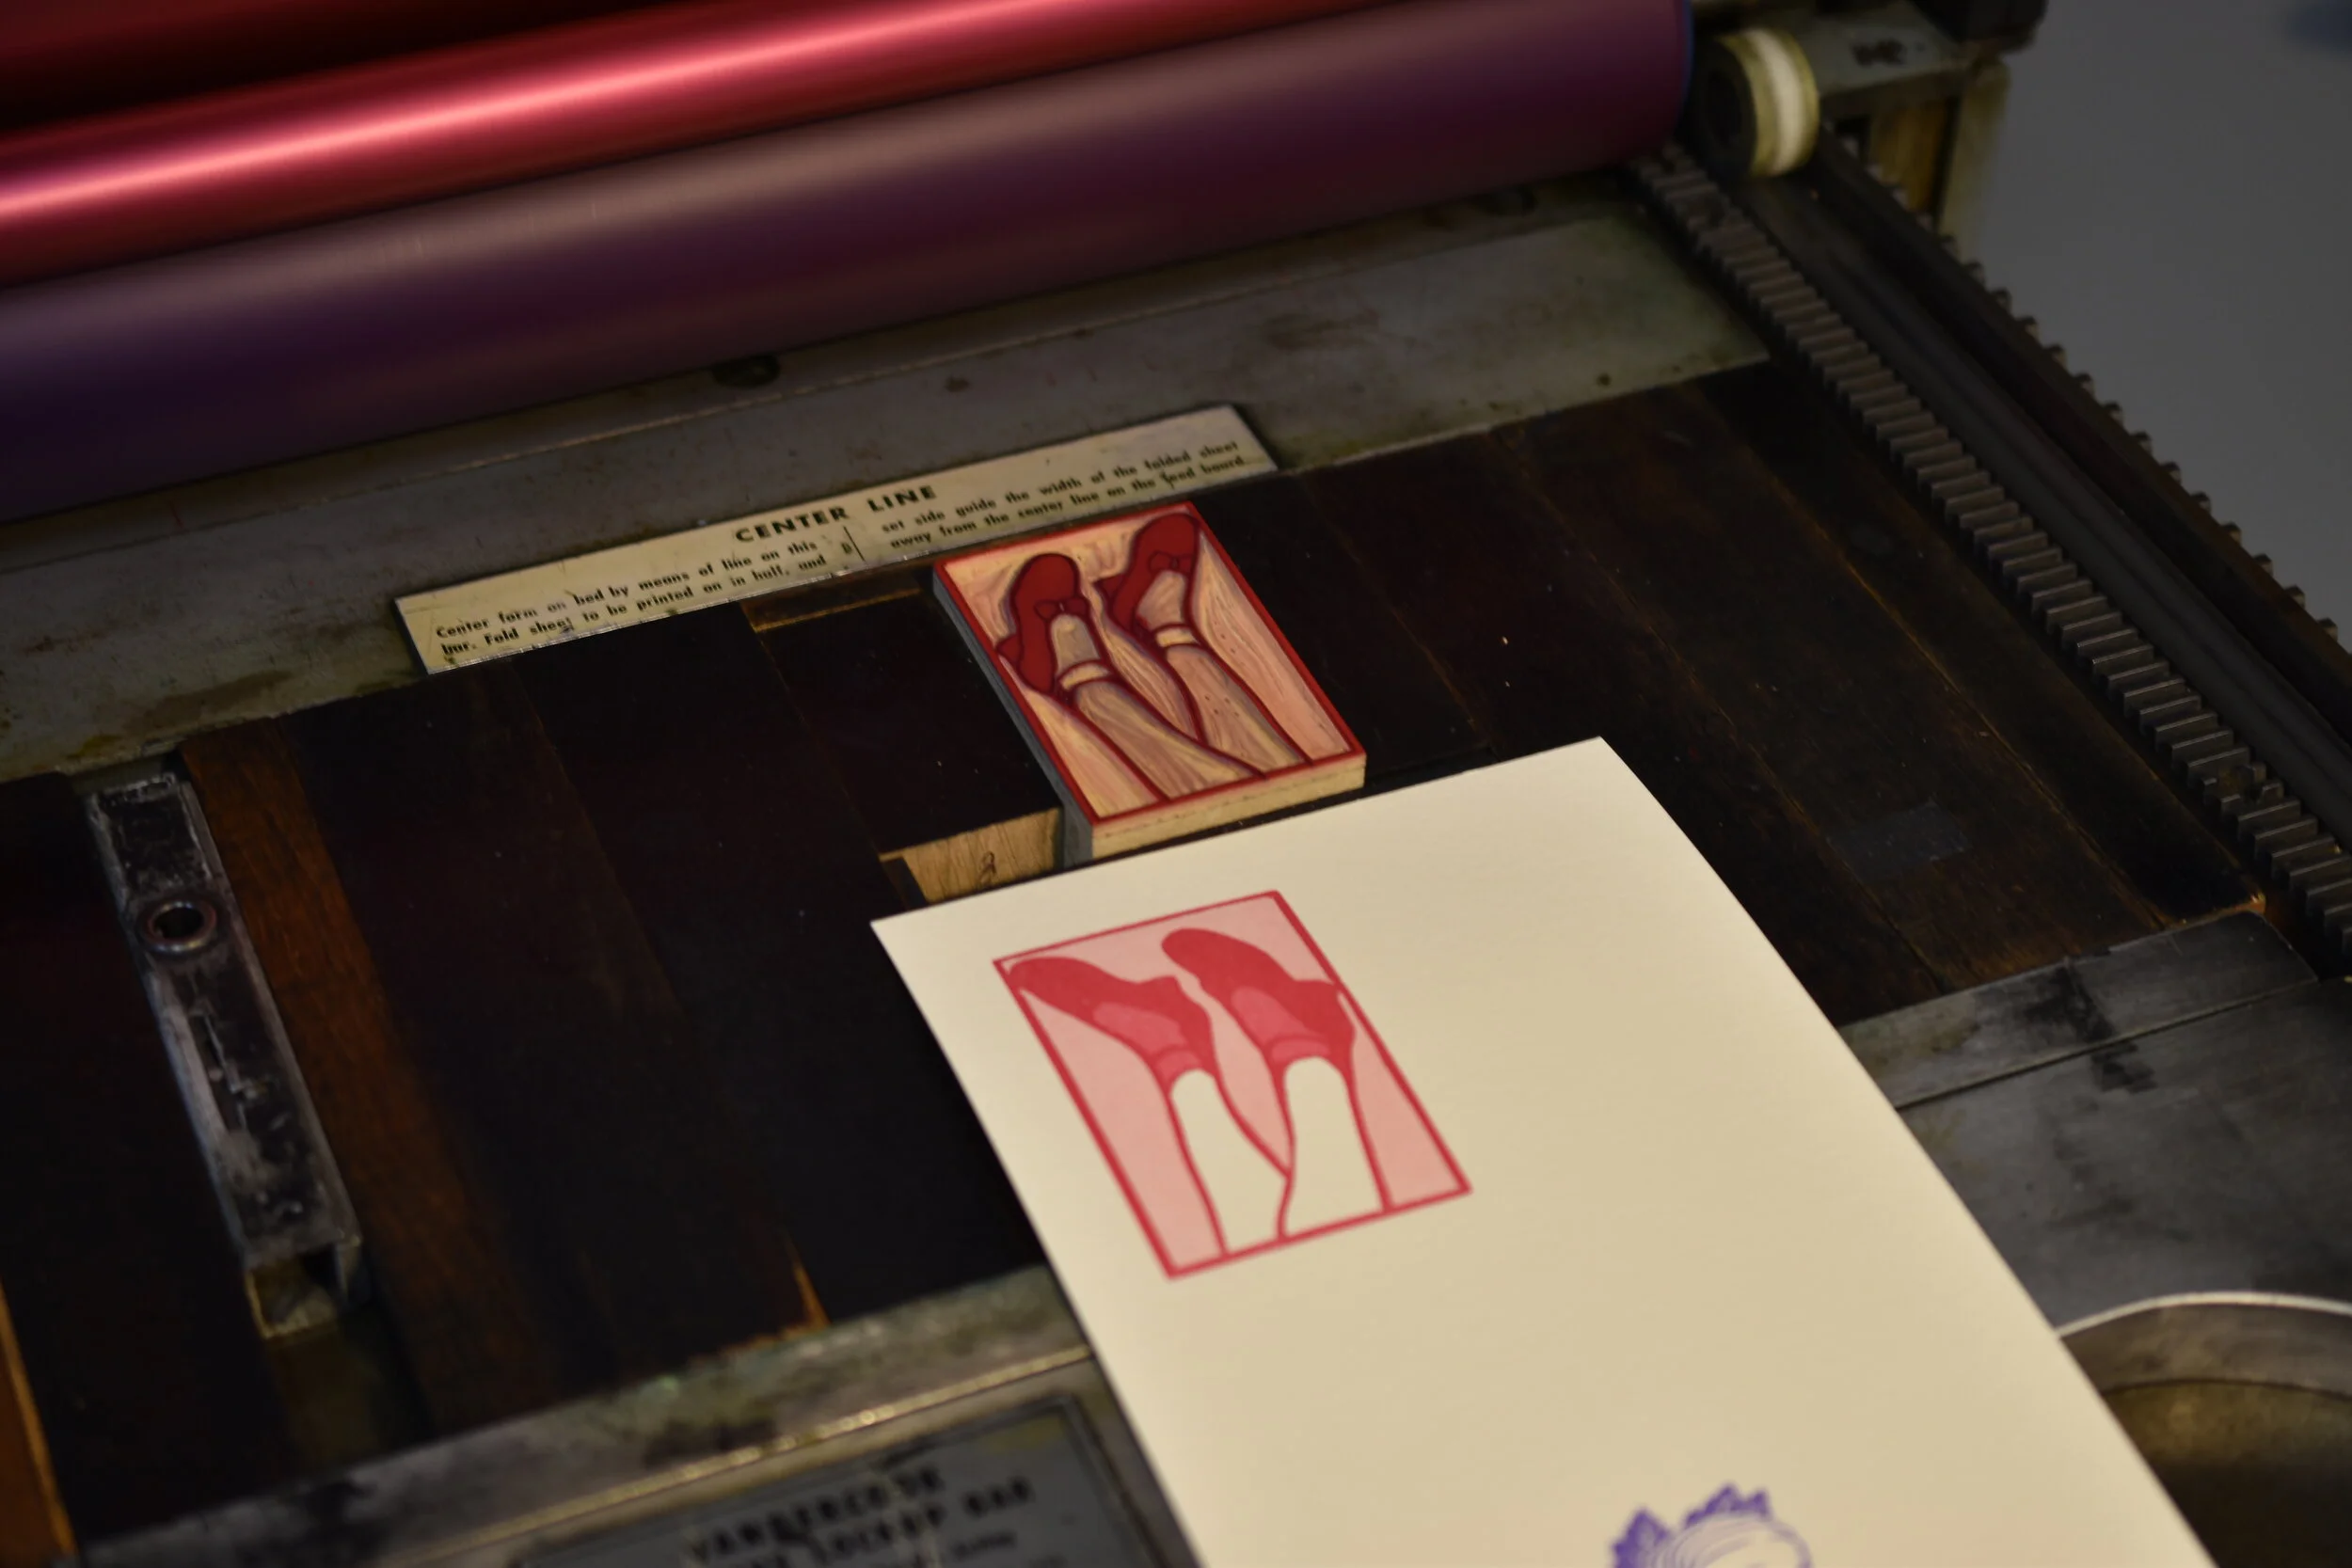
Printing the ruby slippers in a deep red-pink hue.

Printing the ruby slippers in a deep red-pink hue.

It has been fun designing and printing these cards. There could be more since the pandemic is still with us!

I have completed a suite of greeting cards inspired by the Covid19 Pandemic. This series began as a way of reaching out to family and friends during the quarantine. However, it also became a way of exploring the language that has become a part of our vocabulary. Take a look at the four I have completed. Designing and printing these cards has been therapeutic during this challenging time.

Image of form and ornament set up on my press and a printed card.

Image of form and ornament set up on my press and a printed card.

The next card I printed was inspired by the importance of washing hands during the pandemic. I believe this is one of the most important ways of preventing the spread of Covid 19 and protecting one’s self and others from the virus.

I combined antique wooden type with 18 pt. Times New Roman metal type. A wooden heart ornament was also used. This card is printed on chip board.

I combined antique wooden type with 18 pt. Times New Roman metal type. A wooden heart ornament was also used. This card is printed on chip board.

I drew a simple pencil drawing and transferred it to the linoleum block.

I drew a simple pencil drawing and transferred it to the linoleum block.

Carving for the second color. All the areas that are carved away will remain blue.

Carving for the second color. All the areas that are carved away will remain blue.

The key block provided the intricate details of the image and was printed in a darker green. The word HOME is my favorite part of the print….and the little bird on the roof!

The key block provided the intricate details of the image and was printed in a darker green. The word HOME is my favorite part of the print….and the little bird on the roof!

Since I wanted her legs to remain the color of the Lettra paper, I carved them away. I then printed a light pink mat.

Since I wanted her legs to remain the color of the Lettra paper, I carved them away. I then printed a light pink mat.

Printing the second color.

Printing the second color.

Printing the key block in black provides the details of the image.

Printing the key block in black provides the details of the image.


A Box for the Book

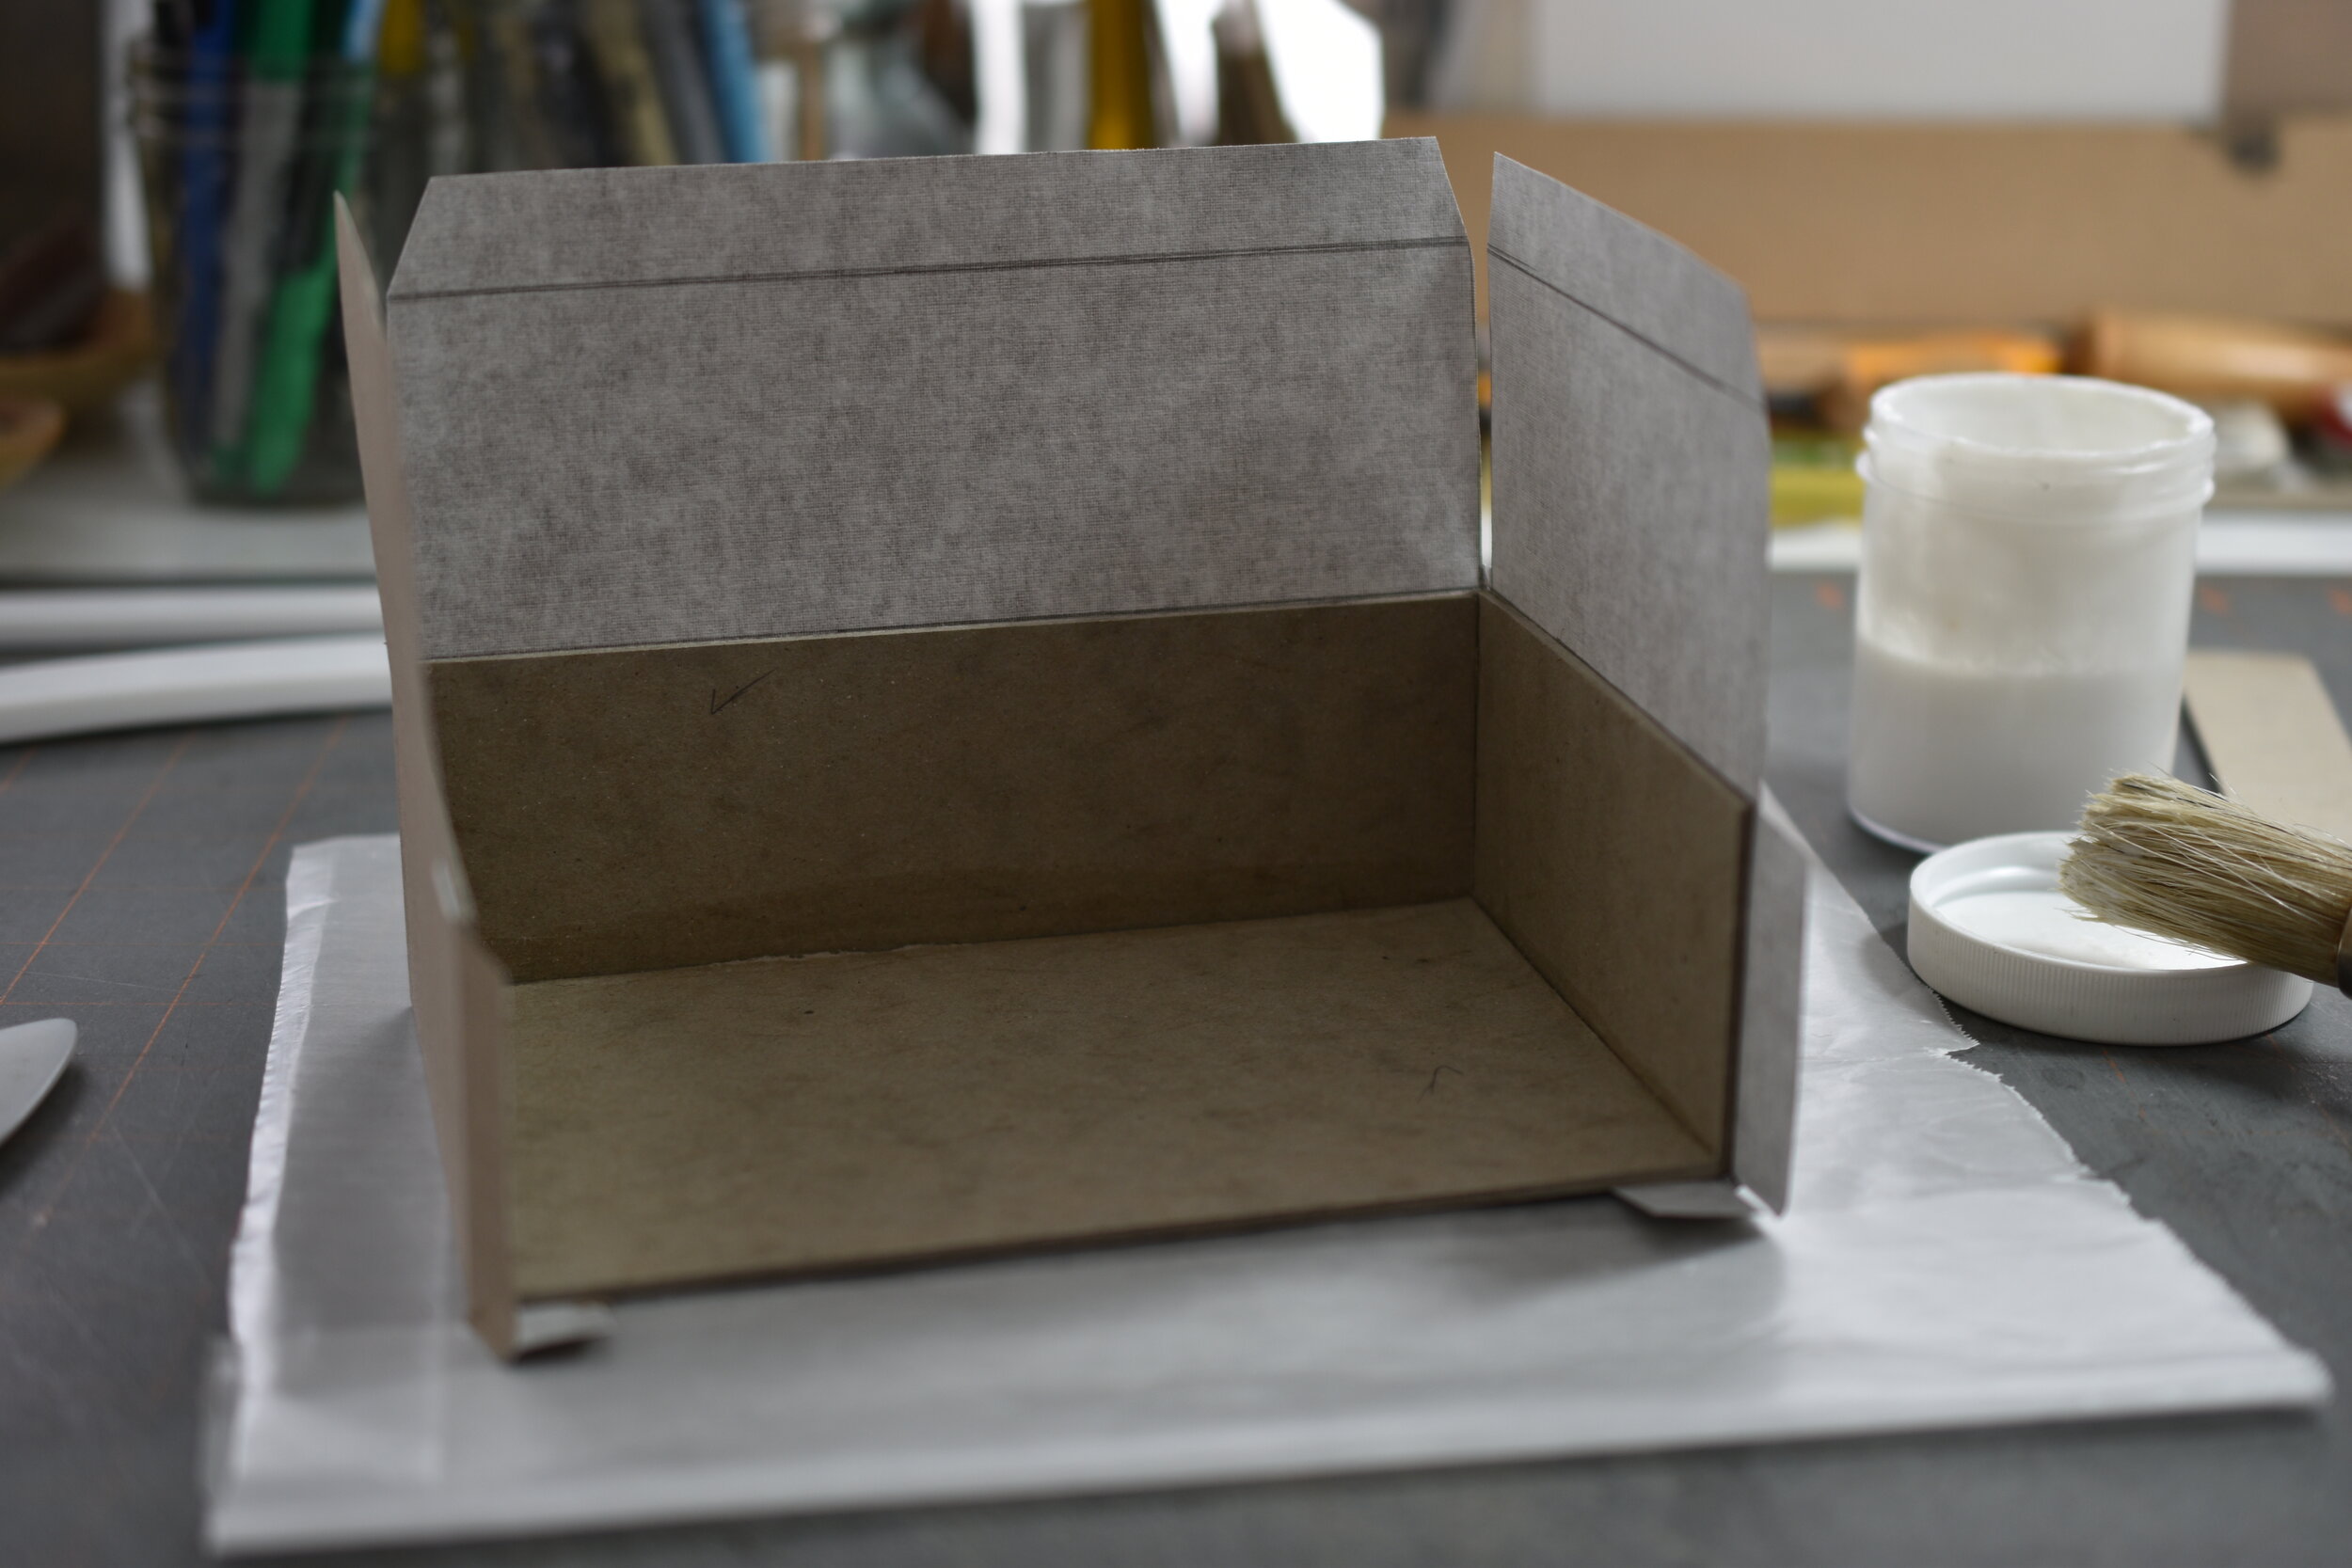
I built the inner tray first using Davey board. This compartment holds the book and the size and dimensions are based on the book’s measurements.

I built the inner tray first using Davey board. This compartment holds the book and the size and dimensions are based on the book’s measurements.

i covered the compartments of the box with the same Iris book cloth I used for the book.

i covered the compartments of the box with the same Iris book cloth I used for the book.

Covering the outer tray, which fits over the inner tray when the box is closed. Davey board was used for this as well.

Covering the outer tray, which fits over the inner tray when the box is closed. Davey board was used for this as well.

Attaching the two trays to the case. I added a piece of pressure printed Mohawk Superfine to the bottom of the inner tray to give this section a bit of embellishment.

Attaching the two trays to the case. I added a piece of pressure printed Mohawk Superfine to the bottom of the inner tray to give this section a bit of embellishment.

Once I completed Musing Garden Sprites; I decided to build a box for the book. I had not built a Clamshell box in quite some time, but felt this would work well as a place to house and protect the book. Take a look at the process and completed box.

I was very pleased with how the book fit into the inner tray.

I was very pleased with how the book fit into the inner tray.

Covering the front opening of the tray was a bit tricky. Still I figured this step out and completed covering the inner tray.

Covering the front opening of the tray was a bit tricky. Still I figured this step out and completed covering the inner tray.

The final steps were to build the case for the two trays and add a few embellishments.

Covering the case with the book cloth. This step is very much like assembling and covering a case bound book.

Covering the case with the book cloth. This step is very much like assembling and covering a case bound book.

Finished and closed Clamshell box with a print of the Carolina Wren in a recessed area.

Finished and closed Clamshell box with a print of the Carolina Wren in a recessed area.

Opened with book inside - so pleased with how it all came together! This piece will be in the Winter Show 2020 at the GreenHill in Greensboro, NC.

Opened with book inside - so pleased with how it all came together! This piece will be in the Winter Show 2020 at the GreenHill in Greensboro, NC.

Musing Garden Sprites - An Artist Book and Box

Carolina Wren, Chickadee, Tit Mouse, Nuthatch, Gold Finch, and Hummingbird - six of my favorite birds

Carolina Wren, Chickadee, Tit Mouse, Nuthatch, Gold Finch, and Hummingbird - six of my favorite birds

Transferring the birds to blocks for carving.

Transferring the birds to blocks for carving.

I printed a proof of each block.

I printed a proof of each block.

I printed the leaves in a taupe brown. Next I printed a light blue mat; then the birds and text in a dark charcoal black.

I printed the leaves in a taupe brown. Next I printed a light blue mat; then the birds and text in a dark charcoal black.

Each bird and text page were placed within a recessed area carved into the Davey board.

Each bird and text page were placed within a recessed area carved into the Davey board.

The recessed areas are all carved. I then covered the Davey board with a taupe colored Iris book cloth before attaching the image or text pages.

The recessed areas are all carved. I then covered the Davey board with a taupe colored Iris book cloth before attaching the image or text pages.

Hinging the pages together. I made the hinges from the handmade paper, which worked beautifully.

Hinging the pages together. I made the hinges from the handmade paper, which worked beautifully.

Closed book.

Closed book.

Here is a detail of the birds and the poem.

Here is a detail of the birds and the poem.

I have spent the past several weeks designing, printing, and assembling a new artist book housed in a Clamshell box. It has been a great project to focus on during the onset of the Coronavirus pandemic.

Working on book binding and printmaking has been very therapeutic. I will share the various steps in completing Musing Garden Sprites.  I began by completing a suite of bird drawings to serve as the visual images for the book. The six birds I chose are all small birds that frequent our gardens during various times of the year. Next, I considered several book structures and chose the Stiff Leaf Accordion Book. I have made this type of book in the past. The structure can stand freely displaying the book’s interior pages. This was the main reason I chose this form.

Carving the Carolina Wren.

Carving the Carolina Wren.

I used this pressure plate of leaves to print the background for the birds and text.

I used this pressure plate of leaves to print the background for the birds and text.

I was now ready to print the pages for the book. I used both handmade cotton rag paper and Mohawk Superfine.

Various text forms set and ready for printing.

Various text forms set and ready for printing.

I wrote a poem entitled ‘Garden Sprites’. I set all the text in either Garamond or Times New Roman. Here I am printing the title page and poem.
I wrote a poem entitled ‘Garden Sprites’. I set all the text in either Garamond or Times New Roman. Here I am printing the title page and poem.

I was ready to make the book once the printing was completed.

I used papyrus painted with milk paint on the book’s cover.

I used papyrus painted with milk paint on the book’s cover.

Covering with book cloth.

Covering with book cloth.

The next several images are of the completed book.

The book’s cover - I love how the sanded and polished milk paint looks on the papyrus!

The book’s cover - I love how the sanded and polished milk paint looks on the papyrus!

The title of each bird and a muse of the bird are on the opposite side of each bird image.

The title of each bird and a muse of the bird are on the opposite side of each bird image.

Completed book as seen from the bird image side.

Completed book as seen from the bird image side.

I then built a Clamshell box for the book. I will share some images from this process in another blog post.

Fun Designing and Printing Greeting Cards

A tiny heart will be the focus of this valentine, carved and ready for the first color.

A tiny heart will be the focus of this valentine, carved and ready for the first color.

I am now ready to print over the first color layer and add a bit of text.

I am now ready to print over the first color layer and add a bit of text.

What a gorgeous purple using rubine red, process blue, and transbase inks.

What a gorgeous purple using rubine red, process blue, and transbase inks.

The image is transferred. This will be a two block reduction print. Therefore, I carved off the entire background from this block and left Pooh.

The image is transferred. This will be a two block reduction print. Therefore, I carved off the entire background from this block and left Pooh.

The sky is carved away in order to remain blue in the finished print.

The sky is carved away in order to remain blue in the finished print.

The second color (green) is printed over the areas I left when carving away the sky.

The second color (green) is printed over the areas I left when carving away the sky.

The carved key block. I am now printing the fourth run through the press using a black-gray.

The carved key block. I am now printing the fourth run through the press using a black-gray.

The print is complete! I will now add the text.

The print is complete! I will now add the text.

I often begin a new year by designing and printing cards. This frequently includes a valentine. Here is a look at my endeavors for the start of 2020. Each one is a reduction relief print with text.

The heart is printed. I will now carve away for the second color.

The heart is printed. I will now carve away for the second color.

I was pleased with how placing the text above and below the heart brought it all together!

I was pleased with how placing the text above and below the heart brought it all together!

I then printed a card using some text from A.A. Milne’s Winnie the Pooh; a favorite character from my childhood. The imagery was my interpretation of Pooh pondering the text.

The two blocks are ready for printing. One contains Pooh. The other block will be the background surrounding Pooh and will eventually become the key block.

The two blocks are ready for printing. One contains Pooh. The other block will be the background surrounding Pooh and will eventually become the key block.

The first color is printed - sky blue.

The first color is printed - sky blue.

I switched the blocks in order to print Pooh. I printed him in a peachy-orange.

I switched the blocks in order to print Pooh. I printed him in a peachy-orange.

I then carved the rest of the key block leaving the linear details.

I then carved the rest of the key block leaving the linear details.

I used 12 pt Garamond for the text to complete this card enabling the sender to reach out to a friend or family member.

I used 12 pt Garamond for the text to complete this card enabling the sender to reach out to a friend or family member.

On Wednesday, when the sky is blue,

And I have nothing else to do,

I sometimes wonder if it’s true

That who is what and what is who.

And I often wonder…how are you?

-Winnie-the-Pooh

A Trio of Winter Birds - Holiday Card Reduction Prints

I used a barred owl for the first print in the series. The drawing is complete and the block is ready to carve. I will go over it with a black Sharpee pen before I begin carving.Note the composing stick with text forms. These are the greetings I use…

I used a barred owl for the first print in the series. The drawing is complete and the block is ready to carve. I will go over it with a black Sharpee pen before I begin carving.

Note the composing stick with text forms. These are the greetings I used for the cards.

Final carving of the owl; ready for printing the third color.

Final carving of the owl; ready for printing the third color.

A wren and a chickadee were used on the other cards. In this picture I have drawn and transferred the images and am ready to begin carving. These cards were printed in the same blue hues that I used for the barred owl.

A wren and a chickadee were used on the other cards. In this picture I have drawn and transferred the images and am ready to begin carving. These cards were printed in the same blue hues that I used for the barred owl.

Two colors have now been printed on the chickadee.

Two colors have now been printed on the chickadee.

The chickadee is finished. Notice how the dark blue adds the key details of the image. This card will say ‘Happy Holidays’ inside; printed in 18 pt Times New Roman metal type.

The chickadee is finished. Notice how the dark blue adds the key details of the image. This card will say ‘Happy Holidays’ inside; printed in 18 pt Times New Roman metal type.

This shows the completed wren print. The interior message will say ‘Tidings of Joy’ also using 18 pt Times New Roman metal type.

This shows the completed wren print. The interior message will say ‘Tidings of Joy’ also using 18 pt Times New Roman metal type.

I explored the imagery of birds in winter surroundings using reduction prints. The prints were the images for a trio of holiday cards I recently completed.

I have completed two runs through the press. The third and final color will be a dark blue-black (using Reflex Blue and Black ink).

I have completed two runs through the press. The third and final color will be a dark blue-black (using Reflex Blue and Black ink).

The third color is printed. I printed the message ‘Peace on Earth’ in 12 pt Garamond on the inside of the card. This card was my personal Christmas card. I have sent a handmade holiday card since 1985.

The third color is printed. I printed the message ‘Peace on Earth’ in 12 pt Garamond on the inside of the card. This card was my personal Christmas card. I have sent a handmade holiday card since 1985.

Carving for the first run through the press of the chickadee - the areas that are carved away will remain white (or the color of the Lettra paper I used for the cards).

Carving for the first run through the press of the chickadee - the areas that are carved away will remain white (or the color of the Lettra paper I used for the cards).

This shows how the carved chickadee looks prior to the third run through the press.

This shows how the carved chickadee looks prior to the third run through the press.

The wren was also printed in three colors. Here I am carving away everything except what will be printed with the dark blue.

The wren was also printed in three colors. Here I am carving away everything except what will be printed with the dark blue.

4BDE5E23-F7B2-4455-B331-09E7AA052F38_1_201_a.jpeg

Printing this suite of prints and cards was a satisfying way to end 2019 and begin 2020. Happy New Year!

Little Hanging Birds...Holiday Ornaments

Planning, drawing, and tracing the shape and form.

Planning, drawing, and tracing the shape and form.

I used two blocks. One was for the bodies and the other was for the wings. I printed them using my Vandercook SP 15 on Cougar Natural 100# paper in blue and red ink. Note that I printed two of each and they are reversed. I did this because they are …

I used two blocks. One was for the bodies and the other was for the wings. I printed them using my Vandercook SP 15 on Cougar Natural 100# paper in blue and red ink. Note that I printed two of each and they are reversed. I did this because they are 3D and viewed ‘in the round’.

Packaged and ready for delivery.

Packaged and ready for delivery.

I was invited to participate in a holiday ornament exhibit this year. I created these little relief carved and letterpress printed birds for the event.

Once I had the final forms figuted out (a wren-like and cardinal-like bird); I carved them into a linoleum block.

Once I had the final forms figuted out (a wren-like and cardinal-like bird); I carved them into a linoleum block.

Here a group of red birds have been cut out and are ready for assembling using PVA.

Here a group of red birds have been cut out and are ready for assembling using PVA.

These are assembled and ready for packaging. A little metallic thread allows for hanging.

These are assembled and ready for packaging. A little metallic thread allows for hanging.

A completed hanging blue bird ornament!

A completed hanging blue bird ornament!

A Print for Art Lives Here

The print was based on this photograph of Revolution Mill. I really loved the placement of the water tower and the shapes of the clouds in this image.

The print was based on this photograph of Revolution Mill. I really loved the placement of the water tower and the shapes of the clouds in this image.

I have completed the sketch I will use for the print and am ready to transfer it to the linoleum block.

I have completed the sketch I will use for the print and am ready to transfer it to the linoleum block.

I am carving for the first run through the press. All of these carved areas will remain white (the color of the paper). I will carve away more of the image for each subsequent run. This is why it is called a reduction print Each time I add a new lay…

I am carving for the first run through the press. All of these carved areas will remain white (the color of the paper). I will carve away more of the image for each subsequent run. This is why it is called a reduction print Each time I add a new layer of color, I carve more of the image - reducing the amount of the linoleum.

This is the final carving. All that remains will be the details or key elements of the image. I will print the final run with black ink.

This is the final carving. All that remains will be the details or key elements of the image. I will print the final run with black ink.

The image is complete. I printed an edition of 31. Now I will add a bit of text to the lower edge of the print. It will also be printed in black ink.

The image is complete. I printed an edition of 31. Now I will add a bit of text to the lower edge of the print. It will also be printed in black ink.

I have printed a commemorative print for the annual Art Lives Here fundraiser for several years. Funds from this event support the Hirsch Wellness Network, a cancer support organization in Greensboro. I became involved with Hirsch as a contributing artist to Art Lives Here and as a teacher of various workshops. I then had my own experience with cancer causing this organization to became even more important to me. The healing power of creativity is intrinsic to the healing arts and wellness programs offered through Hirsch.

This year I printed a small four color reduction print based on a photograph I took of Revolution Mill. This is where the Hirsch studio and offices are located. Revolution Mill was a textile mill at one point in time. I am grateful that it was restored since these buildings represent an important part Greensboro’s history.

The process of creating the commemorative print is always meaningful and fun. It is one way for me to give back to this organization that does so much for those in treatment, survivors, and caregivers. The prints are given to Board Members and others in the community who support Hirsch. Take a look at the process.

The image is transferred. I am now ready to carve. Notice that the water tower will say ‘BE WELL’ (not Revolution). The Hirsch Wellness Network believes that through creativity a person’s wellness is strengthened and enhanced.

The image is transferred. I am now ready to carve. Notice that the water tower will say ‘BE WELL’ (not Revolution). The Hirsch Wellness Network believes that through creativity a person’s wellness is strengthened and enhanced.

The first color was a yellow-orange. I carved a bit more away (what I wanted to remain this color) after this run. I then printed with an orange hue.

The first color was a yellow-orange. I carved a bit more away (what I wanted to remain this color) after this run. I then printed with an orange hue.

The form is set and on the press. I used Twentieth Century Modern, a san serif typeface.

The form is set and on the press. I used Twentieth Century Modern, a san serif typeface.

Image and text are combined to complete the print. I am delighted with the results of my creative endeavors…..don’t ever underestimate the healing power of creativity!

Image and text are combined to complete the print. I am delighted with the results of my creative endeavors…..don’t ever underestimate the healing power of creativity!

Reduction Printing at the Penland School of Craft

Photograph of lion (and little bird). This was the source for the print. I watched this lion for a good hour one morning. It was a challenging image due to the shadows. Nevertheless, I persisted!

Photograph of lion (and little bird). This was the source for the print. I watched this lion for a good hour one morning. It was a challenging image due to the shadows. Nevertheless, I persisted!

Working with colored pencils and tracing overlays to figure out the colors I will use for the print.

Working with colored pencils and tracing overlays to figure out the colors I will use for the print.

I have now completed the first two colors. I really like the blue of the sky, but I didn’t want a green lion. So, I added a brown color layer I was not intending to use initially.

I have now completed the first two colors. I really like the blue of the sky, but I didn’t want a green lion. So, I added a brown color layer I was not intending to use initially.

There are many aspects of the print which are successful. I do wish I had worked a bit more around the mane giving it more contrast against the texture and colors of the tree. Still, this print will always have a special meaning for me. It reminds me of this great adventure during the Summer of 2017. Additionally, I learned so much about another way to approach reduction printmaking on the letterpress. Thank you Penland School of Craft for making this opportunity possible by offering this great class. Laura Baisden (www.campnevernice.com) is an amazing artist, printmaker, and teacher. I am so fortunate to have had this experience.

I recently studied at the Penland School of Craft in the Blue Ridge Mountains of North Carolina. I took a Reduction Printing on Letterpress class taught by Laura Baisden, an amazing printmaker. The class was entitled ‘No Going Back’. Reduction printing allows for printing multiple colors while using one (or sometimes multiple) linoleum blocks. The first layer serves as a base for other color and image layers. Additionally, the first layer has fewer details. As more layers and colors are added, so too are more details.

I completed a suite of prints which celebrated my journey on the Serengeti in 2017. I am delighted to have completed these prints. Additionally, I am grateful for all that I learned while participating in the class; much new information regarding technique and process. This blog covers the first in the series ‘Nap Time on the Serengeti’.

Pencil drawing used as the ‘foundation’ of the print.

Pencil drawing used as the ‘foundation’ of the print.

I kept some of the green on the tree, leaves, and bird. I actually believe the image is strengthened by the addition of this additional color.

I kept some of the green on the tree, leaves, and bird. I actually believe the image is strengthened by the addition of this additional color.


I used a dark brown for the final color; making this a four color reduction print.

I used a dark brown for the final color; making this a four color reduction print.

A Suite of New Greeting Cards

Bluebells inspired one of the cards.

Bluebells inspired one of the cards.

These irises inspired another image to which I added a finch!

These irises inspired another image to which I added a finch!

Finch and bud carved and proofed.

Finch and bud carved and proofed.

Image and text…a birhday card completed!

Image and text…a birhday card completed!

A sweet little edition!

A sweet little edition!

I love this picture of my vandercook. Printing the edition of thank you cards is underway!

I love this picture of my vandercook. Printing the edition of thank you cards is underway!

It was so satisfying fitting the text in between the two flowers!

It was so satisfying fitting the text in between the two flowers!

Printing these cards was a rewarding way to celebrate Spring. I can’t wait to see what happens when Summer is ‘in full bloom’!

I recently completed a trio of greeting cards using images inspired by my gardens. Here is a look at the process and results.

Carving the block - this will become a thank you card.

Carving the block - this will become a thank you card.

Carved and proofed; now ready for printing on the letterpress.

Carved and proofed; now ready for printing on the letterpress.

Carving the finch and the iris bud.

Carving the finch and the iris bud.

I designed and printed a third card based on the beautiful tulips in our gardens (see earlier blog post). The sketch has been transferred to the block and carving is underway. This worked perfectly for a birthday card.

I designed and printed a third card based on the beautiful tulips in our gardens (see earlier blog post). The sketch has been transferred to the block and carving is underway. This worked perfectly for a birthday card.

Printing the bluebells.

Printing the bluebells.

The little finch says ‘hello’!

The little finch says ‘hello’!

The Making of a Greek Coptic

I had printed patterns using relief blocks onto an old quilt square. I added bits of embroidery and then backed the fabric using paste and kozo paper (a Japanese technique called Urauchi). I will use this on the covers. I added a recessed area to th…

I had printed patterns using relief blocks onto an old quilt square. I added bits of embroidery and then backed the fabric using paste and kozo paper (a Japanese technique called Urauchi). I will use this on the covers. I added a recessed area to the front cover, after cutting Davey board to the desired size.

The interior sections have been folded and cut to size. I used a navy blue French paper and black Ingres paper for end pages and Mohawk superfine for the text pages. The Greek Coptic structure enables a thick book. This particular book has twenty se…

The interior sections have been folded and cut to size. I used a navy blue French paper and black Ingres paper for end pages and Mohawk superfine for the text pages. The Greek Coptic structure enables a thick book. This particular book has twenty sections. The jig shows the pattern of the sewing stations. The colors of the waxed linen threads work well with the fabric colors.

Sewing.

Sewing.

What a beautiful form the opened Greek Coptic is!

What a beautiful form the opened Greek Coptic is!

I also bound a couple of miniature Greek Coptic books using backed quilt squares. Here are some images of them.

I added closures using waxed linen threads and vintage buttons.

I added closures using waxed linen threads and vintage buttons.

I added a bit of the fabric to the inner front covers, an element of surprise when opening and handling the books.

I added a bit of the fabric to the inner front covers, an element of surprise when opening and handling the books.

I learned how to bind a Greek Coptic book a couple of years ago. It is a beautiful book structure; which I hope to teach in the future. I recently revisited the structure to practice and hone my skills.

The cover boards are now covered with the backed quilt square. The patterns and lines of the cloth, the printed patterns, and the embroidery came together nicely. I pasted a black piece of Ingres paper into the recessed area and then added a piece o…

The cover boards are now covered with the backed quilt square. The patterns and lines of the cloth, the printed patterns, and the embroidery came together nicely. I pasted a black piece of Ingres paper into the recessed area and then added a piece of the backed cloth. I was pleased with how this added yet another element to the front cover.

The sewing stations have been punched with an awl into the interior sections. The book is now ready for sewing!

The sewing stations have been punched with an awl into the interior sections. The book is now ready for sewing!

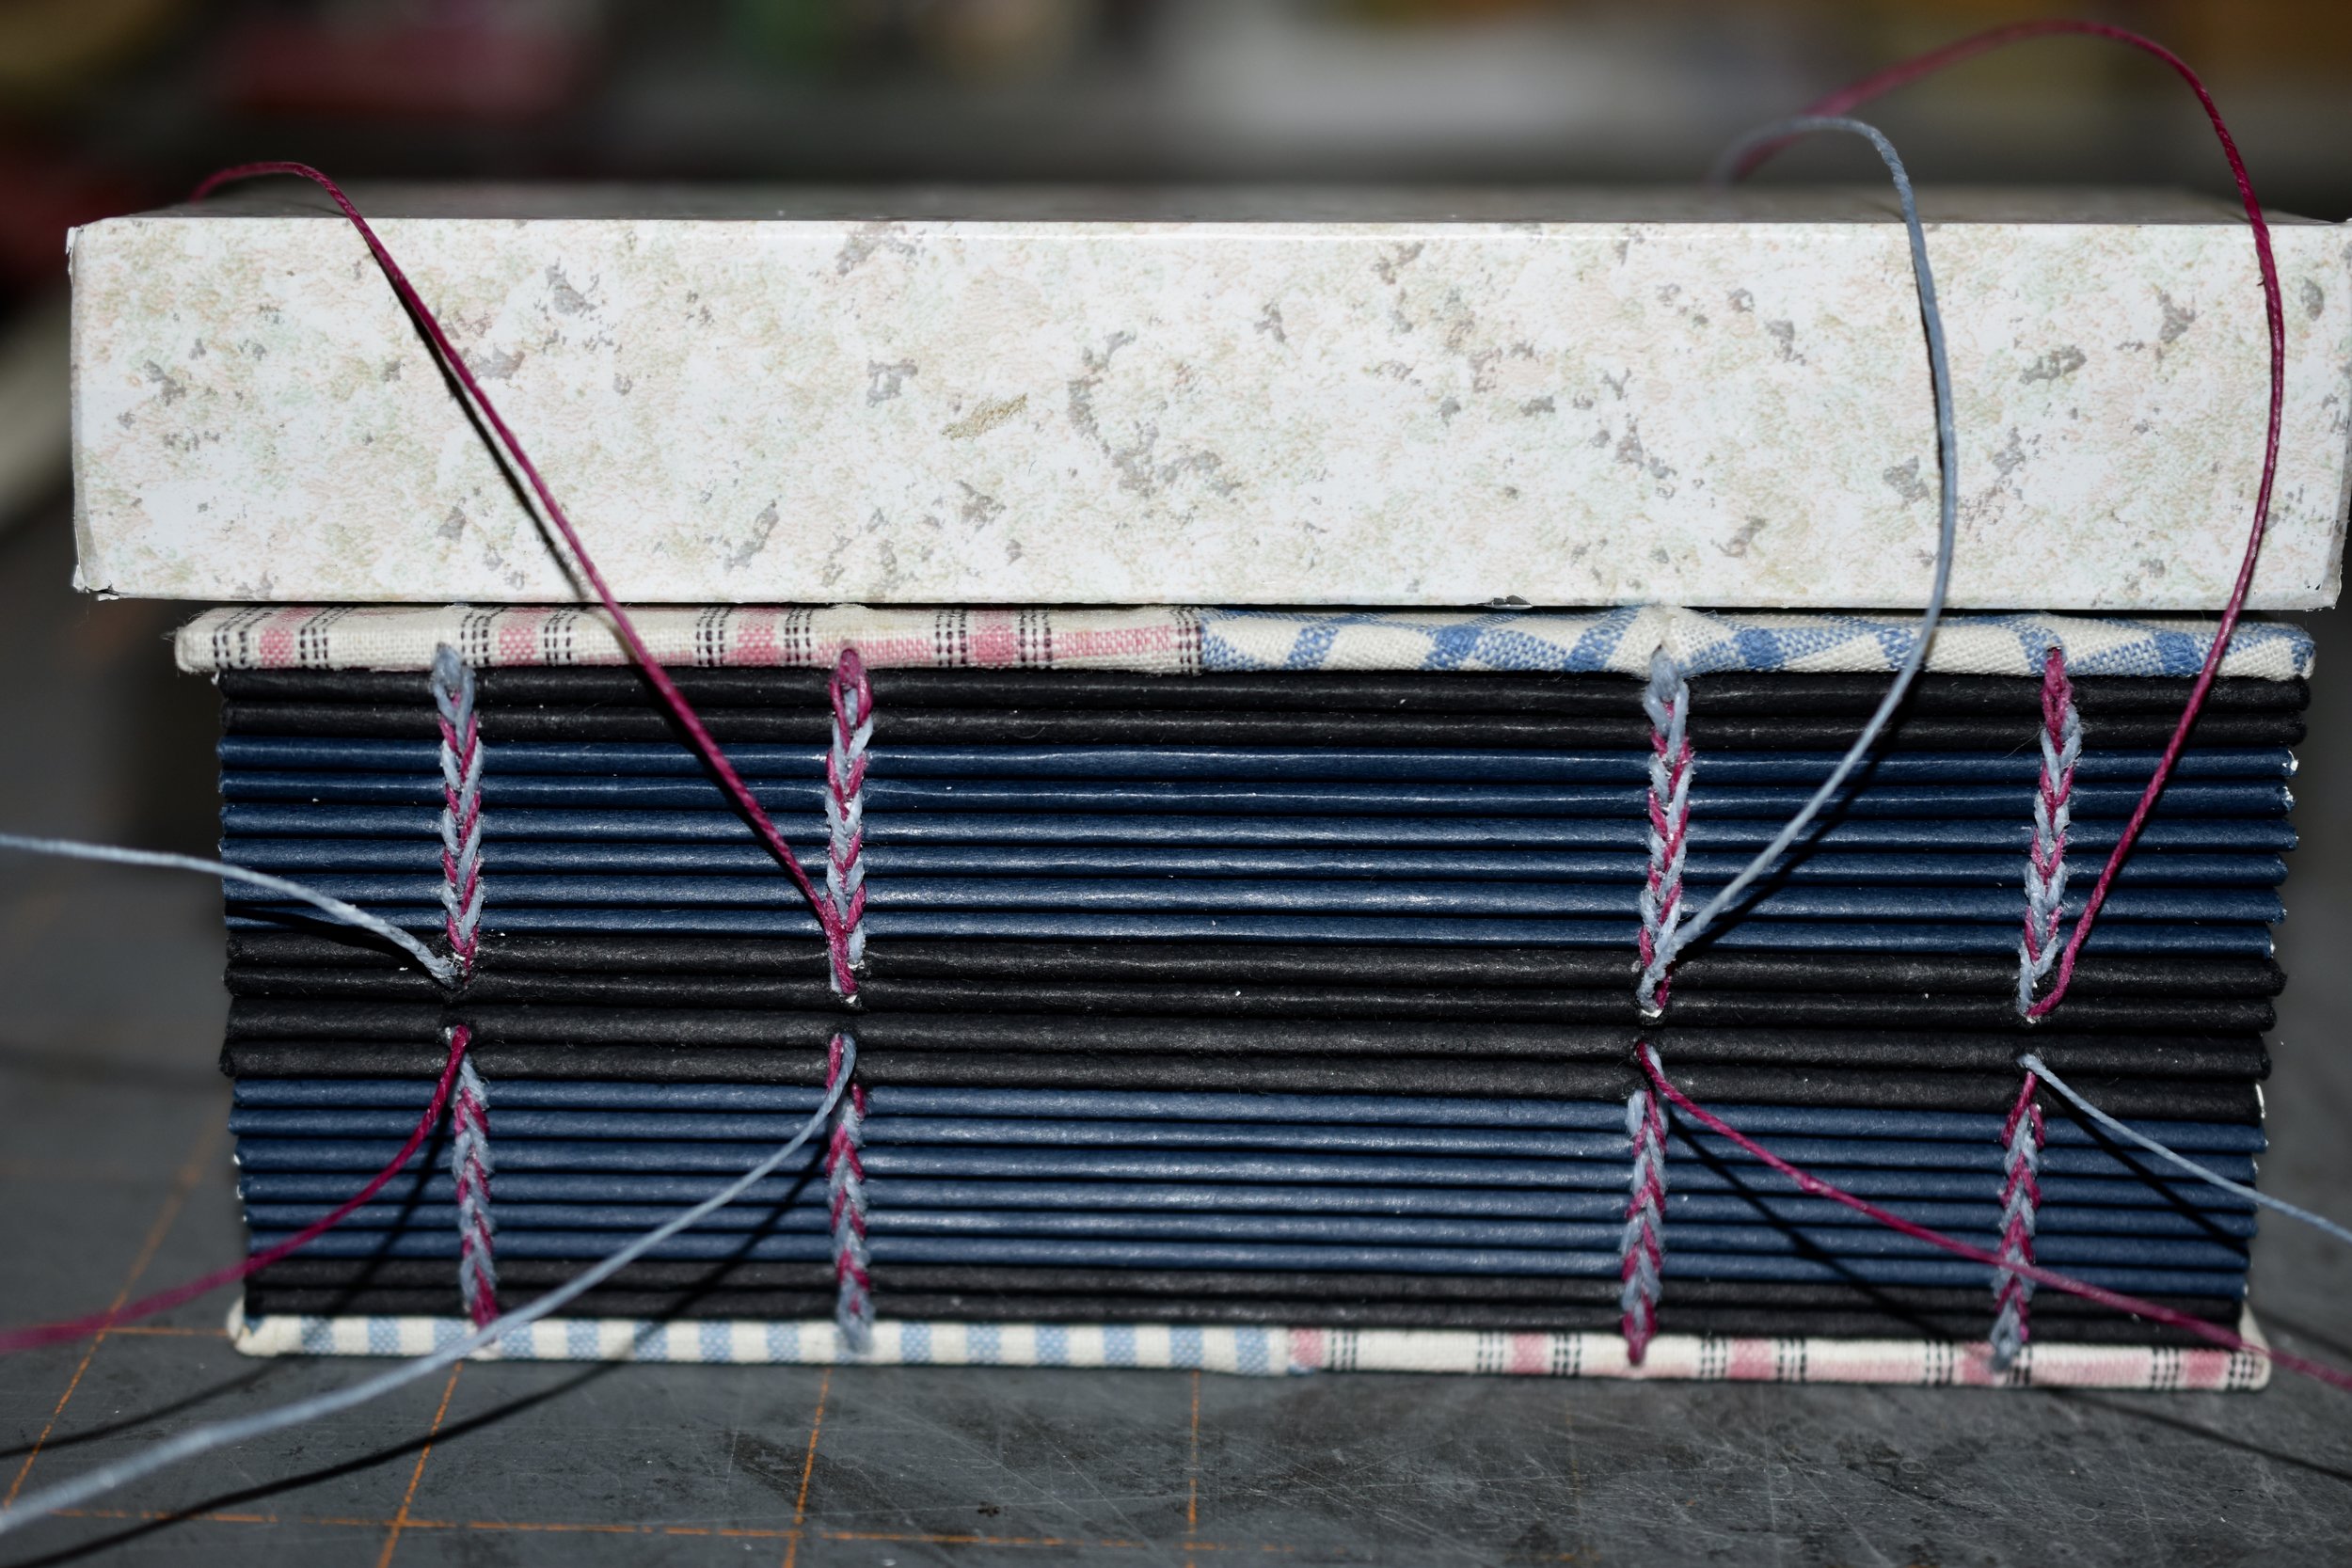
Each half has been sewn using a chain formed by locking the loop stitch. The two halves will be joined by alternately linking the top and bottom threads (similar to braiding).

Each half has been sewn using a chain formed by locking the loop stitch. The two halves will be joined by alternately linking the top and bottom threads (similar to braiding).

All sewn up….the contrasting colors of the waxed linen threads show up nicely on the navy and black end pages.

All sewn up….the contrasting colors of the waxed linen threads show up nicely on the navy and black end pages.

Another view of the spine.

Another view of the spine.

‘Slinky’ like when opened.

‘Slinky’ like when opened.

Completing these books was a great way to relearn this structure. I hope the opportunity to teach the Greek Coptic arises!

A Walk in the Garden

Narcissus.

Narcissus.

Lone tulip; such beautiful colors.

Lone tulip; such beautiful colors.

Columbine…they are everywhere in the garden!

Columbine…they are everywhere in the garden!

Henry’s Garnet; this bush is such a treat. It has these lovely delicate blooms in the Spring. The leaves turn a beautiful shade of red in the Fall (thus the name).

Henry’s Garnet; this bush is such a treat. It has these lovely delicate blooms in the Spring. The leaves turn a beautiful shade of red in the Fall (thus the name).

My gardens are a source of inspiration for my prints, books, and cards. Here are some pictures. Spring has indeed arrived!

Tulips.

Tulips.

Columbine.

Columbine.

Iris.

Iris.

There is so much more to see. Color, texture, pattern, and shape - inspiration from nature.

Creating a Lidded Box

Davey board is cut into the various components. I assembled the trays using PVA. The flat pieces will be covered with papers and joined together to make the lids.

Davey board is cut into the various components. I assembled the trays using PVA. The flat pieces will be covered with papers and joined together to make the lids.

I used the same paper on the lid. Notice the recessed area I cut on the small Davey board component. I will place a patterned paper into this area as a way to embellish the lid.

I used the same paper on the lid. Notice the recessed area I cut on the small Davey board component. I will place a patterned paper into this area as a way to embellish the lid.

The components are covered and joined together. I cut the bird images from a Cavallini paper. I thought they added a wonderful decorative element to the finished boxes!Handmade boxes make great gifts and are so nice to use. This particular size is o…

The components are covered and joined together. I cut the bird images from a Cavallini paper. I thought they added a wonderful decorative element to the finished boxes!

Handmade boxes make great gifts and are so nice to use. This particular size is often purchased for use as a jewelry box.

Several years ago I took a box building class at the Penland School of Crafts with Julie Leonard; book artist extraordinaire. It was a great class as well as being a remarkable experience. I have continued to design and build boxes since the class. As a result, I can now build hinged and lidded boxes without instructions! There is truth in the saying ‘practice makes perfect’ (though I am not sure my boxes are perfect)! I recently built several boxes. Take a look at some of the steps in building lidded boxes.

Here, the trays are being wrapped and covered with a patterned Nepalese paper.

Here, the trays are being wrapped and covered with a patterned Nepalese paper.

I used a pressure printed French paper to cover the upper layer component. I printed this paper on my Vandercook SP 15. I liked how these larger circle designs worked with the dotted Nepalese paper. Note how the recessed area looks before I added th…

I used a pressure printed French paper to cover the upper layer component. I printed this paper on my Vandercook SP 15. I liked how these larger circle designs worked with the dotted Nepalese paper. Note how the recessed area looks before I added the embellishment.

A Panoply of Pamphlets

I am about to pull a print from the gelli plate. Paints, brushes, and various found objects…pressed leaves, buttons, lino blocks and so much more can be used to provide imagery in this mono printing process.

I am about to pull a print from the gelli plate. Paints, brushes, and various found objects…pressed leaves, buttons, lino blocks and so much more can be used to provide imagery in this mono printing process.

More found objects.

More found objects.

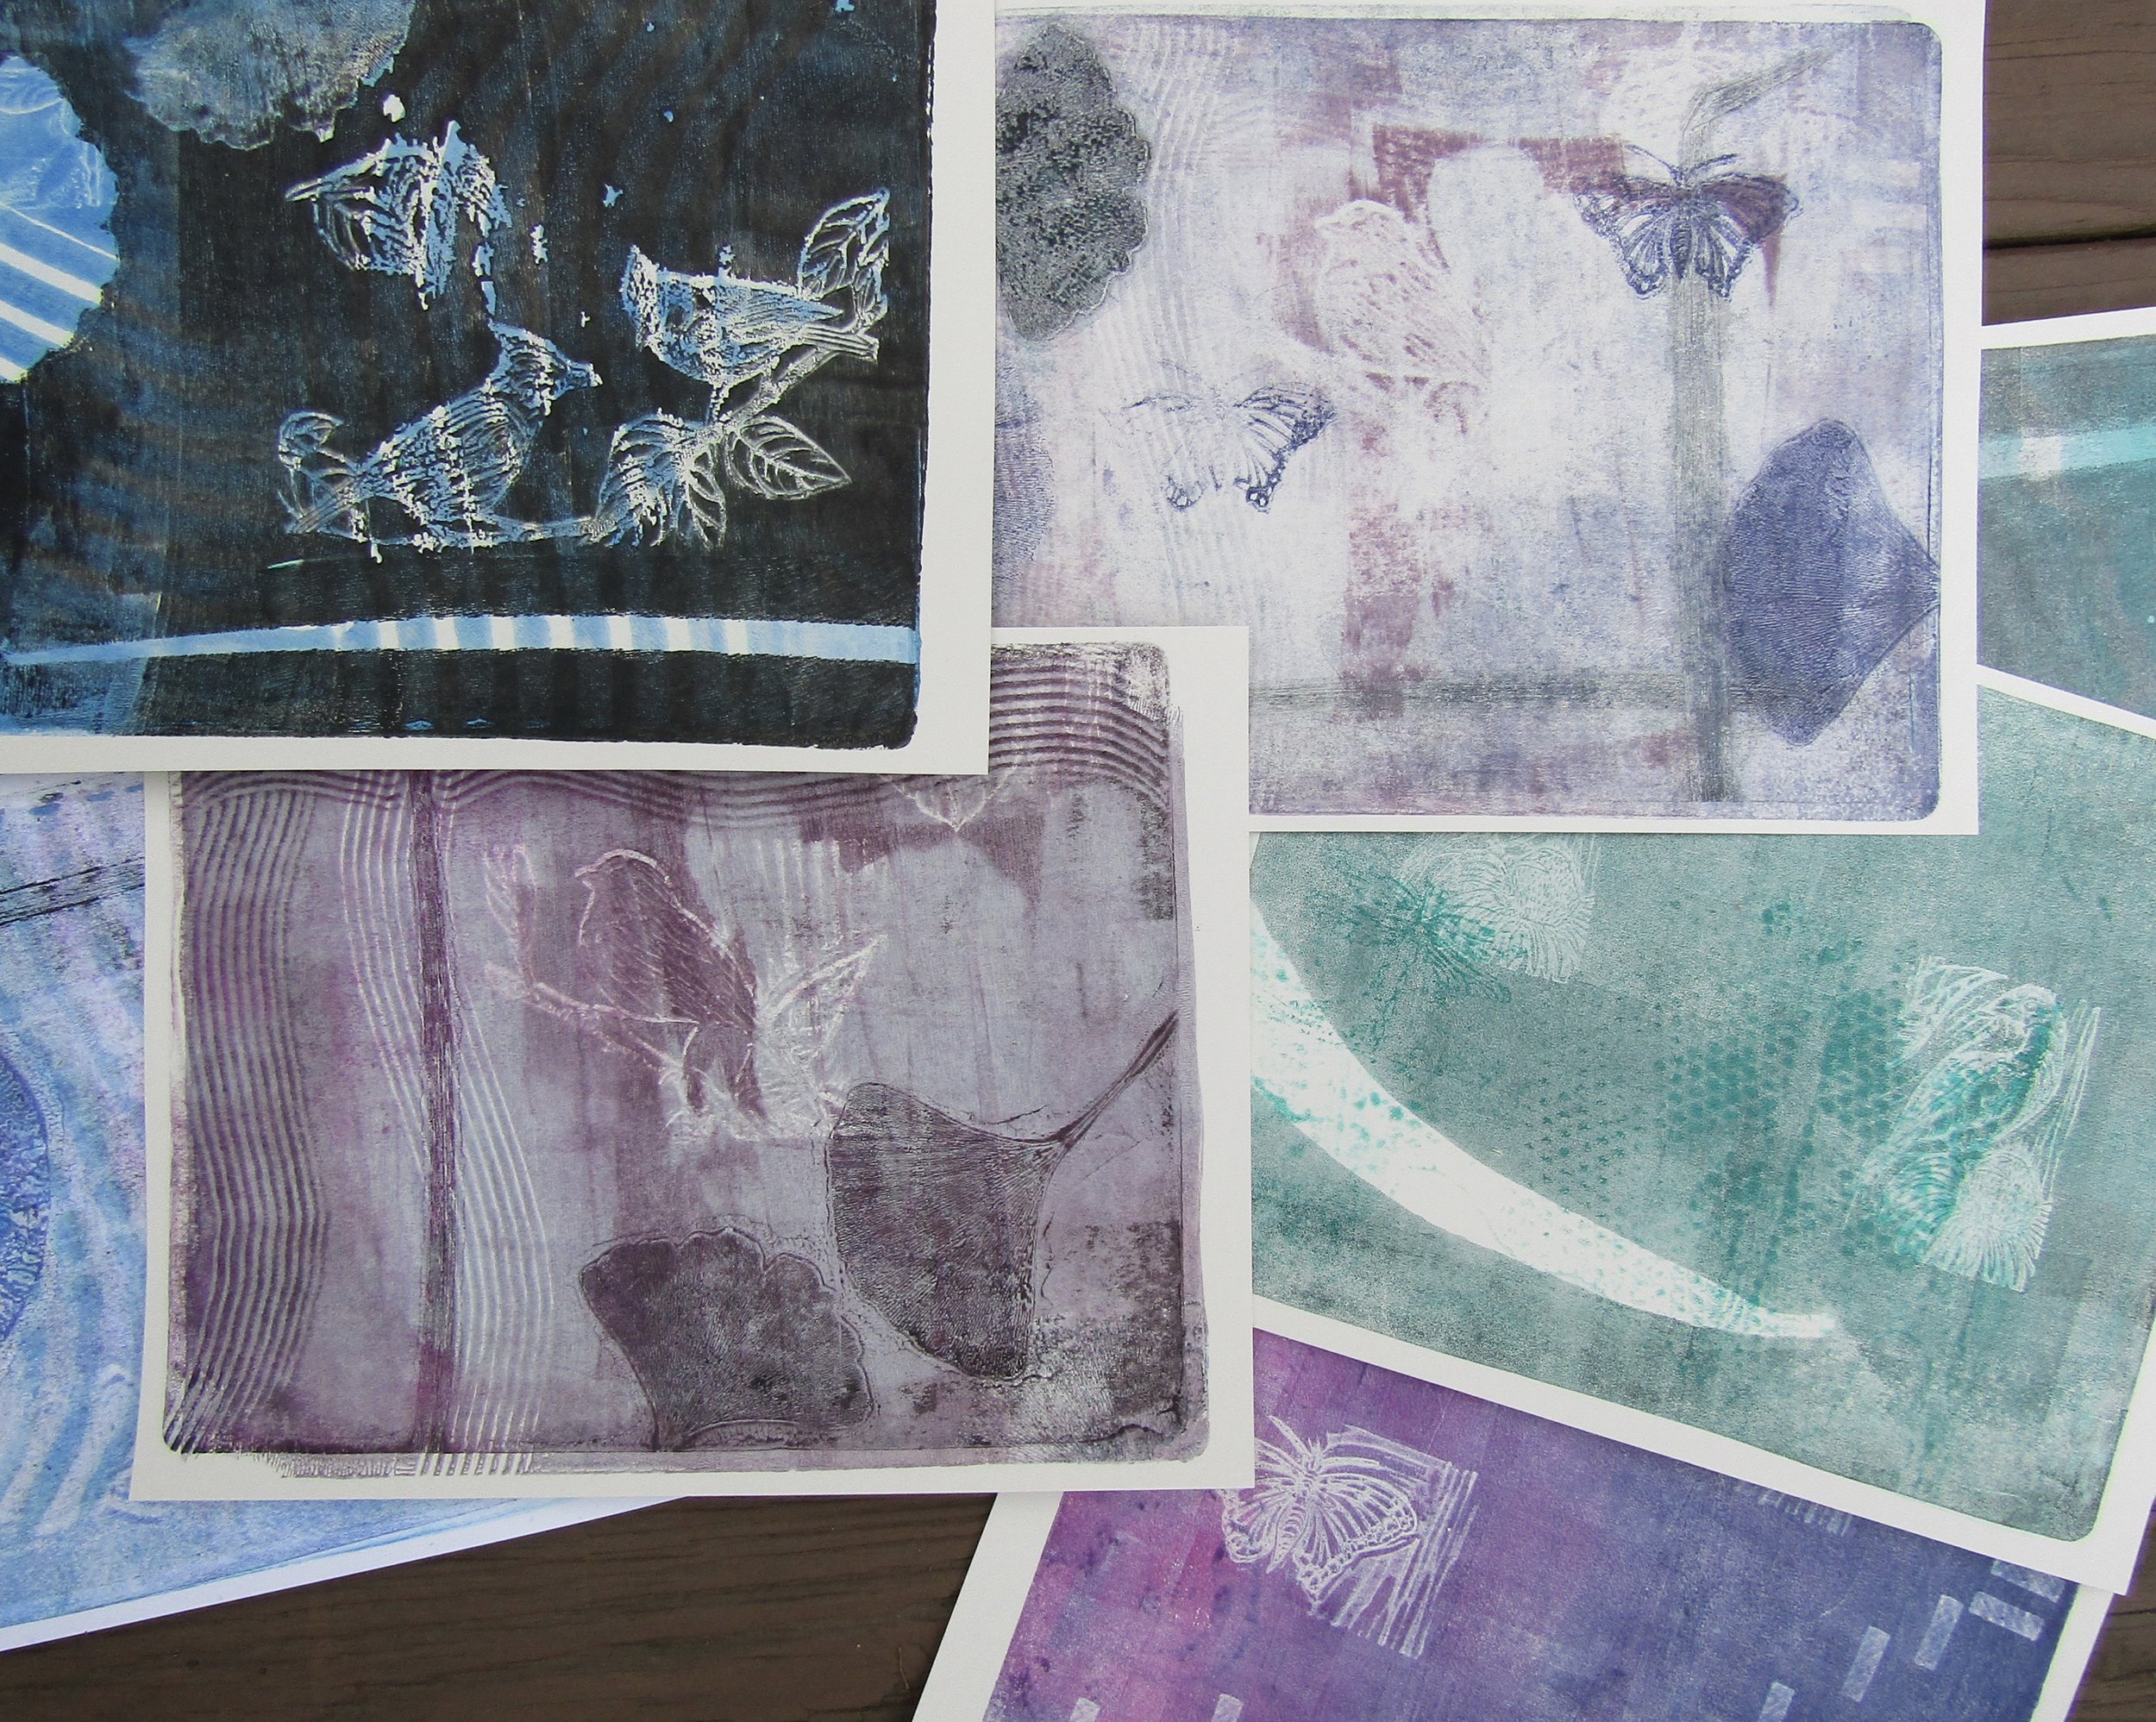
This is one of my favorite prints. Most of the paint had been removed from the plate (when printing previous prints). Consequently, this print resulted in pale purples and grays. I printed the purple butterfly directly onto the printed iris leaf.

This is one of my favorite prints. Most of the paint had been removed from the plate (when printing previous prints). Consequently, this print resulted in pale purples and grays. I printed the purple butterfly directly onto the printed iris leaf.

Prints and more prints!

Prints and more prints!

Sewing up the bird print using the Coil Spring binding pattern.

Sewing up the bird print using the Coil Spring binding pattern.

I will be teaching a pamphlet binding and gel printing workshop in March. Since I had not worked with this type of mono printing in a while; I decided to re-visit the technique. I completed a small series of prints, which I then used as covers for several pamphlet journals. It was loads of fun and I am excited to share these processes with my students during the upcoming workshop!

I use a brayer to spread the various colored paints (acrylic) onto the gelli plate. Here I put a bit too much paint on the plate. So, I simply rolled it onto a sheet of plexiglass until I removed enough from the gelli plate to get the desired consis…

I use a brayer to spread the various colored paints (acrylic) onto the gelli plate. Here I put a bit too much paint on the plate. So, I simply rolled it onto a sheet of plexiglass until I removed enough from the gelli plate to get the desired consistency.

I used a cool color palette - purples, blues, and greens with a bit of black and gray. Here are several of the finished prints.

Notice how the butterfly image is the color of the paper. This happened because I pressed the relief block onto the pink and purple paints (removing them from the plate). Therefore the image printed the color of the paper when I pulled the print. I …

Notice how the butterfly image is the color of the paper. This happened because I pressed the relief block onto the pink and purple paints (removing them from the plate). Therefore the image printed the color of the paper when I pulled the print. I used a cover weight French paper.

I built up layers of patterned blues and blacks onto the gelli plate. Then before pulling the final print I pressed this bird relief block onto the black paint. I love the ghost-like quality of the image.

I built up layers of patterned blues and blacks onto the gelli plate. Then before pulling the final print I pressed this bird relief block onto the black paint. I love the ghost-like quality of the image.

I let the prints dry and used several of them as covers for three section pamphlet journals. I was most pleased with the finished books.

Sewing, using the Triple Chain binding.

Sewing, using the Triple Chain binding.

I am delighted with the completed panoply of pamphlets!

I am delighted with the completed panoply of pamphlets!

Beautiful prints resulted in beautiful pamphlet journals!

Beautiful prints resulted in beautiful pamphlet journals!

Diminutive Journals

Materials are selected and prepared for sewing. The holes in the leather and sewing stations in the textblocks must be added.

Materials are selected and prepared for sewing. The holes in the leather and sewing stations in the textblocks must be added.

The blue leather journal came together nicely.

The blue leather journal came together nicely.

Completed brown leather journal.

Completed brown leather journal.

Sometimes the materials dictate the size. I had some lovely small pieces of leather. Consequently, I made a couple of small longstitch journals. Working small isn’t any easier. The same preparations and steps must be followed.

Sewing.

Sewing.

Opened journal - I was able to use some pressure printed Mohawk Superfine for the book’s end pages. The printed images added another element to the interior.

Opened journal - I was able to use some pressure printed Mohawk Superfine for the book’s end pages. The printed images added another element to the interior.

Sewn diminutive journals - special books for creative thoughts, words, and deeds!

Sewn diminutive journals - special books for creative thoughts, words, and deeds!

Leather Longstitch Journals

I completed some leather longstitch bindings prior to the holidays. I enjoyed spending time combining the materials of leather (recycled upholstery leather), paper, and waxed linen thread into blank journals. I had been printing quite a number of projects. Sewing in my book studio was a nice change.

A lot goes into making a book, regardless of the type or complexity. One must be able to handle the materials while considering elements of design such as color, texture, and form. Making books is both fun and challenging; and most rewarding when the final piece is lovely to look at while inviting touching, handling, and use.

Prepared text blocks with leathers, threads, and spine designs. The designs will be a decorative element on the sewn spines of the books. They are also the sewing pattern for the books. I will use the Japanese Drill Punch for punching holes into the…

Prepared text blocks with leathers, threads, and spine designs. The designs will be a decorative element on the sewn spines of the books. They are also the sewing pattern for the books. I will use the Japanese Drill Punch for punching holes into the leather and the awl to place holes (sewing stations) in the paper sections.

Sewing book cover and textblock together.

Sewing book cover and textblock together.

Completed books with covers and closures using vintage buttons.

Completed books with covers and closures using vintage buttons.

Other books coming together. The materials have been selected, now to punch holes into the leather and sewing stations into the paper sections.

Other books coming together. The materials have been selected, now to punch holes into the leather and sewing stations into the paper sections.

I kept the natural edge of this piece of  leather and used it on the book cover. Here I am figuring out and sewing the closure of the book.

I kept the natural edge of this piece of leather and used it on the book cover. Here I am figuring out and sewing the closure of the book.

Completed books.

Completed books.

Sewn spines.

Sewn spines.